|
Observing Notes (to myself and titrated (leaving out much of the guiding details and post-processing verbiage, believe it or not!):
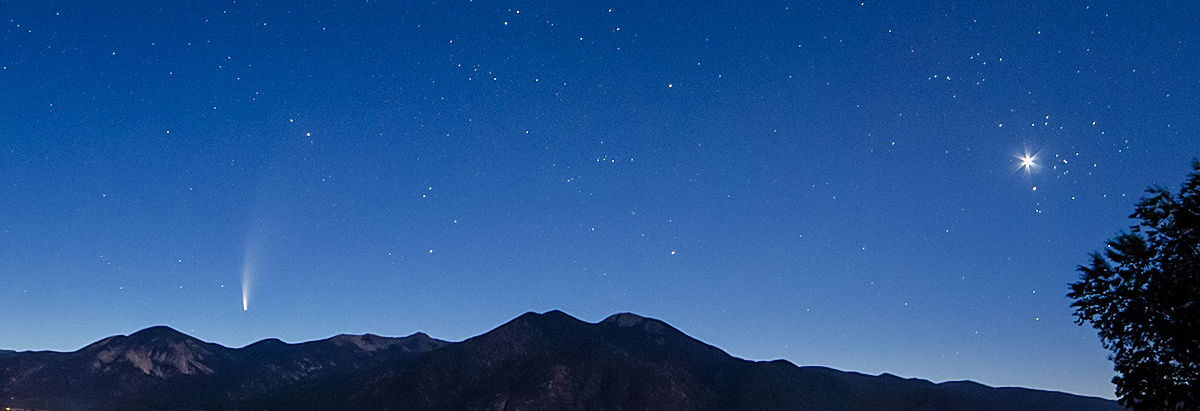
I started up the AstroPhotographyTool program and aimed up on a star from a mount position west of the pier. I lined up and focused on first-magnitude Betelgeuse, which was also relatively near to the subject object, NGC2244, the Rosette Nebulae and associated cluster. One thing I MUST do is get the green laser and finder ‘scope aimed up well, and also aimed up well with the main ‘scope. The right-angle illuminated finder is very nice -- the green laser pointer needs to be brighter. I ordered and received same, with more power.
After centering the target star by using the main imaging camera with APT, I set off a sequence of short exposure images in the center and focus “plan” accessed in the plan section of the program. Such images are not saved unless you ask APT to.
Centering at 16X setting on the mount was quick, focusing not as much. At first I tried the auto-focus, but failed to understand how to set it up. So, I installed the Bahtinov mask. I switched between “Focus Aid” and “Bahtinov Aid.” Amazingly, the focus was “close” from the get-go, so I didn’t adjust it at all. I scrutinized some of the initial images –- they looked great. I calibrated the NGC-MAX (digital setting circles), and pushed the mount to the subject object. My set-up doesn't automatically find objects -- I have to do that myself!
I took some images for centering purposes, but they looked weird, very off.
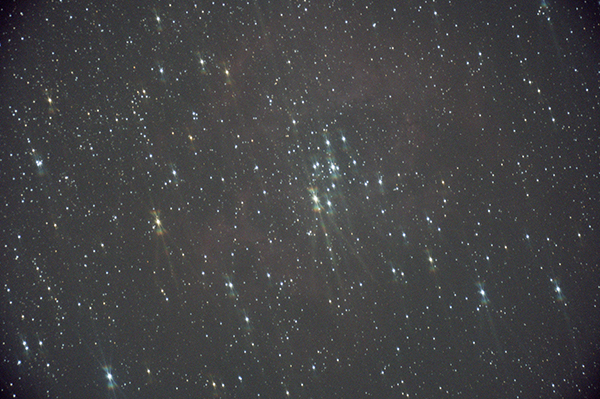
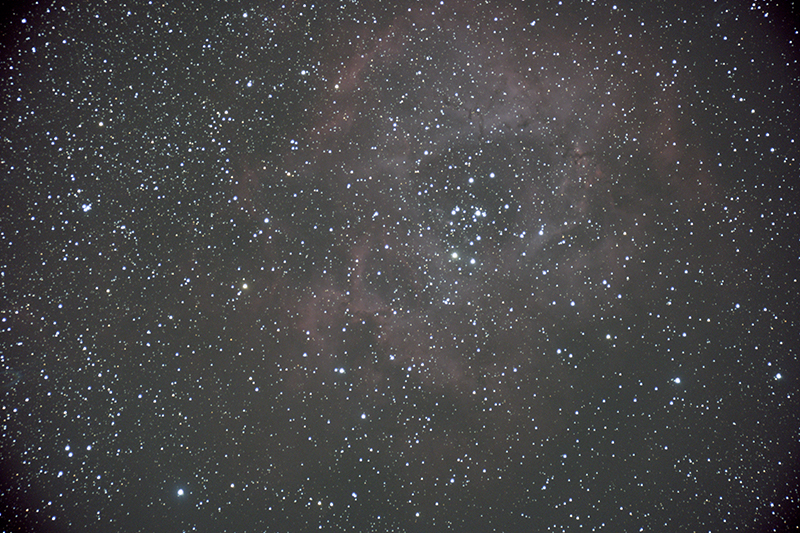
I forgot to take the focusing mask off! Note the lurking nebula behind the stars. |
Even initially stretched (enhanced), the large nebula is barely visible. |
This was the result of forgetting to take the mask off! You could see the Bahtinov rendering of stars throughout the centering image. Once I removed the mask, everything was fine. Note nebula (faint) as well –- that’s how it looks at the time of imaging, even with intense stretching.
Now it was time to “test” the mount movement with PhD2, using the “on camera” toggle as previously discussed, and switching over to .5 sidereal. It worked perfectly and calibrated itself quickly, per my previous successful results. I used the new multi-star function as well. For now the guiding situation is resolved!
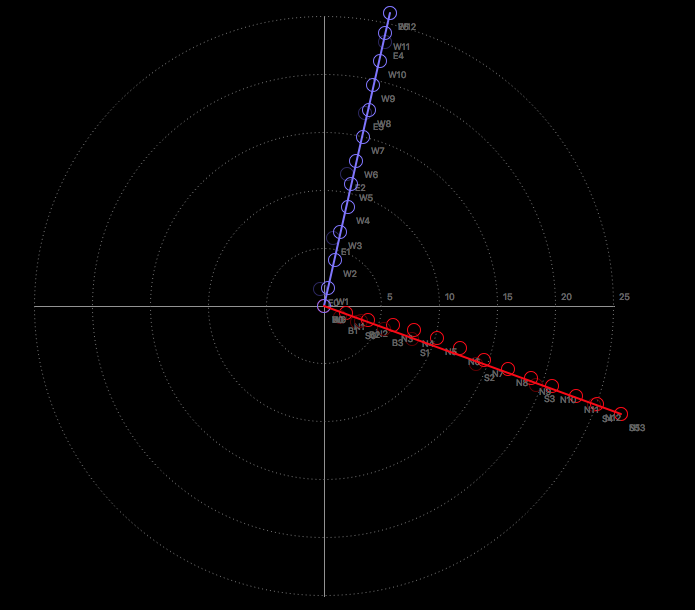
Guider calibration graph -- looks like the mount axes are little out of orthogonal (exactly 90 degrees) |
|
|
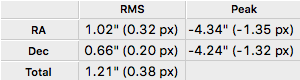
Numeric representation of the auto-guiding session |
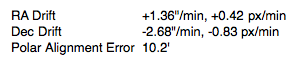
Numeric representation of the mount's polar alignment accuracy |
These graphs and charts are just a small part of the output rendered by the excellent PhD2 auto-guiding program -- and it's FREE! Entire books are written on auto-guiding and the interpretation of such output. Many more books are written on the post-processing of such "data." All that's far too much to cover here; suffice it to say that nowadays the reality that the mount sort-of automatically guides itself into achieving sub-pixel accuracy is frankly astounding, and is a significant reason why modern-day amateur astrophotographers are able to produce such stunning images! Good thing -- I didn't do all that well in math class-- and guiding is all about engineering and math. Post-processing as below is all about art -- and I didn't do all that well in art class, either! |
|
After some testing, I decided on 240-second subs, and set up a new “plan” in the program for same. I set the gain at 240, as the previous 160 setting did not render a view of the nebula, even with quite a bit of stretching. Per on-line instructions I set the offset to 50 as well.
During the imaging session, I clicked back and forth between acquired images in APT and PhD2 guiding. I was generally pleased with the output on both screens, although the nebula was quite dim, and not exactly centered perfectly. Above (right) is what those sub frames coming out were looking like. I wasn’t at all sure I could draw out much nebulosity in the final picture.
I kept going anyway. I heard Tawny, our Australian Cattle dog, barking to make sure I was OK (right!) –- and later in the session I heard the “howling” or “yipping,” maybe of multiple coyotes! This kind of stuff really makes the imaging session (mostly looking at the computer screen, and switching back and forth between programs) tolerable, even enjoyable!
I finished up the light frames, covered the scope, aimed it downward, and clicked onto the already-developed dark plan, making sure both the Gain and Offset settings matched the L frames. I watched several of the dark images appear before I crawled out of the observatory and locked up for the night.
The next morning (03-03-22) I opened up and, to my satisfaction, all the darks had been shot and were fine. I ran the “CCD Flats Aid” –- it worked perfectly and created and exported a nice flats plan. To accomplish this, I aimed the telescope at a lit wall, and put on the diffuser. I needed to use the amount of exposures to match (in this case 20), at least, the light plan, which I did.
As to the bias frames, I covered the telescope and chose .000001 as the exposure (S/B zero, which didn’t work). APT created a nice set of bias frames, so I unhooked everything, shut down and took the saved images on the laptop inside (with the laptop in hand, since I need the programs on it to calibrate and pre-post-process the images)!
After reviewing one or two of the satisfactory light frames in ASI .fits viewer, I waited and rested a day before actually calibrating, stacking, and processing the final image.
Post-processing details:
(It has become clear that I need a rather linear and specific routine for the steps of post-processing, mostly due to complexity and forgetfulness):
1 –- Organize images by types (L, D, F, B) after shooting and saving.
2 -- Bring images into DSS, and per the parameters for M45 or Rosette (M45 is log #11, 2021, Rosette is log #2, 2022) -- go through the steps and produce final calibrated and stacked image. Save as both .fits and .tif.
3 –- Open .tif (16bit) image in CCDStack2. First, deconvolve (must be done before any stretching --
“Deconvolution is an early-stage process, most appropriately applied to the linear data before any other (non-linear) changes have been made to it.” –- from PixInsight tips
if needed, then -- follow program’s instructions (starting on page 43 in tutorial, generally).
- Normalize background
- Make color adjustments, DDP checked “auto scale”
- Play with Background, Maximum and Gamma settings.
- Test with “Balancing White Points” routine.
- Readjust color, then (likely) increase saturation. Make sure background isn’t “too” black.
- “Save as” scaled .tif. It is a 16bit image, which can now be . . .
- Checked in Windows PS Elements -- if OK, save and open in PSCS6 on the Mac or (new Rosette routine below) . . .
- Carefully sharpen with new NI sharpening tool in PS Elements on the Windows machine.
- At this point, create “starless image” with StarNetv2.
- Now, transfer both the scaled image and the starless image into the Mac and open in CS6, 16bit .tif format.
- Open and adjust starless image to bring out nebulosity, etc. “Save as” unique, adjusted image, saving all adjustment layers, etc. for later duplication.
- Create per links below a star-only image. This is accomplished by opening the original imported image with nebulosity and stars, choosing “image drop-down,” select source (the original combined imported image, now opened), selecting the target (the starless image adjusted and copied!) with settings blend=subtract, offset=1 (rendering a black background). This will create a combined image minus nebulosity image equaling a star-only image. Then duplicate the adjustment layers in this star-only image (to equalize the look of the stars vs. the look of the starless nebulosity image). Flatten this image and “save as” a new flattened star image.
- Open both the starless adjusted image with adjustment layers and the star-only adjusted, flattened image.
- Copy and paste the star-only adjusted flattened image using “Duplicate layer,” (name it), choose destination (the starless image). This creates the stars-only image added to the nebulosity image. Once pasted, play with the star-only layer “layers, choose screen or linear dodge” (no reduction) -- and your choice in the “drop-down menu, opacity, fill” -- all this concerning the star layer), then, when satisfied with combined image, move onto another adjustment layer if desired, as below. If above the pasted star layer, this new adjustment layer(s) will effect the entire image.
- If spotting is needed, spot on final background layer, creating a new adjustment layer and thereby preserving all other layers. Also, this technique allows for multiple spotting sessions. Refer to M45 spotted layered image.
4 -- Working now with this combined 16bit .tif file in PSCS6, final adjust levels, color balance, vibrance, etc. Save unflattened master image with layers.
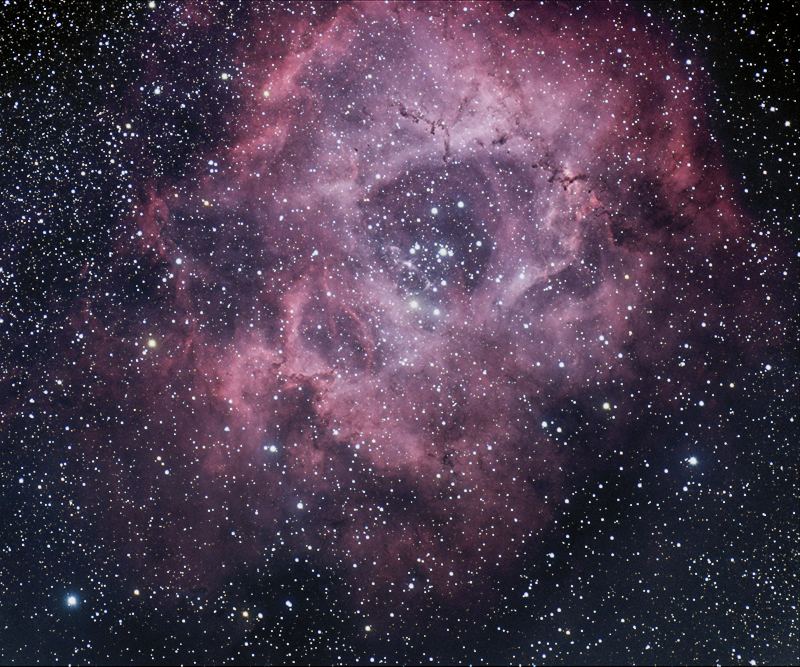
5 -- Save original master (use layered approach) 16bit .tif; then create all renamed flattened high-res full-sized versions, various also renamed small web copies for internet, and high-res .jpg copies for printing, etc. Make sure to save all steps so you can go back and tweak if necessary.
|