Welcome to taosastronomer.com!
offering
local "hands-on" observing
(visual and imaging) sessions and instruction
viewing and imaging from Rabbit Valley Observatory
a dark sky location on the mesa just west of Taos, NM
New!!! -- images presented utilizing RVO's recently-acquired ZWO's Seestar S50 "Smart Telescope." These images are essentially on-the-fly screen grabs; deep-sky objects are created using multiple images auto-stacked within the software and then quickly and minimally post-processed either immediately within the on board software or the next day using ASIStudio, CCDStack2, Topaz Photo AI, and Photoshop. Links for some of the details are within this description, and other minutiae will be added in conjunction with specific astrophotographs shown. My first adventures with this newfangled telescope was photographing the Sun and Moon. |
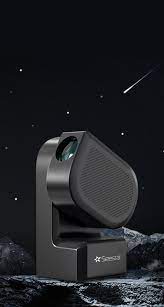 |
photo ©ZWO |
Seestar S50 astro-images of Willis Greiner and guests of Rabbit Valley Observatory [copyright Rabbit Valley Observatory/Willis Greiner, 2025 onward-- all rights reserved] |
 |
 |
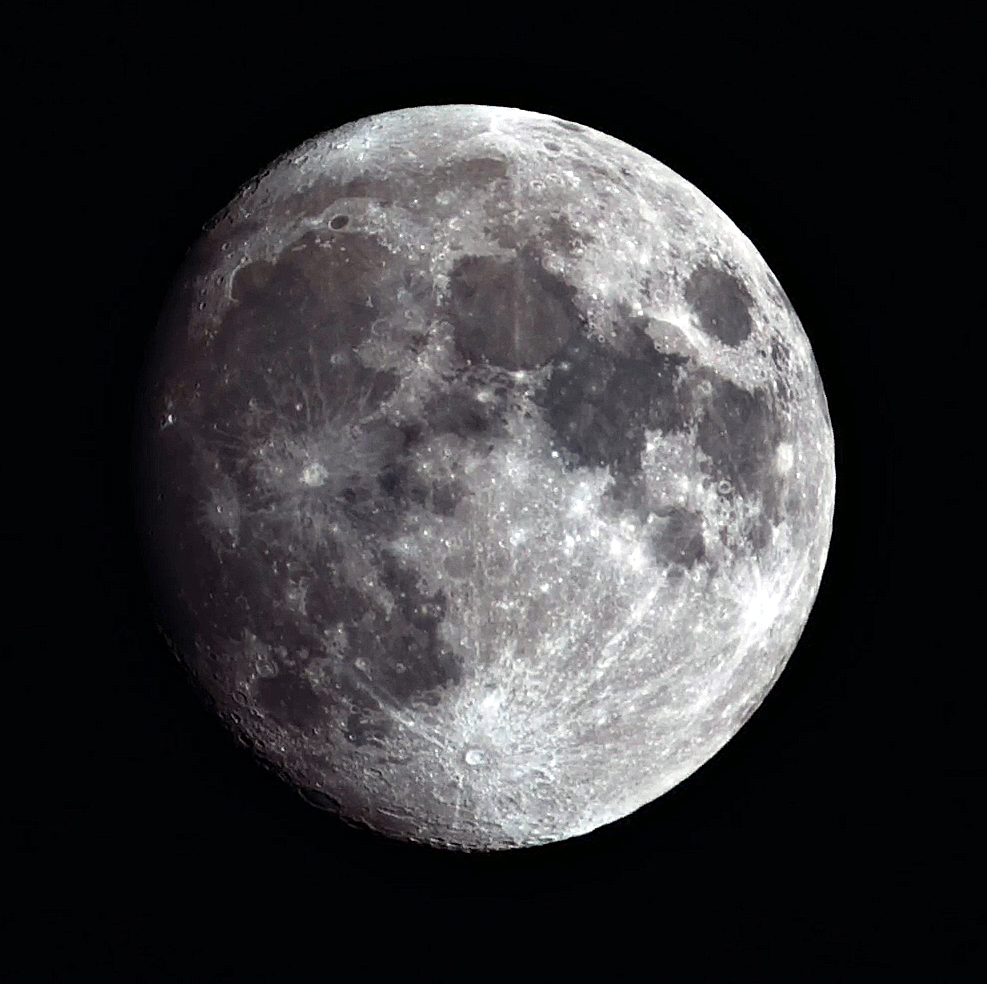
initial Lunar photo -- May, 2025 |
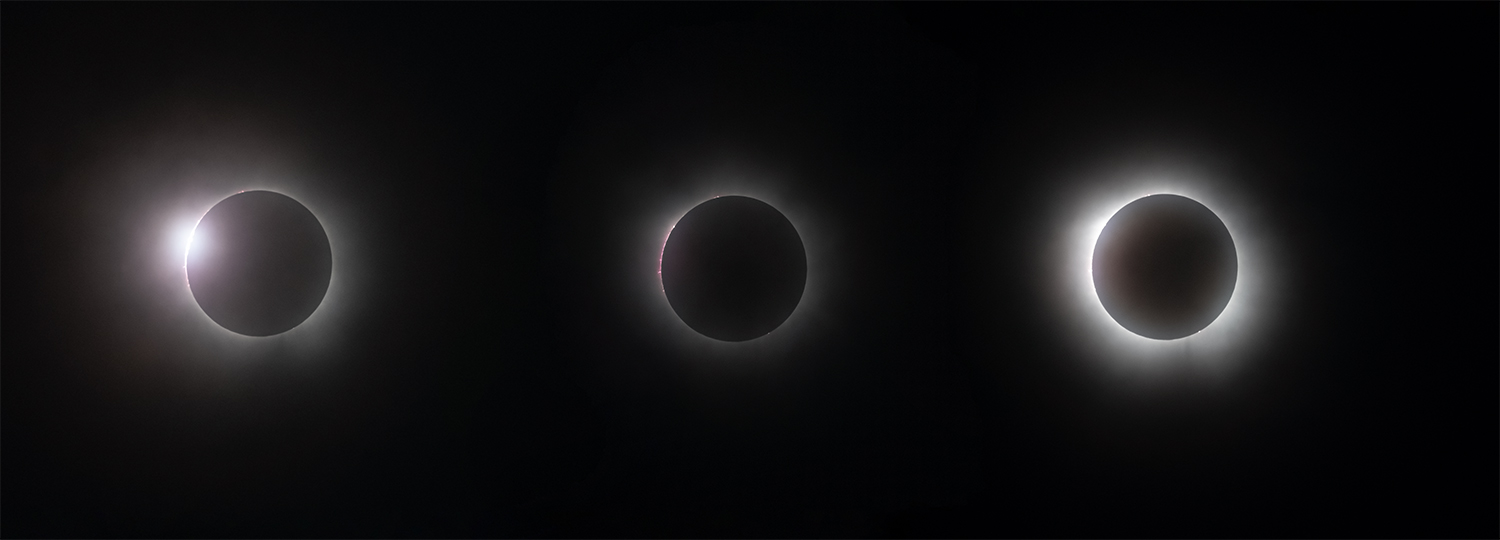
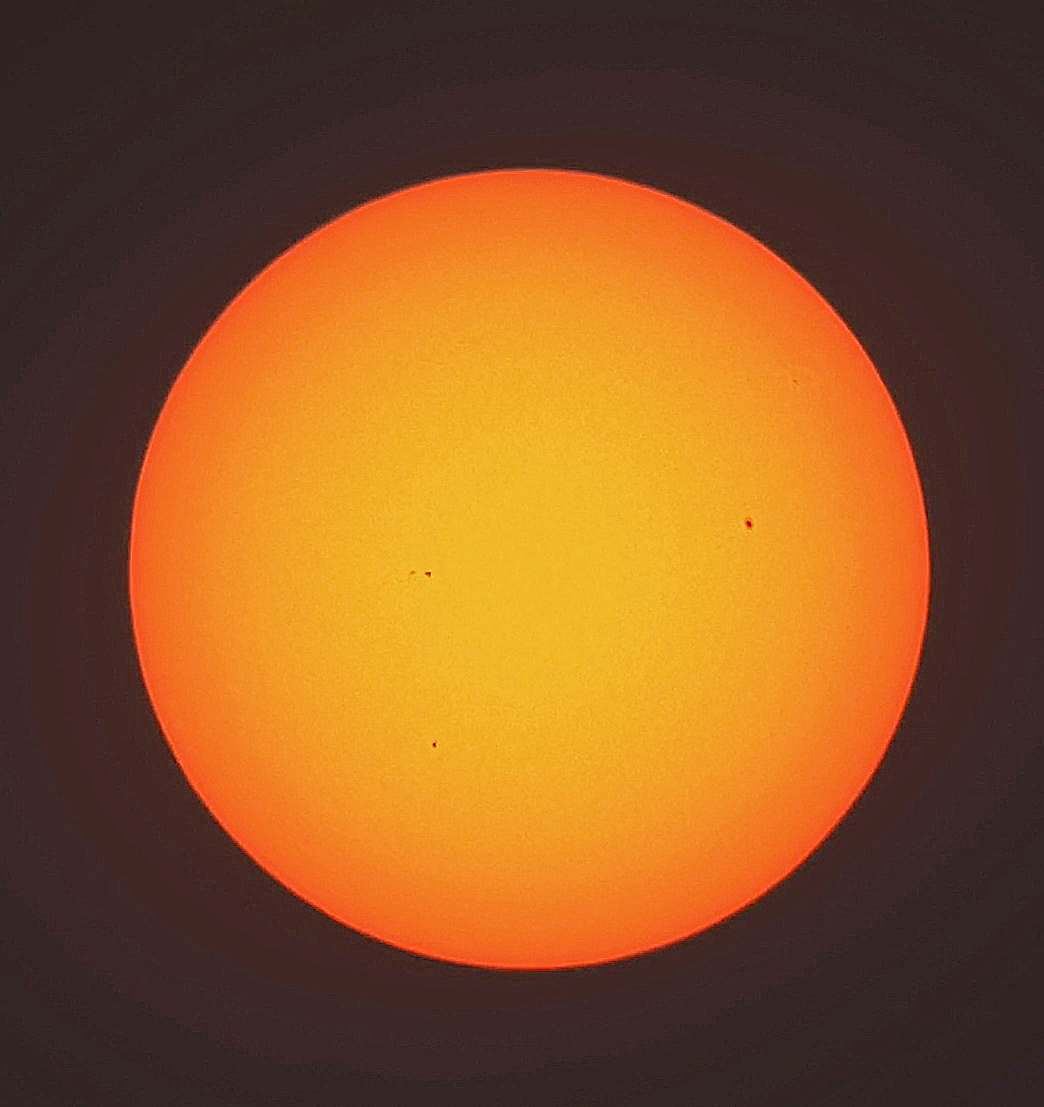
initial Solar photo -- May, 2025 |
 |
|
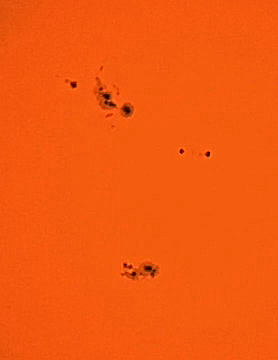
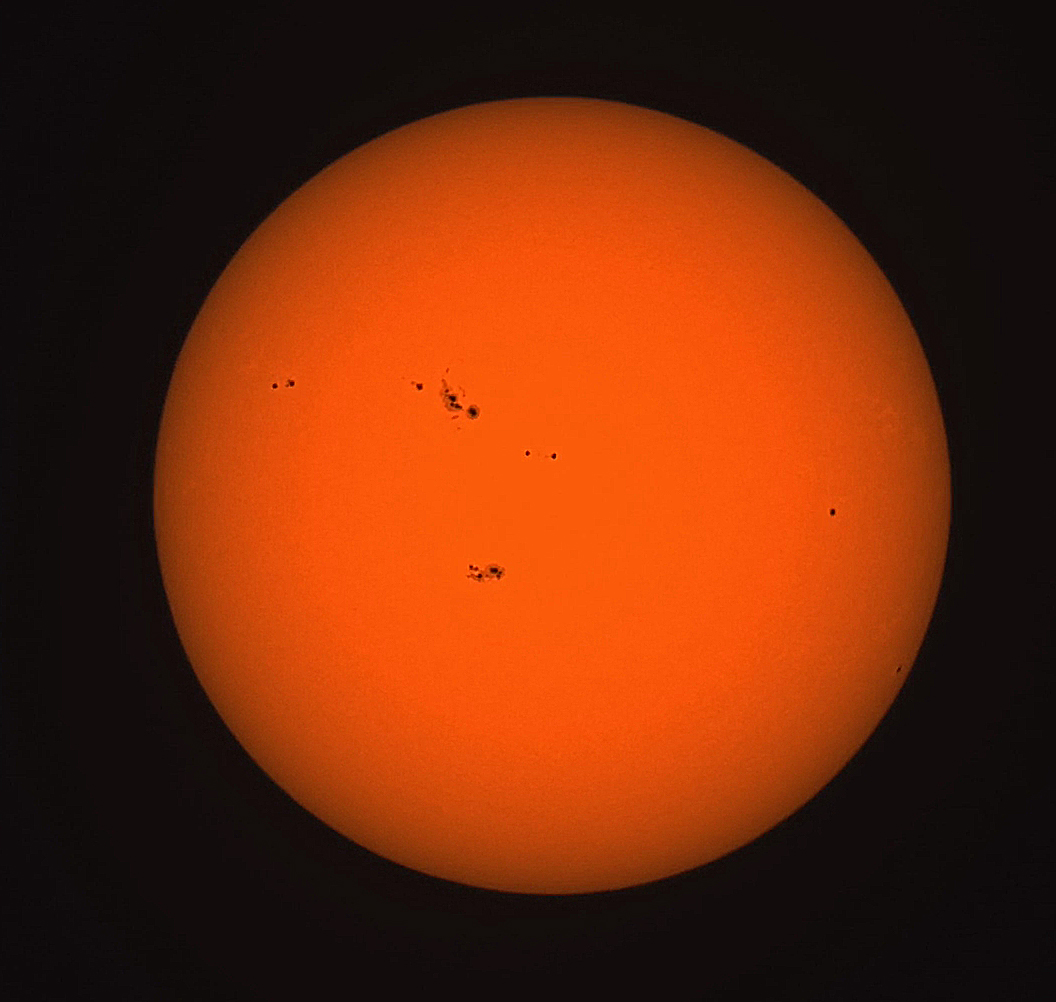
Solar photo -- late May, 2025 |
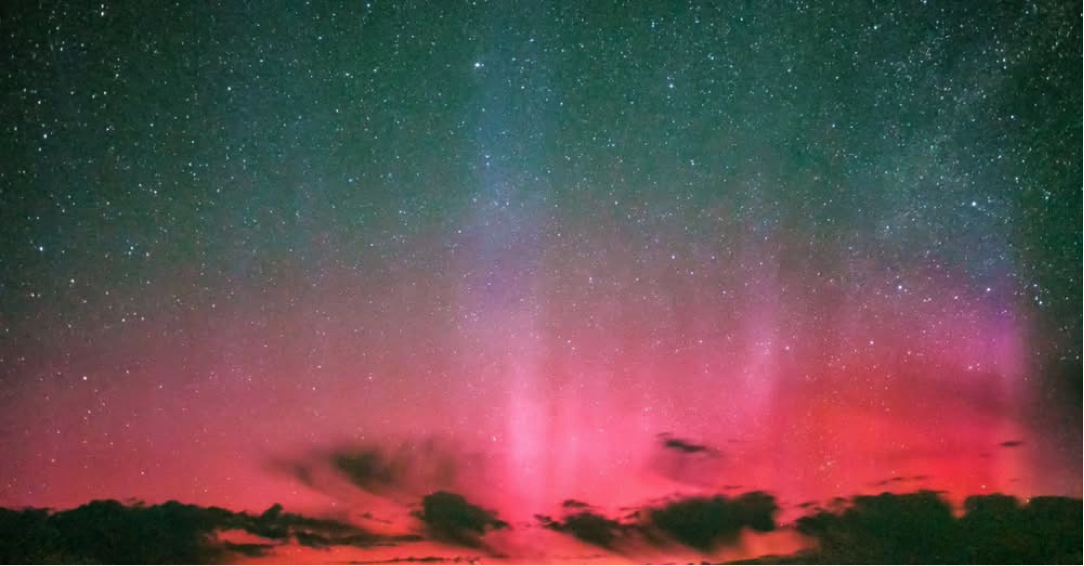
Solar detail and Aurora -- late May, 2025 |
 |
 |
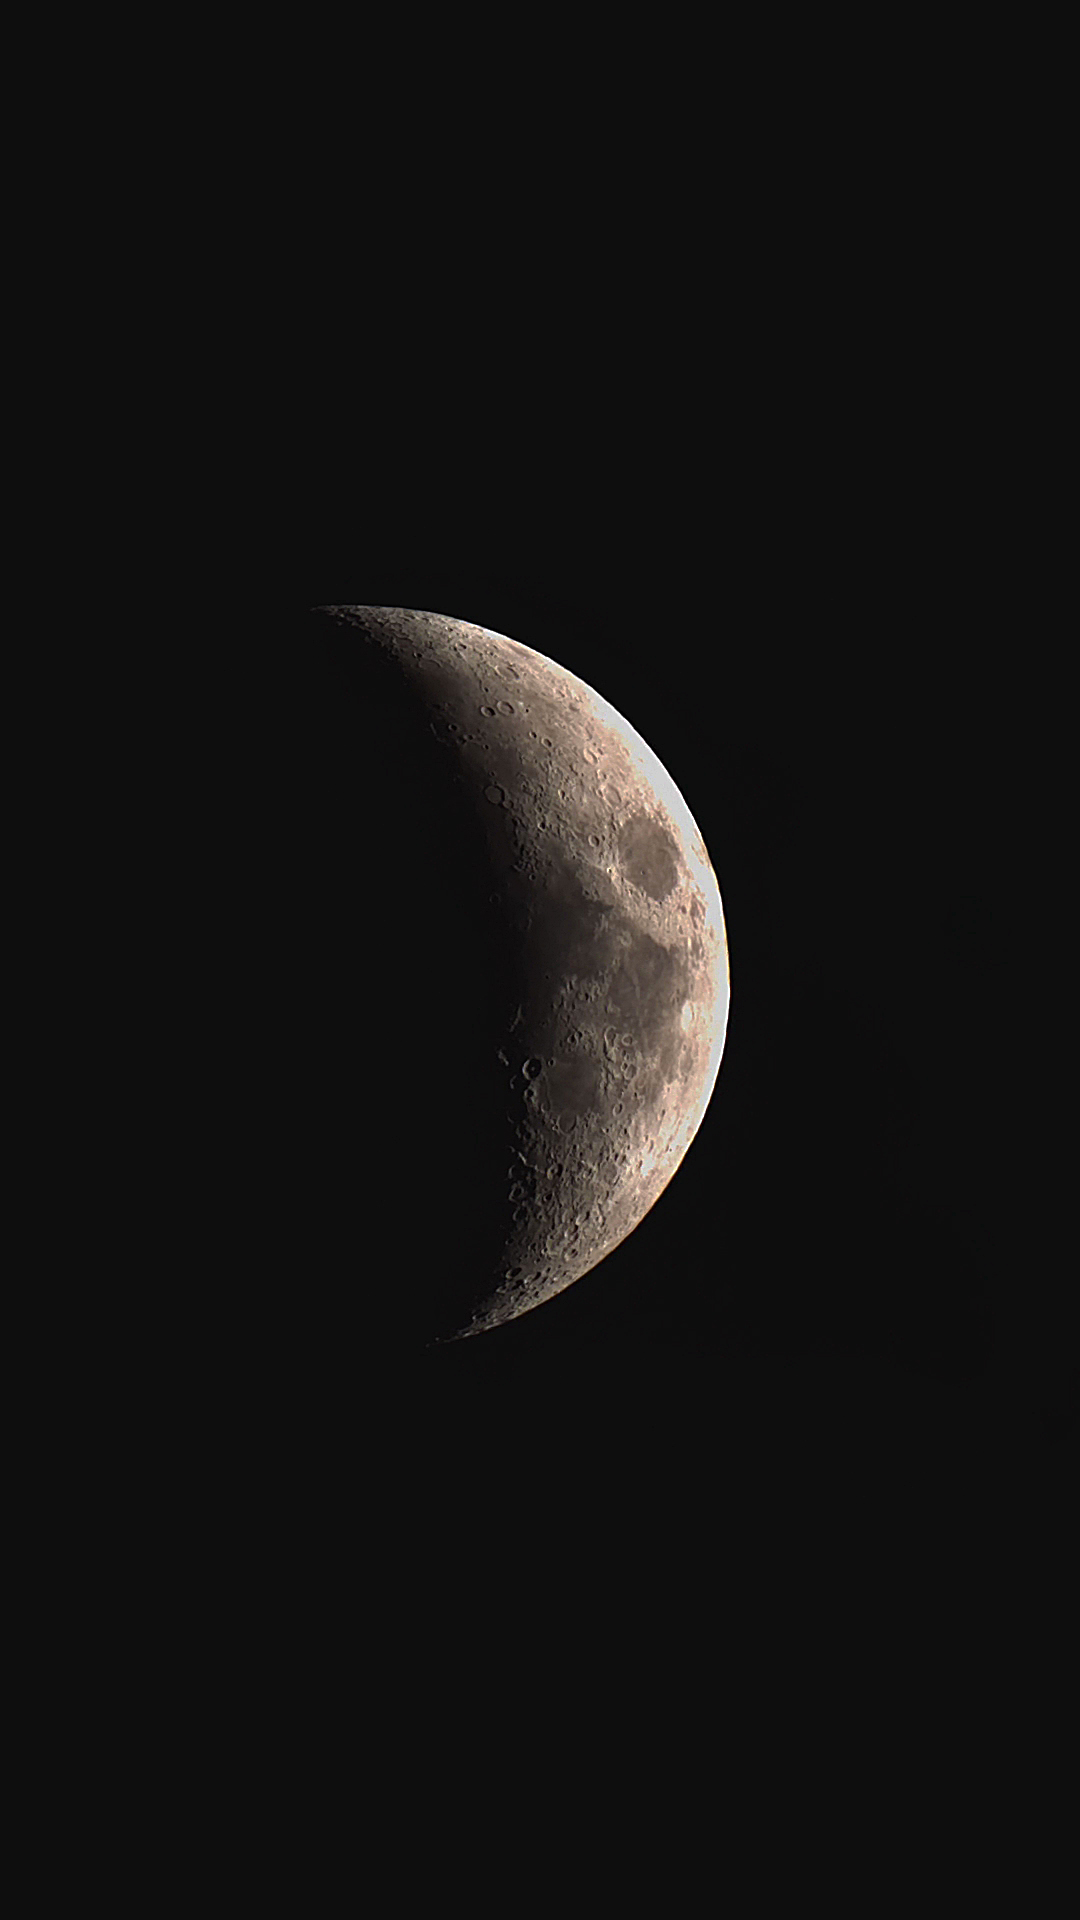
Lunar photo -- early June, 2025 this image was slightly tinted -- detail below Some have stated that the Moon is, in fact, not black and white but some sort of bluish or even tannish shade, mostly, they state, because of mineral deposits. So, in accordance with some astro mythology, I did indeed run this image through a simple coloring routine in Photoshop to produce this slightly tinted tone. |
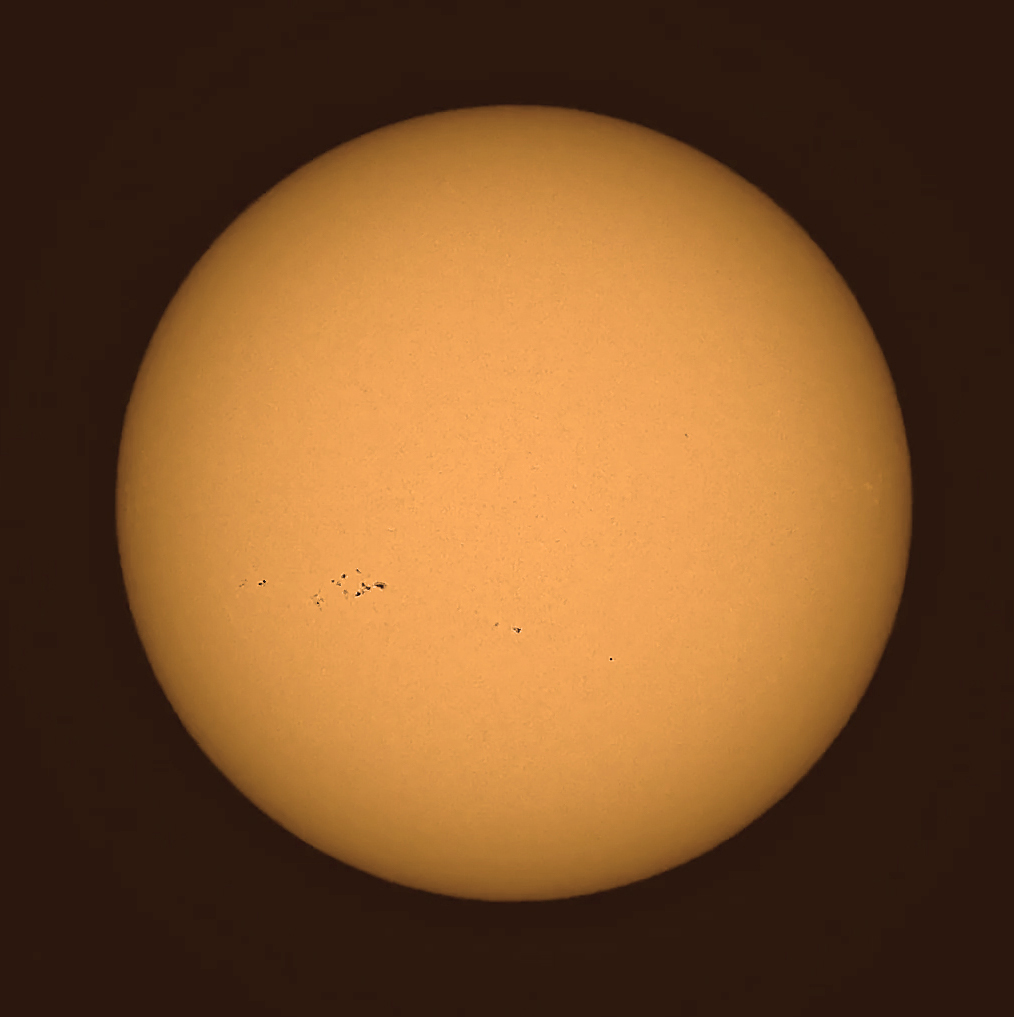
Solar photo -- early June, 2025 this image was shot with a more precise filter The Seestar comes with quite a fine Solar filter, however astro mythology suggests a more precise Baader filter, the industry standard. Such a filter renders the Sun quite white, so I ran the image through a simple coloring routine in Photoshop to produce this hopefully more pleasant shade. |
 |
 |
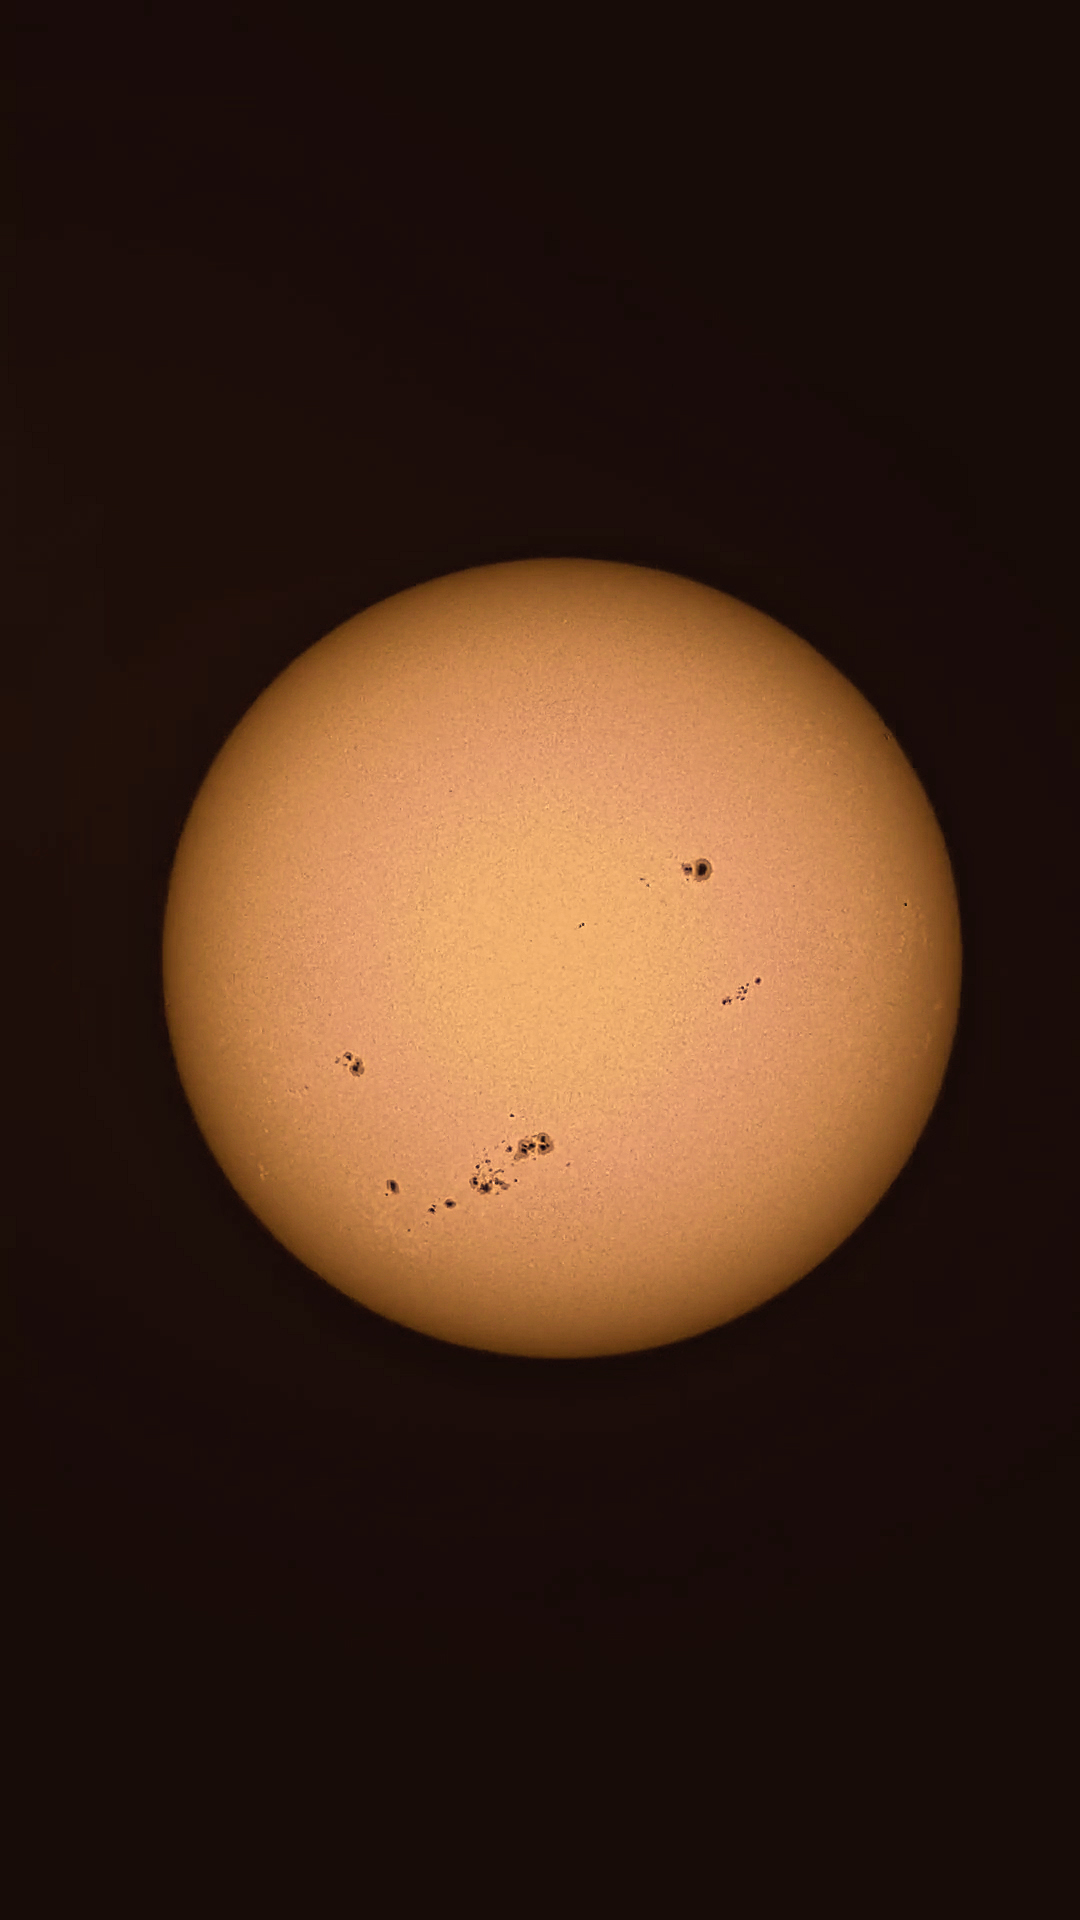
Solar photo -- August 28, 2025 this image was taken through the Baader Solar filter and slighted tinted in Photoshop -- note granulation of the Sun's surface Both images presented here are of the exact configuration as downloaded from the Seestar S50 -- no cropping. You can't turn the camera or the telescope for a better angle, sometimes preferred when shooting deep sky objects, as the cluster or nebula may unfortunately be presented with an odd perspective. Cameras that are connected to a more typical telescope allow for the astronomer to turn the camera for a more pleasing (perhaps a horizontal) configuration. That is not possible here, as all components are inside the protective case of the telescope, automated mount, and attached camera. |
Lunar photo -- August 29, 2025 Per the previous Moon photograph, this photo was also slightly tinted (differently) in post-processing, mimicking a terrestrial camera filter. |
At this point I had learned the basics -- figured out how to aim the telescope at the Sun (rather difficult, as it turned out) gleaned much information and knowledge on the ZWO Seestar S50, including the illuminating reviews below -- and, of course, there is far more discussion and particulars online, just click around! AI Overview from Wiki “The Seestar S50 is a smart, all-in-one telescope integrating a 50mm f/5 apochromatic triplet refractor, a Sony IMX462 sensor (1920x1080 resolution), Alt-Azimuth mount, and internal dualband filters for light pollution. It is controlled by a smartphone app, offers automatic alignment and object finding, features a 6-hour battery, 64GB of internal storage, and connectivity via Wi-Fi, Bluetooth, and USB-C. Key features include image stacking, built-in dew heater, and a mobile app for weather updates and a sky atlas.” -- from the internet High Point Scientific's review Uncle Rod's (Rod Mollise's) S30's review as seen in Sky and Telescope Mag -- important because he's an engaging writer and the software issues are quite similar. Check out his entire blog -- totally informative and funny as well! Cuiv -- the Lazy Geek's review -- he's a fan of this 'scope too, and an expert, just like the others above -- also a very approachable guy -- check out all of his excellent and informative reviews My overview -- it's a winner, and has renewed my lifelong interest in astrophotography! Why -- because it has a relatively easy learning curve, takes great pics of the Sun and Moon as above, and also does a remarkable job on deep-sky objects, as demonstrated below with a sampling of my initial shots! Further, because of its size and sensitivity, an observer does not have to stay out all night to image one object. For an old guy like myself, sleep and warmth are important factors. Also, because of it's size and on board filters, the Seestar is not adversely affected by light pollution (the Lazy Geek lives and images from the top of his apartment building in Tokyo!). The ZWO Seestar S50 IS a winner! P.S. I get paid nothing for this recommendation and purchased the telescope on my own. Thankfully, I am not an internet influencer, but I once had a star party for such influencers. They were more interested in taking selfies of themselves looking through the telescope (not this one) than actually looking through it. The flashes of their devices didn't help. They'd love this unit though;, it take pictures all by itself! And even talks! Oh yeah, it's also incredibly affordable. Don't fret -- the reviews above are also from online influencers, very informative, as is often the case. |
Below are images obtained from the Seestar S50 during my initial deep-sky imaging run. The clusters and nebulae are labeled, and if you click any of the images or text you will be linked to additional information on the object. Seestar's vast onboard database includes star maps and interesting information on all objects, and even recommends objects based on the local time and astronomer's location! It should be noted that I downloaded these initial trial images not from the Seestar S50 itself but instead from the tablet I was using in the field to control the Seestar. Tutorials involving that process and details of the impressive yet easy-to-learn software are within the reviews linked above and here from this text. I have recently learned that one interesting issue is that these images, both individual and stacked, are available also from the rather large (64GB) internal drive onboard the Seestar itself. It turns out that those files are much more complete, including not only smallish .jpg images but also large .fit files (the gold standard of scientific imaging) as well as stacks, both of the .fit files and of enlarged .jpg files. This allows the user to publish the files instantly from their device using the tablet's or 'phone's .jpg files or instead taking advantage of the larger files and either re-stacking them or just using the .fit stacked file to manipulate the image (color, brightness; even sharpening, etc.). This is the method I used not for these smaller .jpg first images but the ones just below the initial group, as linked here. |
 |
 |
 |
M11 Open Star Cluster in Scutum 30 10-second exposures in Alt-Azimuth mode minor quick and dirty post-processing with Photoshop and other astronomically-based software |
 |
 |
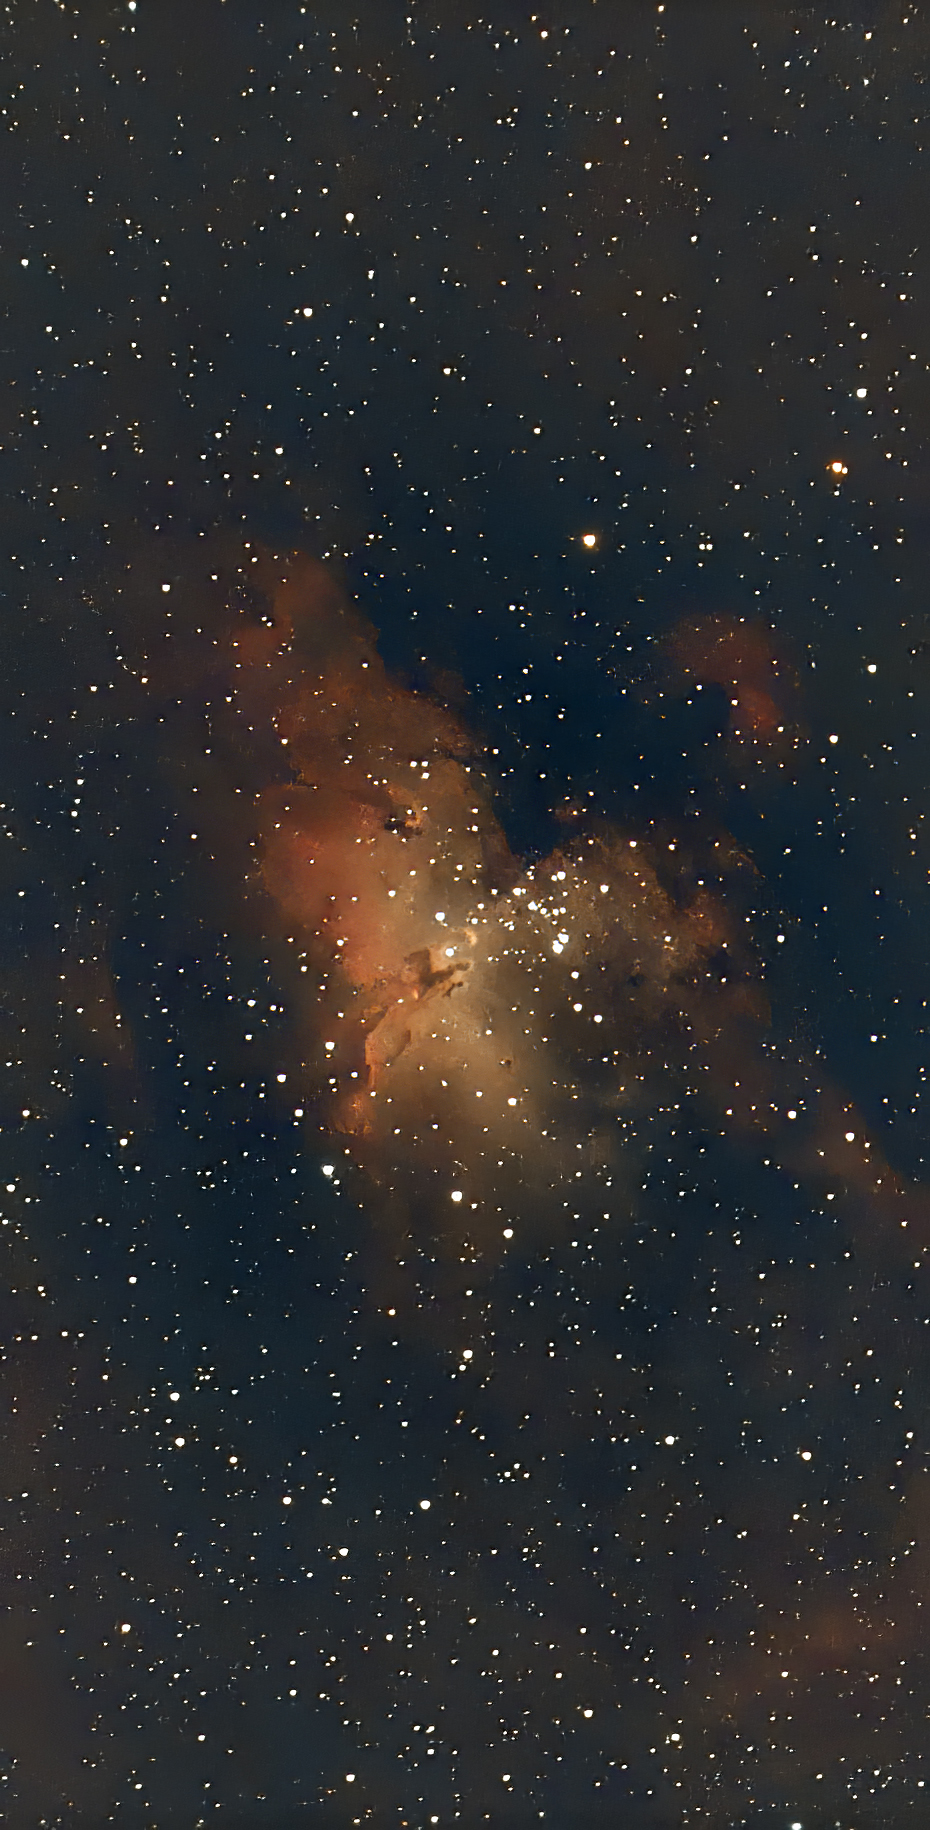
M16 Eagle "Pillars of Creation" Nebula in Serpens 30 10-second exposures in Alt-Azimuth mode minor quick and dirty post-processing with Photoshop and other astronomically-based software |
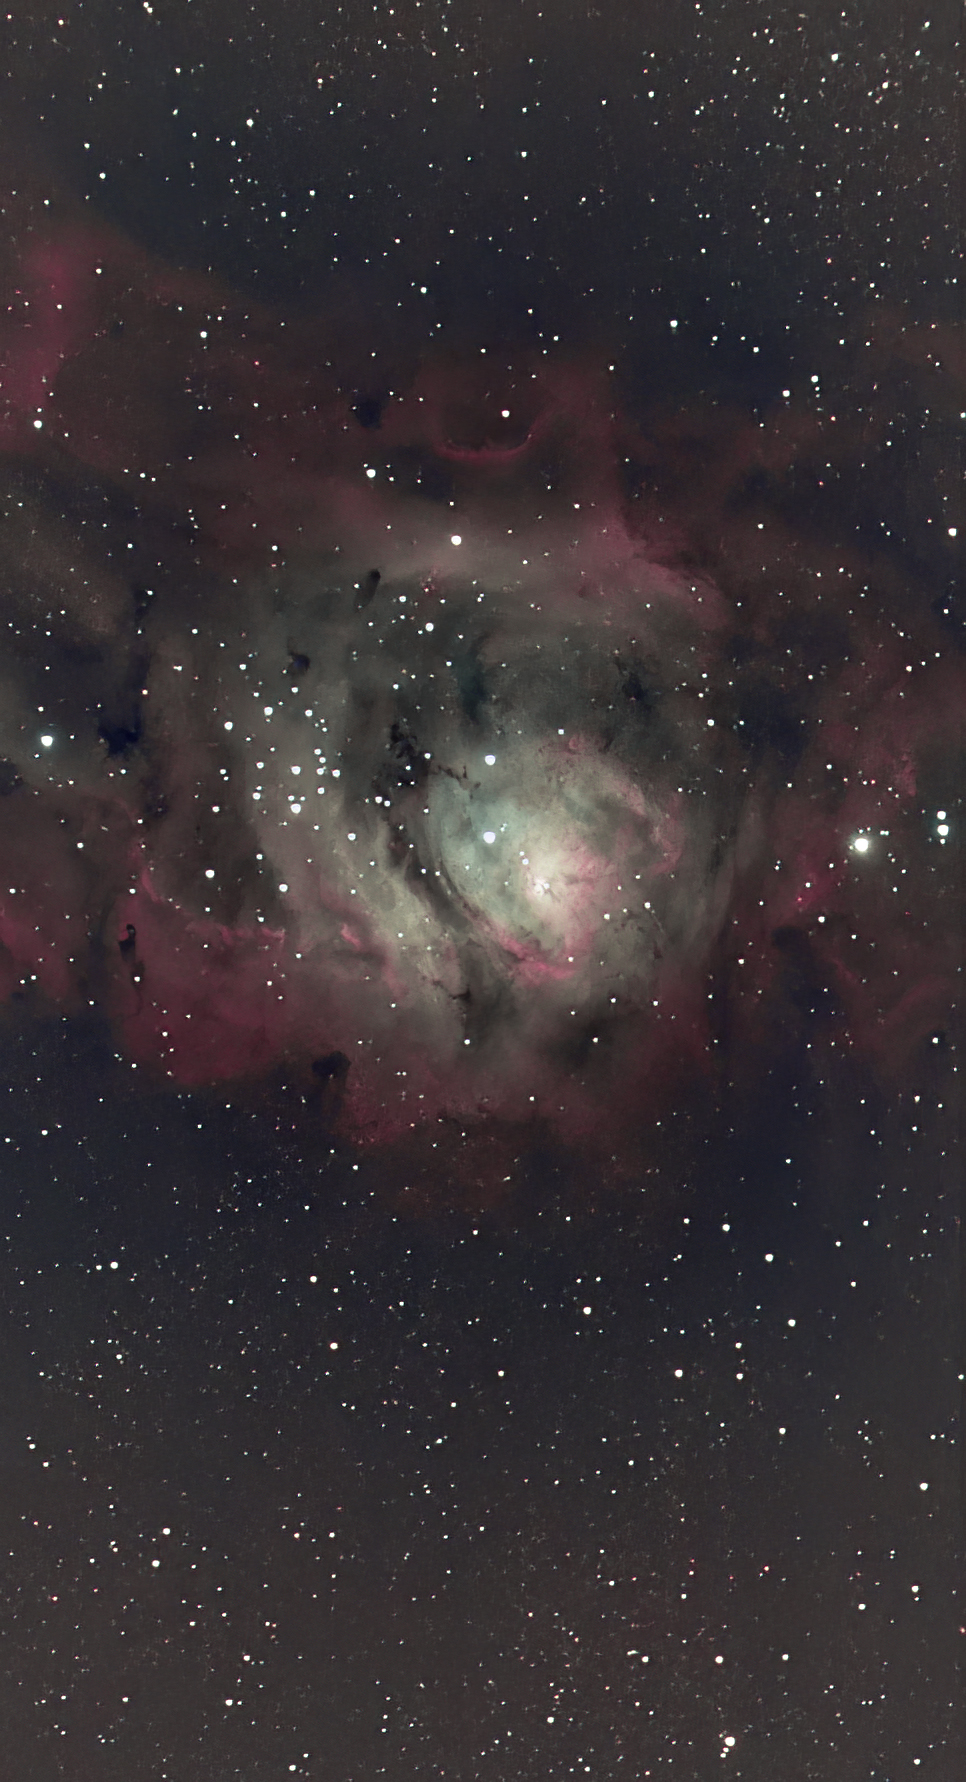
M8 Lagoon Nebula in Sagittarius 30 10-second exposures in Alt-Azimuth mode minor quick and dirty post-processing with Photoshop and other astronomically-based software |
As noted above, below these comments are the images as obtained from an imaging session in the early morning hours of September 16, 2025. The files used were downloaded from the Seestar units' "main frame" (Ha!) onto a Windows 10 desktop computer. I simply used the .fit stacked files, and did a minor quick and dirty post-processing procedure on each image. It is worthy of some comment as to what these individual files look like straight out of the Seestar. An example is: To access the stacked version (which I did) the .fit file name used was: I used this nomenclature for my final adjusted images: I think in the future I will also include the date and time -- I just now figured out what those funny numbers mean! It's important to remember all these great images were created by a 50mm (2-inch) telescope (the lens size of most lowly, decidedly modest finder scopes) that costs about $600 bucks! Remarkable! |
 |
|
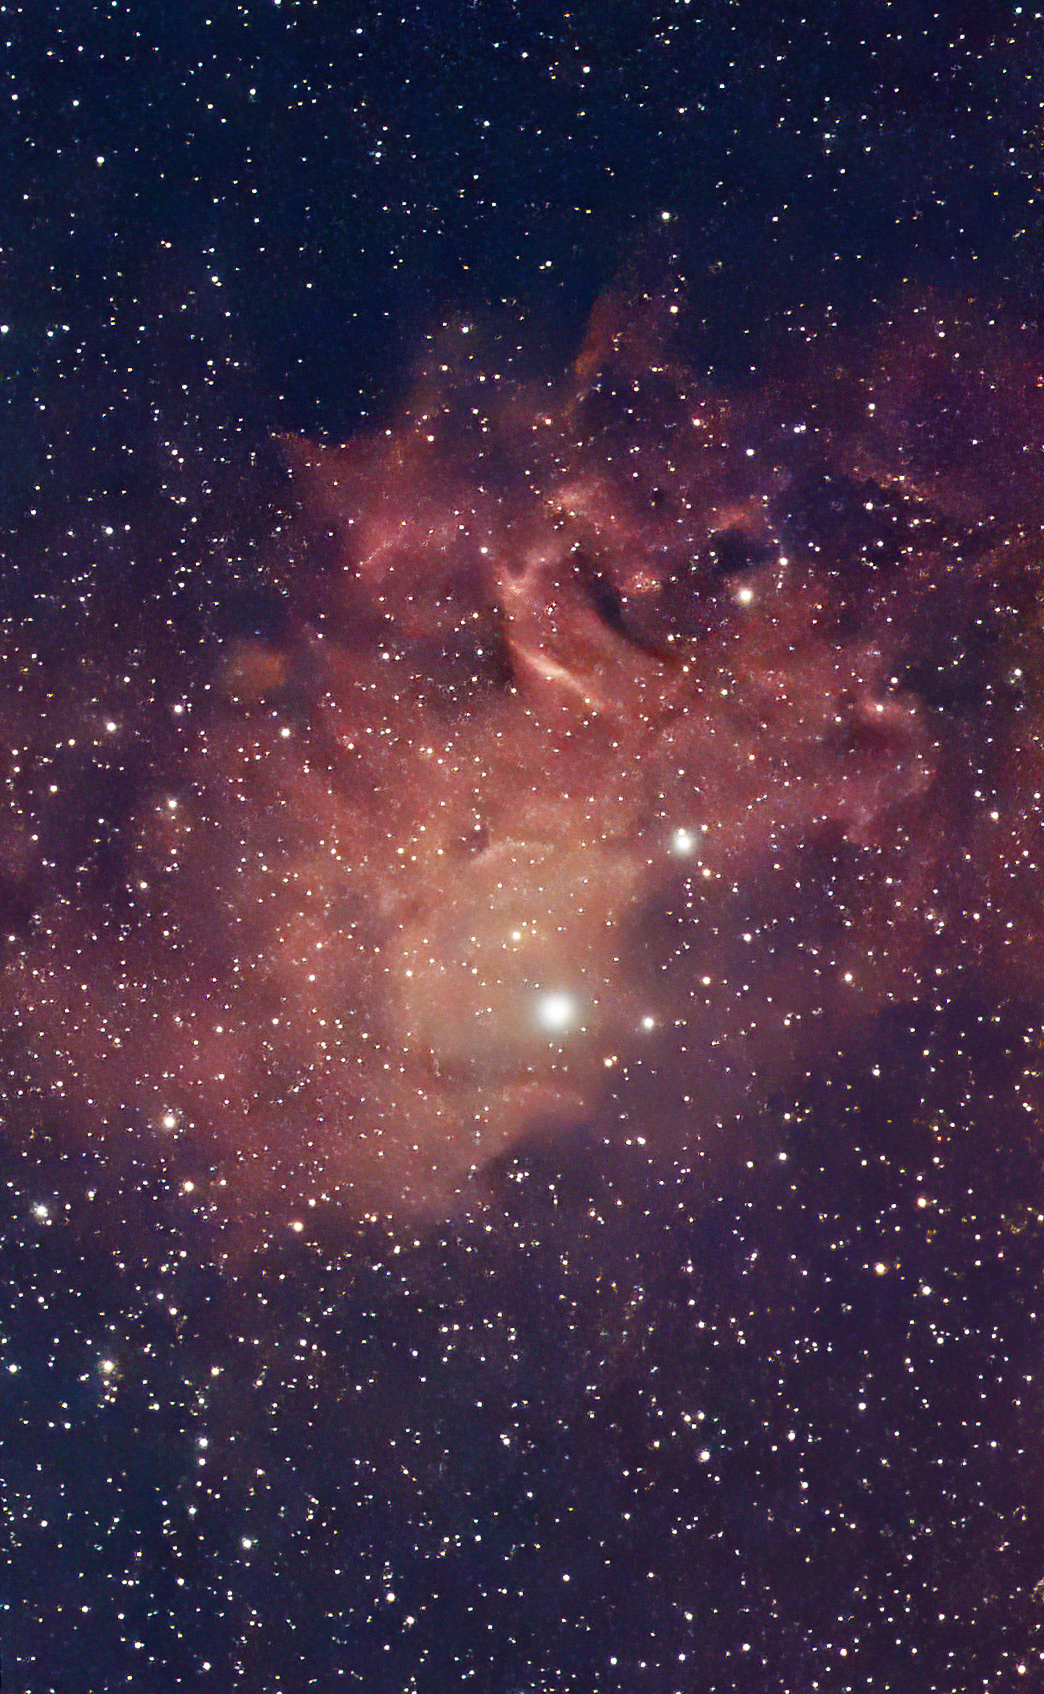
IC 405 Flaming Star Nebula in Auriga 23 30-second exposures in Equatorial mode Equatorial mode allows for longer exposures as the telescope tracks more accurately after being aligned quite precisely with the North celestial pole -- all professional astrophotography is accomplished using this strategy -- longer exposures sometimes still display star trails -- Seestar rejects these errors automatically and announces as it discards that exposure minor quick and dirty post-processing with Photoshop and other astronomically-based software |
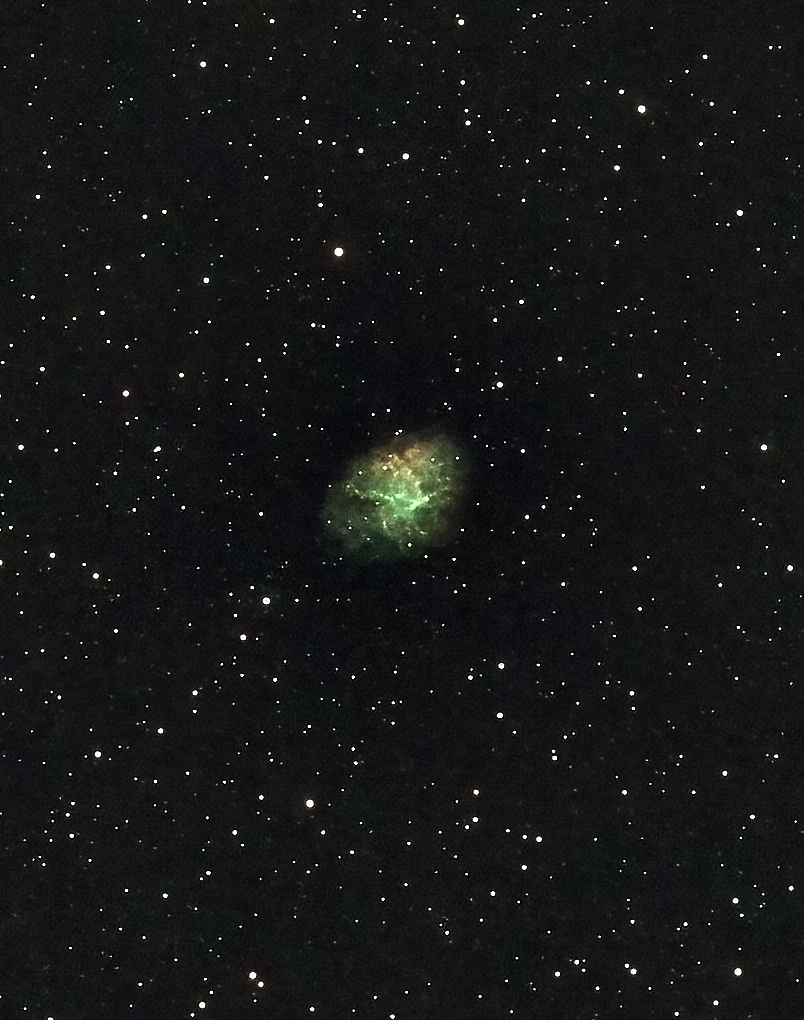
M1 Crab Nebula in Taurus 45 20-second exposures in Equatorial mode minor quick and dirty post-processing with Photoshop and other astronomically-based software -- I have found that the sweet spot for exposure length with the Seestar in Equatorial mode is probably 20 seconds (very few rejected exposures) |
 |
|
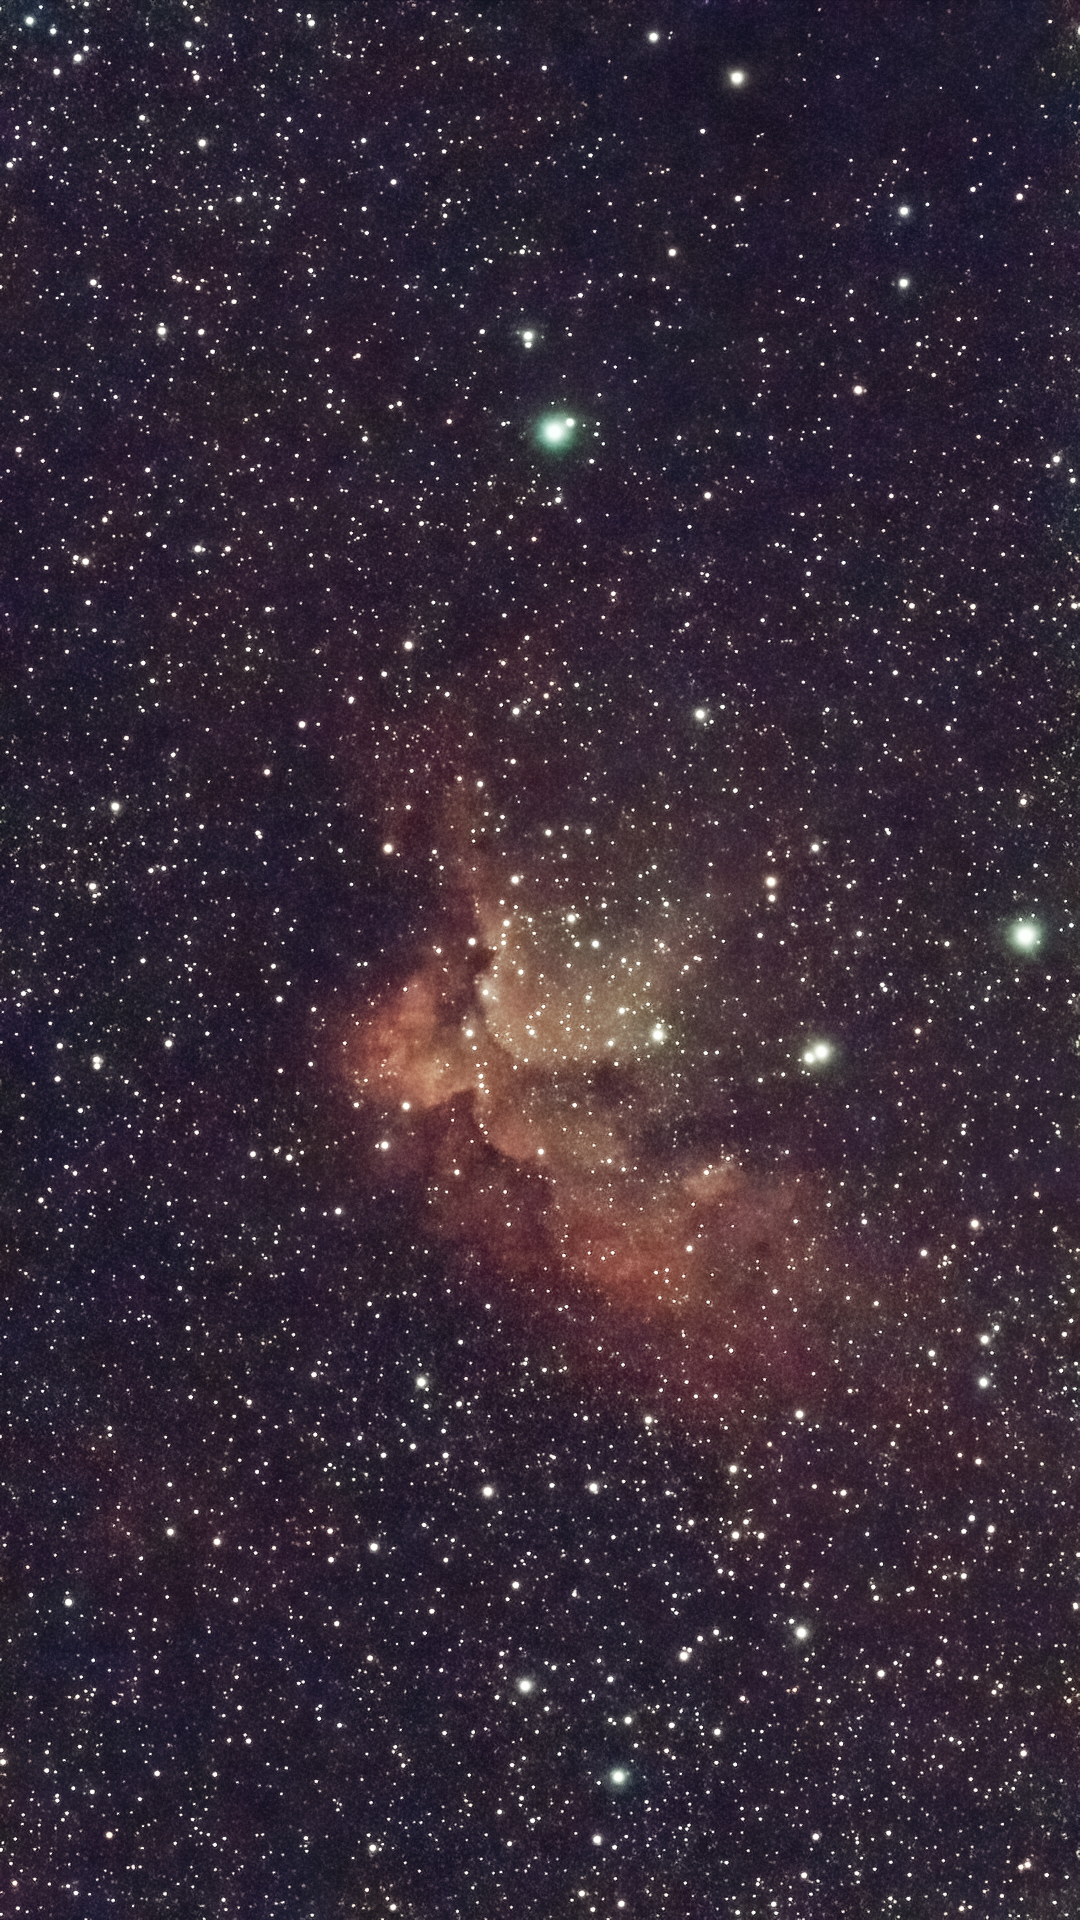
NGC 7380 Flying Horse/Wizard Nebula in Cepheus 45 20-second exposures in Equatorial mode Equatorial mode allows for longer exposures as the telescope tracks more accurately after being aligned quite precisely with the North celestial pole -- all professional astrophotography is accomplished using this strategy -- longer exposures sometimes still display star trails -- Seestar rejects these errors automatically and announces as it discards that exposure minor quick and dirty post-processing with Photoshop and other astronomically-based software |
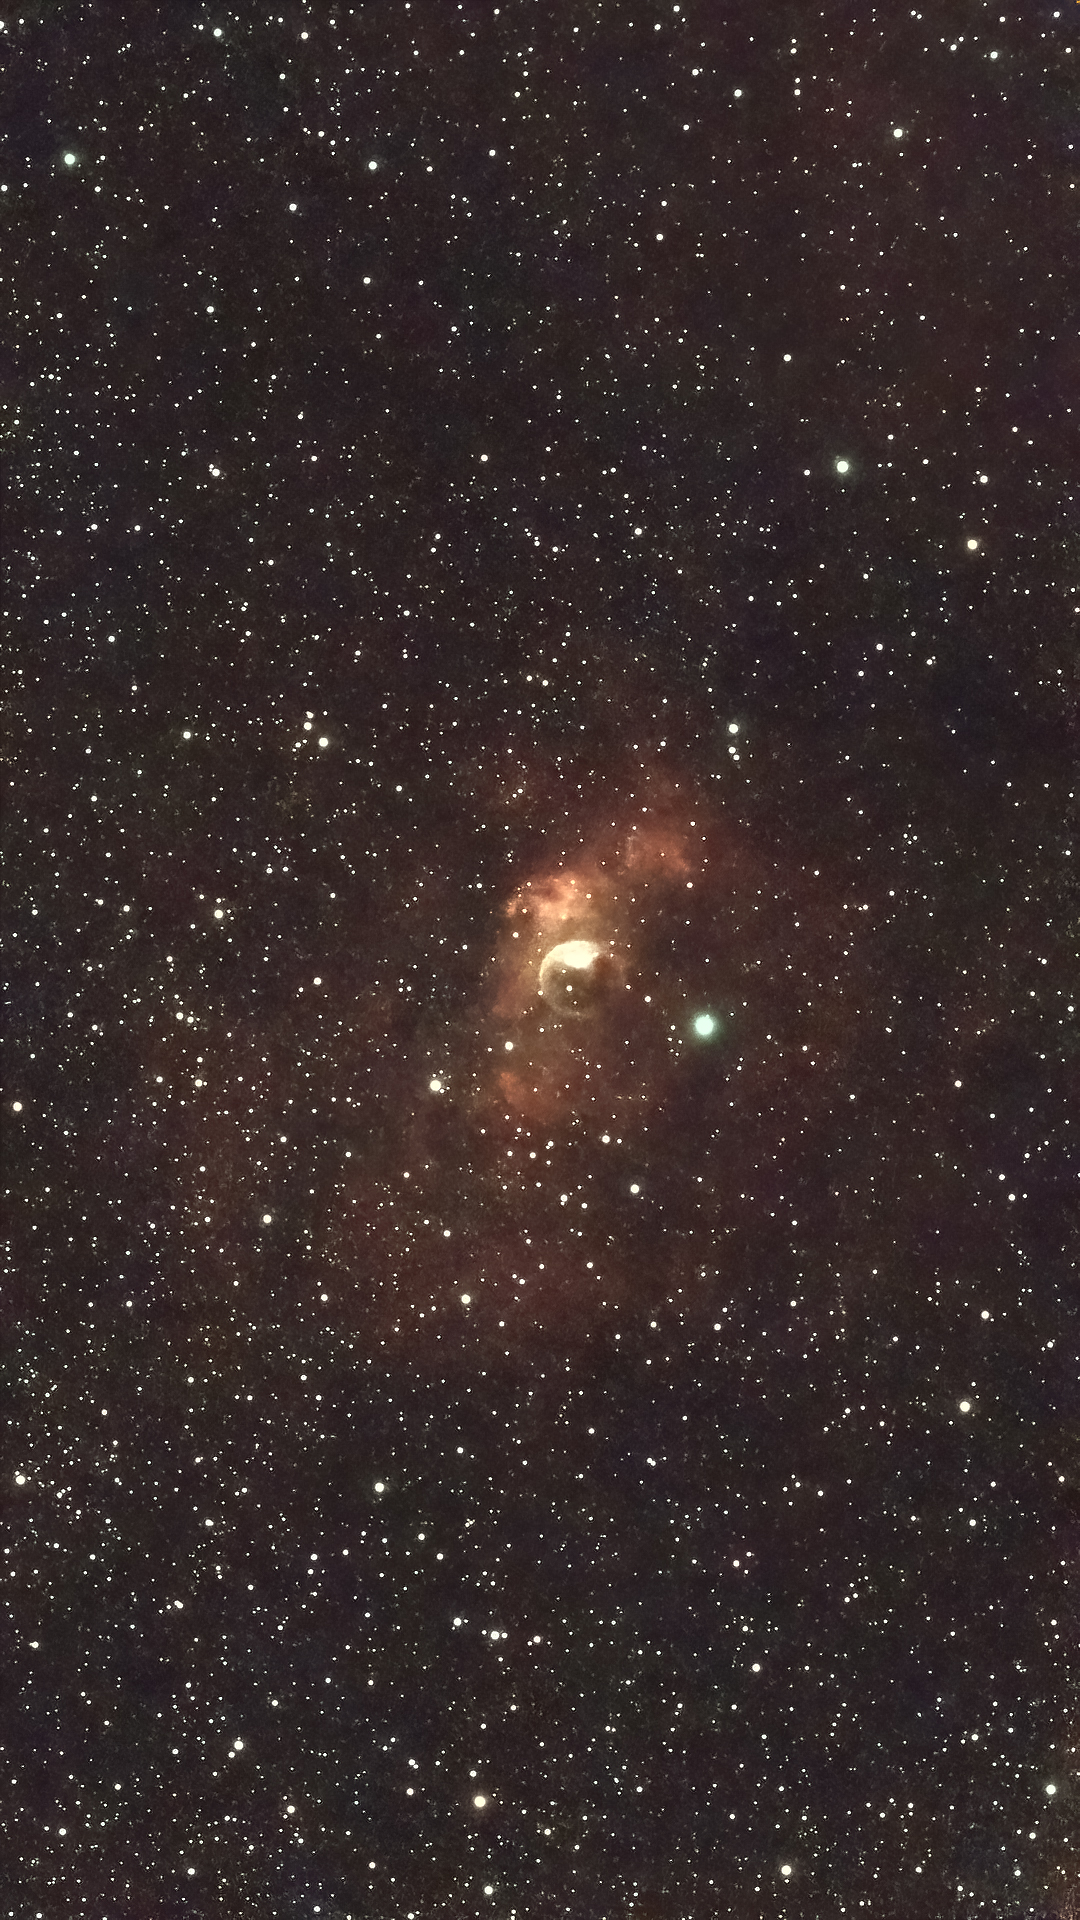
NGC 7635 Bubble Nebula in Cassiopeia 45 20-second exposures in Equatorial mode minor quick and dirty post-processing with Photoshop and other astronomically-based software -- I have found that the sweet spot for exposures with the Seestar in Equatorial mode is probably 20 seconds (very few rejected exposures) -- although I like these two images, I would say that it was difficult to get the reddish tinge I desired, due partly I think, to the LP (light pollution) filter employed, due primarily to a bright Moon nearby, and used by all images in this session other than the Flaming Star Nebula, which was farther away from the bright Moon |
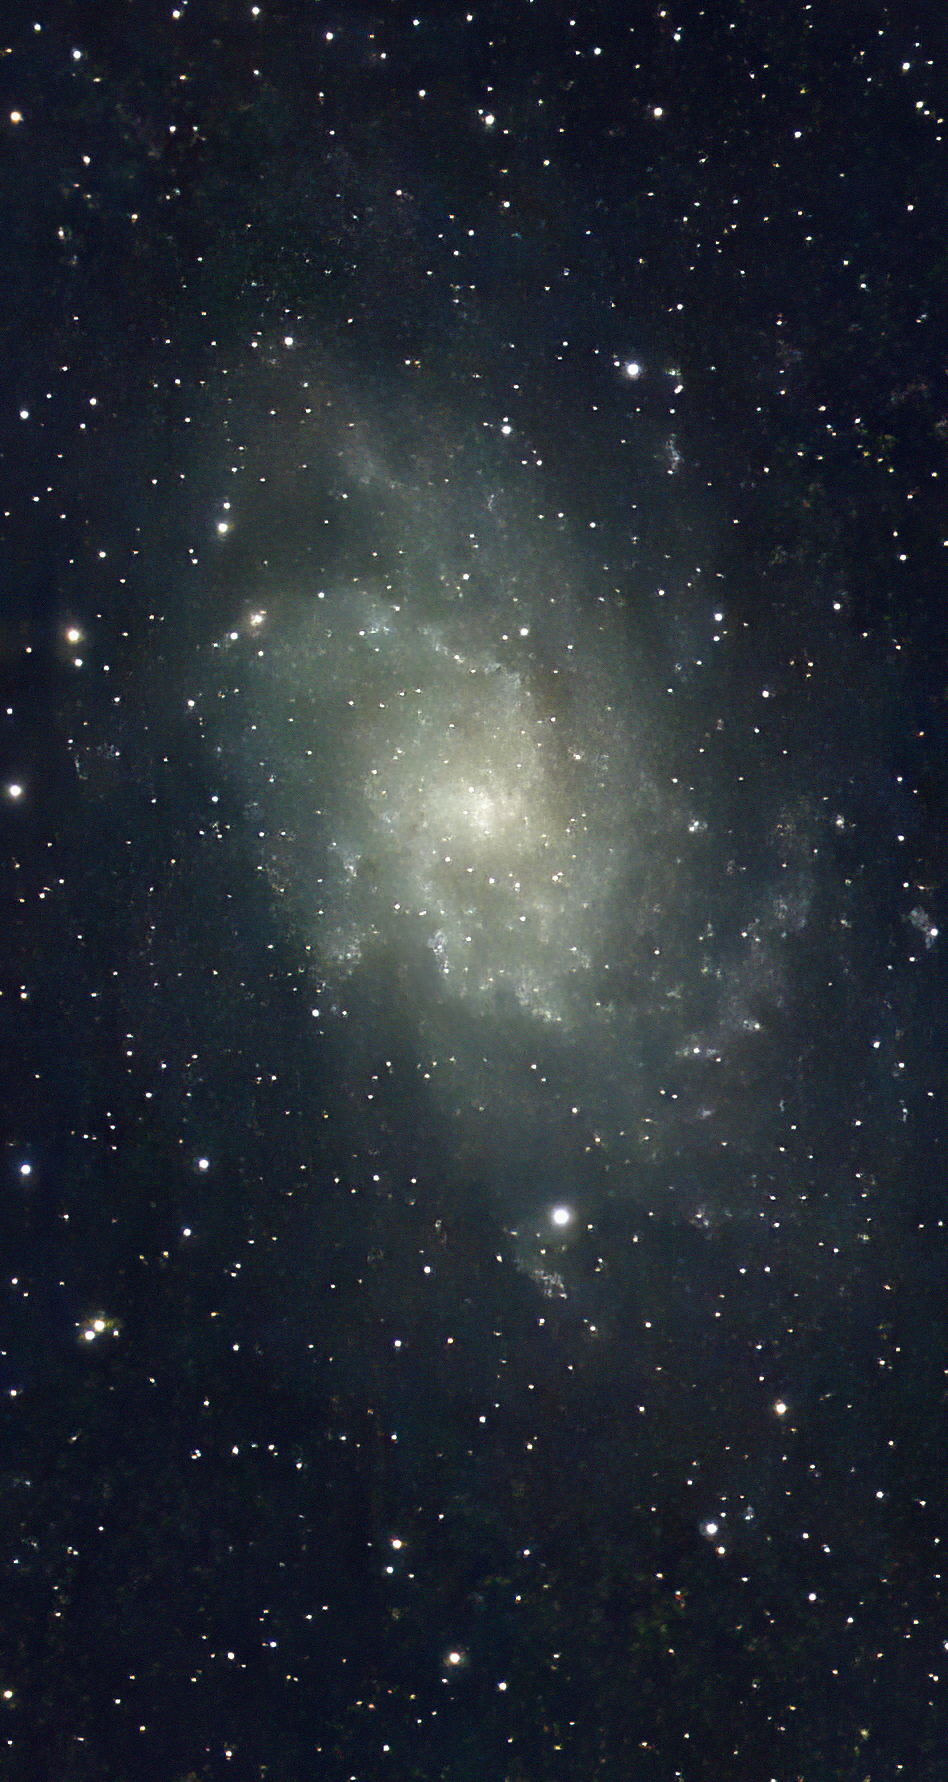
M33 Galaxy in Triangulum |
60 10-second exposures in Equatorial mode IR-CUT filter used
"In astronomy, a UV/IR cut filter is an essential accessory that blocks unwanted ultraviolet (UV) and infrared (IR) light from reaching a camera's sensor, thereby improving image quality by increasing sharpness and reducing star bloat." -- from the internet One thing we do not see here are the often-present most distinctive features; they are ionized hydrogen clouds, also "called H-II regions, which are massive regions of starbirth." Usually appearing red, they are certainly present in this exo-Milky Way galaxy's arms. A longer exposure and better post processing (sic) would likely reveal these areas. |
 |
 |
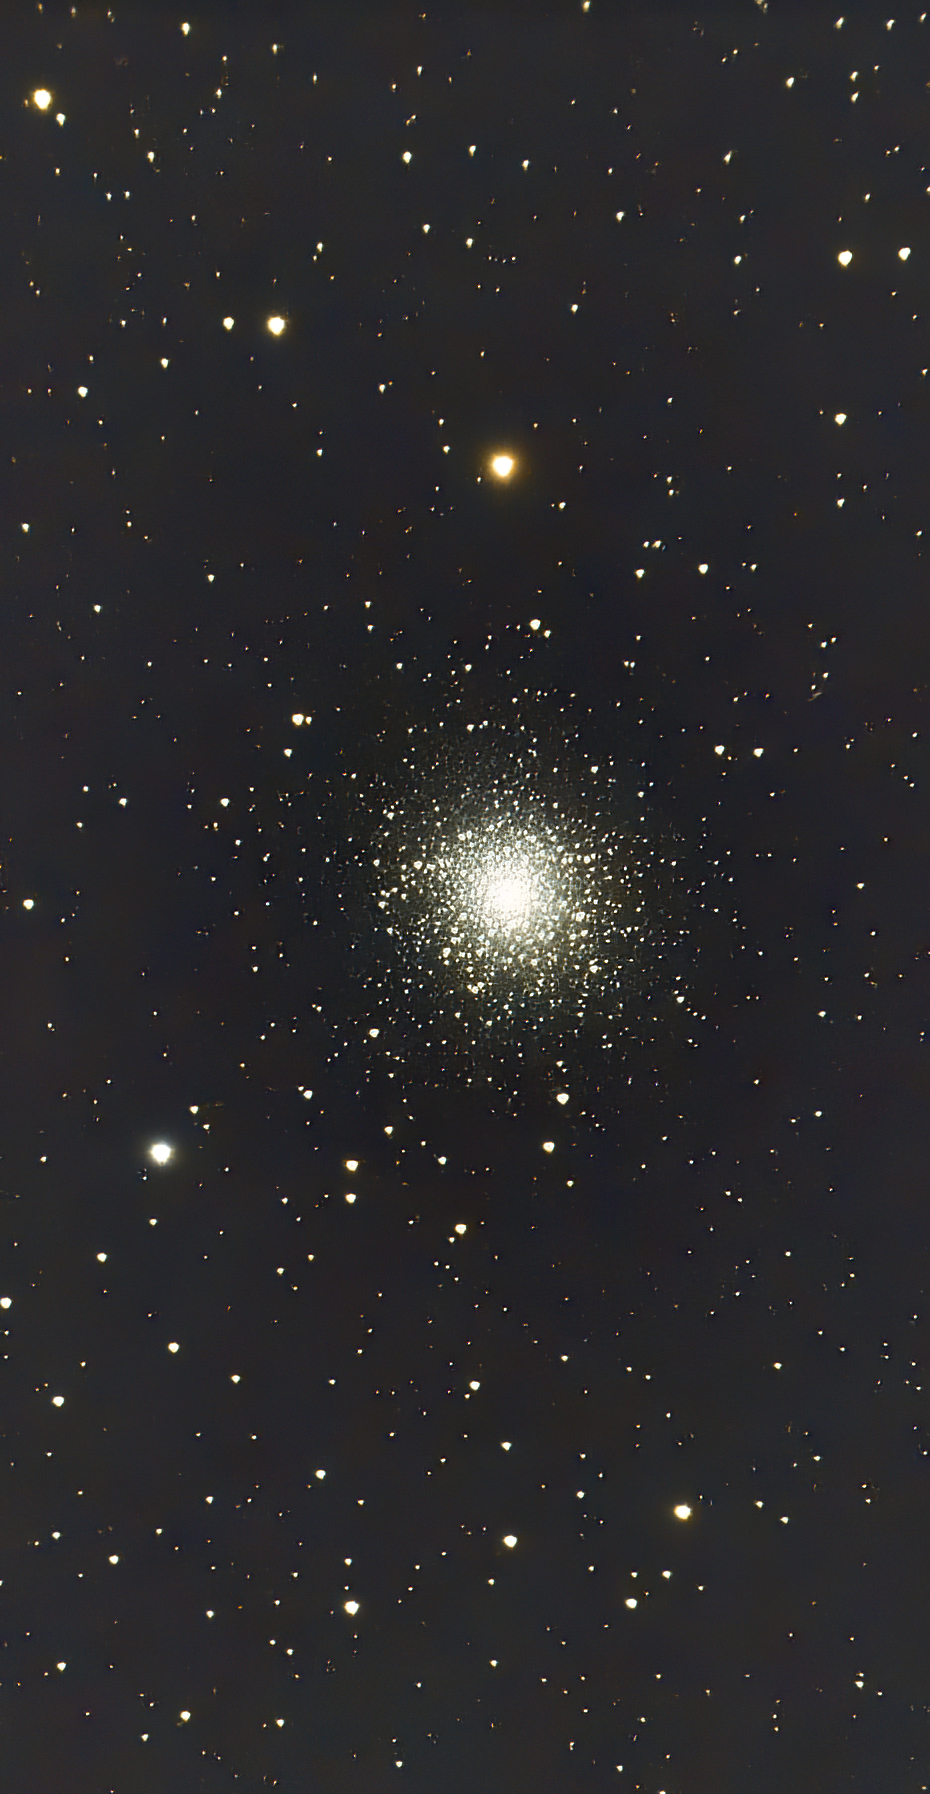
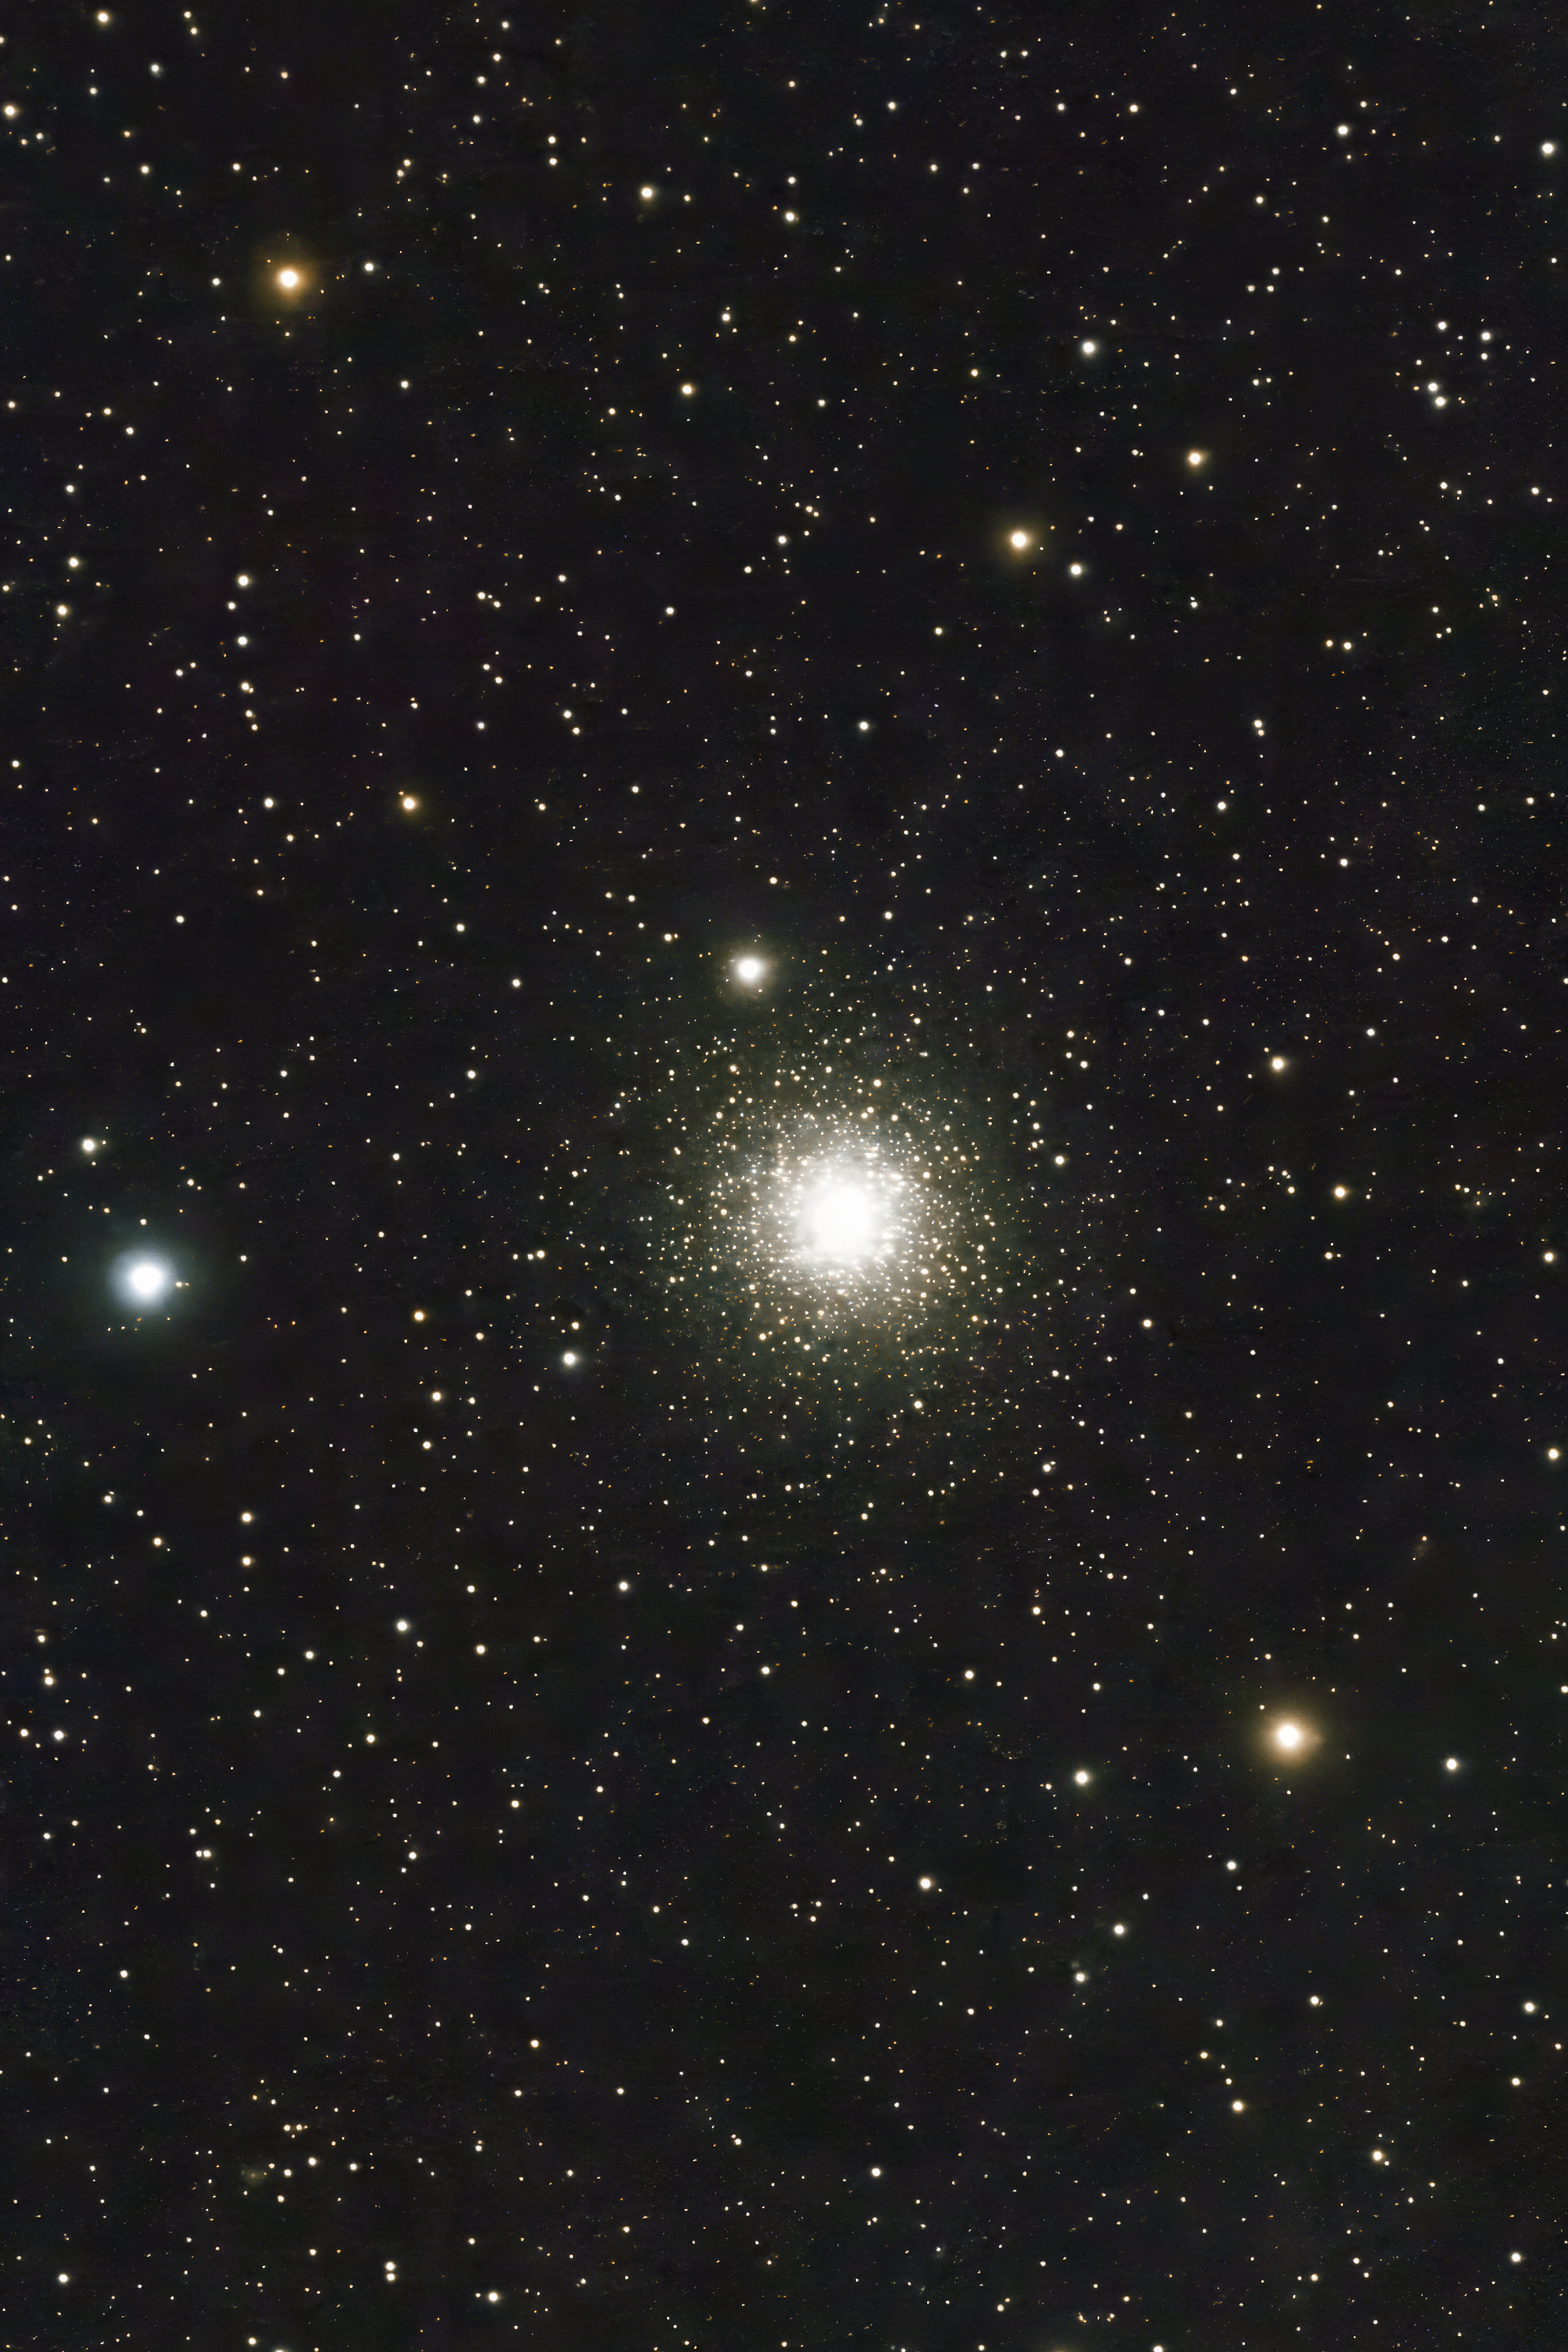
M13 Globular Star Cluster in Hercules |
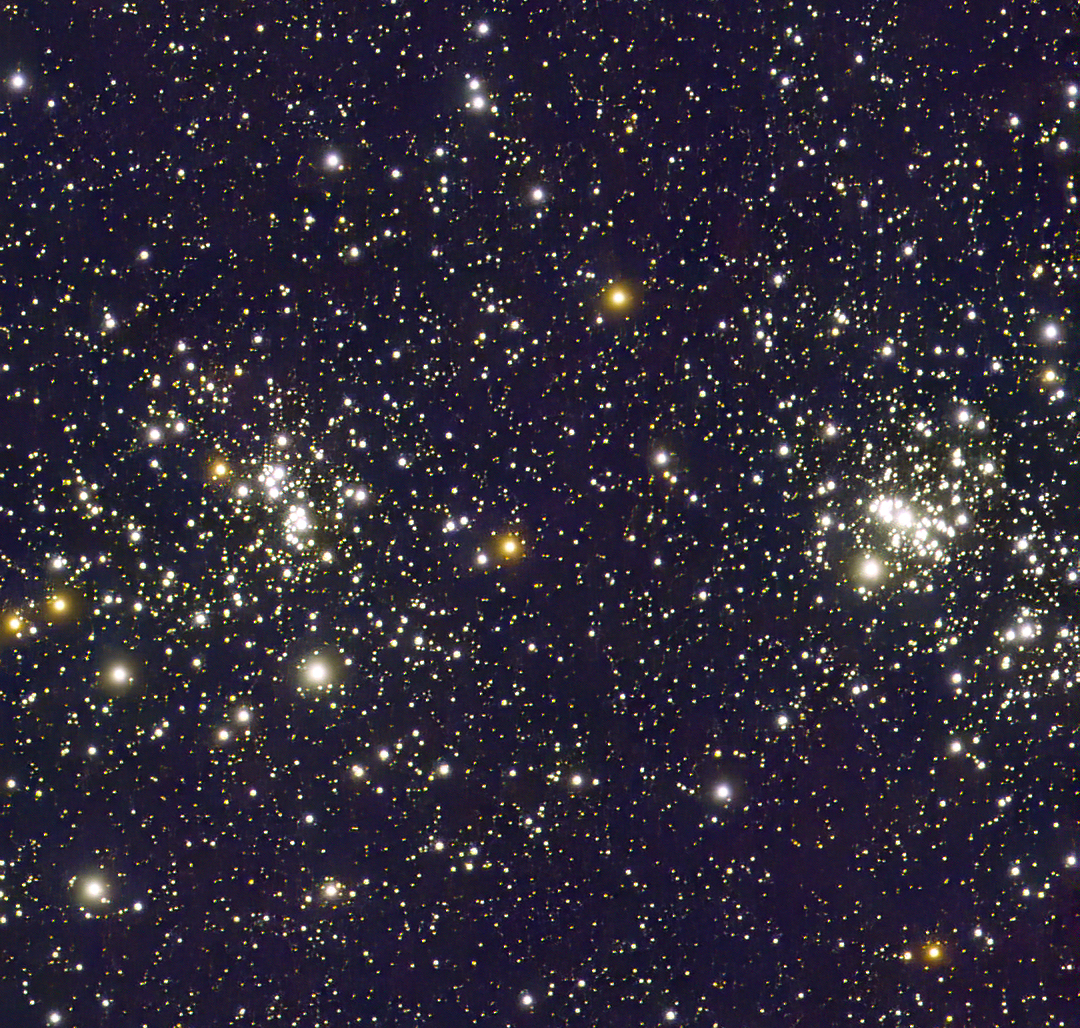
NGC 869 & NGC 884 Double Cluster in Perseus 42 10-second exposures in Equatorial mode employing the IRCUT filter. There is much less background noise in this rendition, generally due to the unexpected non-use (I forgot to turn it on!) of the 4K feature in Seestar's software. Although the 4K feature doubles the apparent size of the chip in the software, the price of more noise is the result. This image had much less shot noise -- because of this I am somewhat hesitant to use the 4K option in the future. The color of the stars also came out more vividly with very much less post-processing necessary. I have found that the sweet spot for exposures with the Seestar in Equatorial mode is probably 20 seconds (very few rejected exposures). |
 |
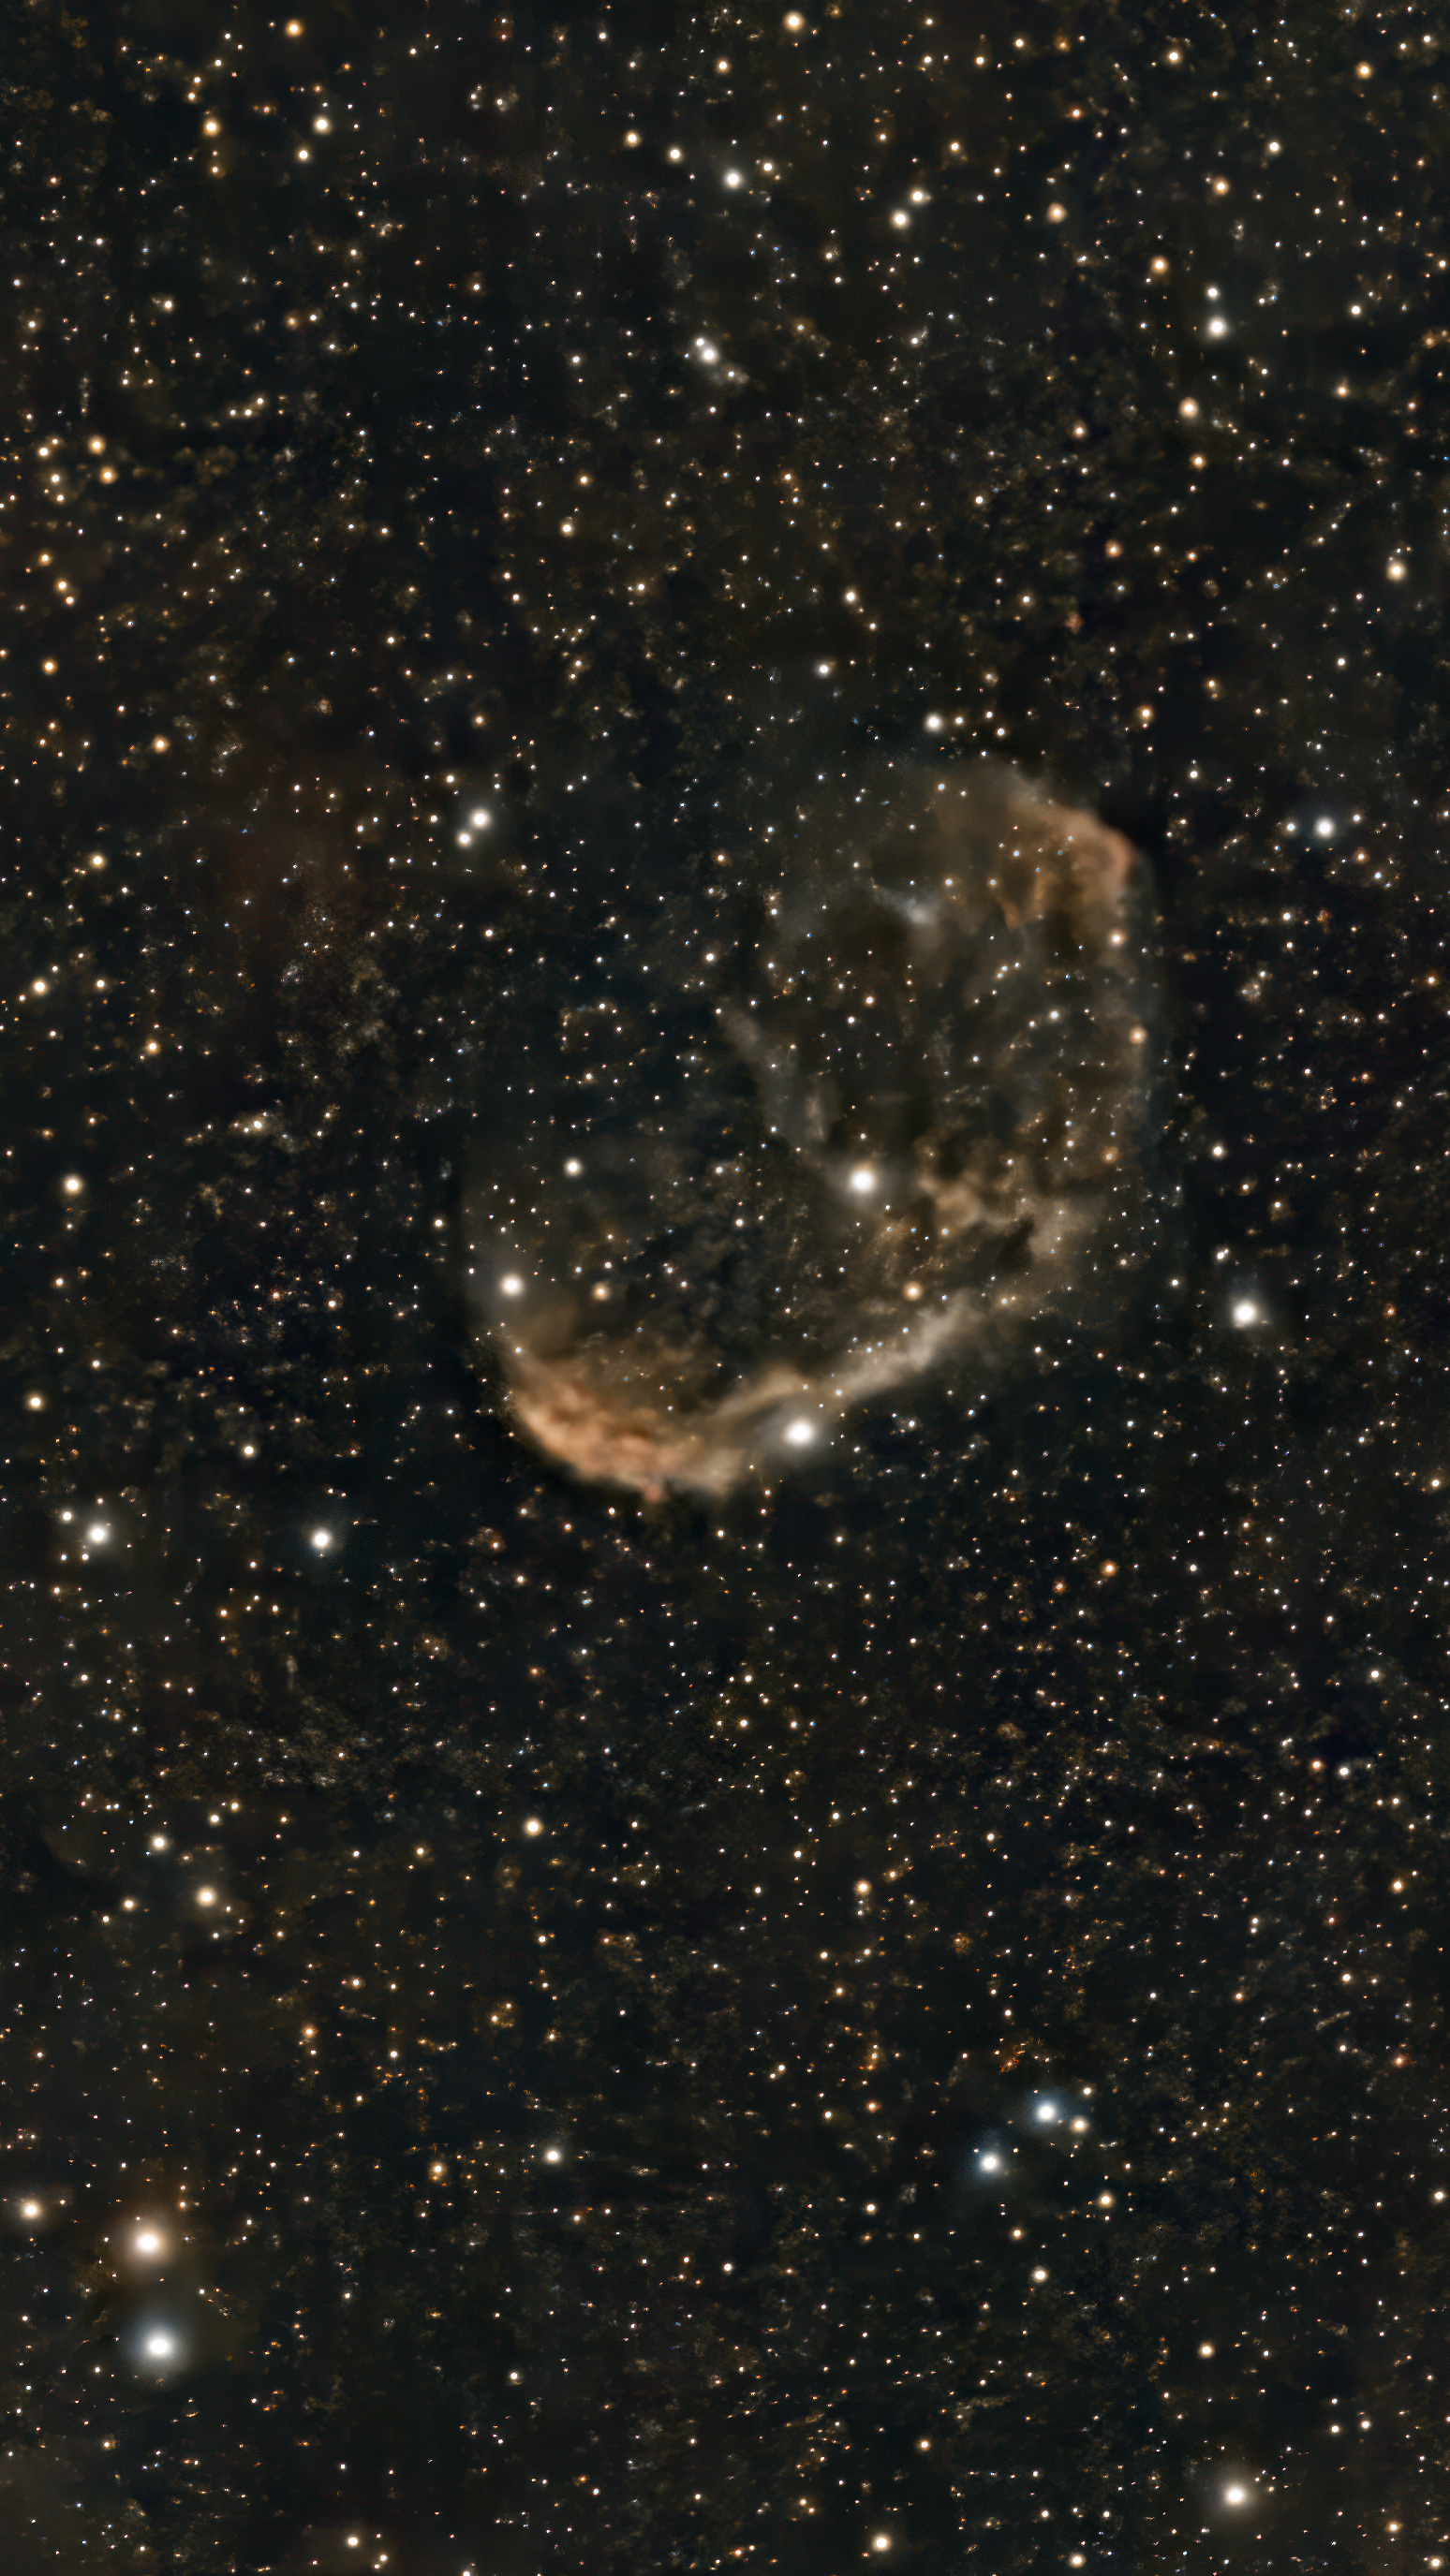 |
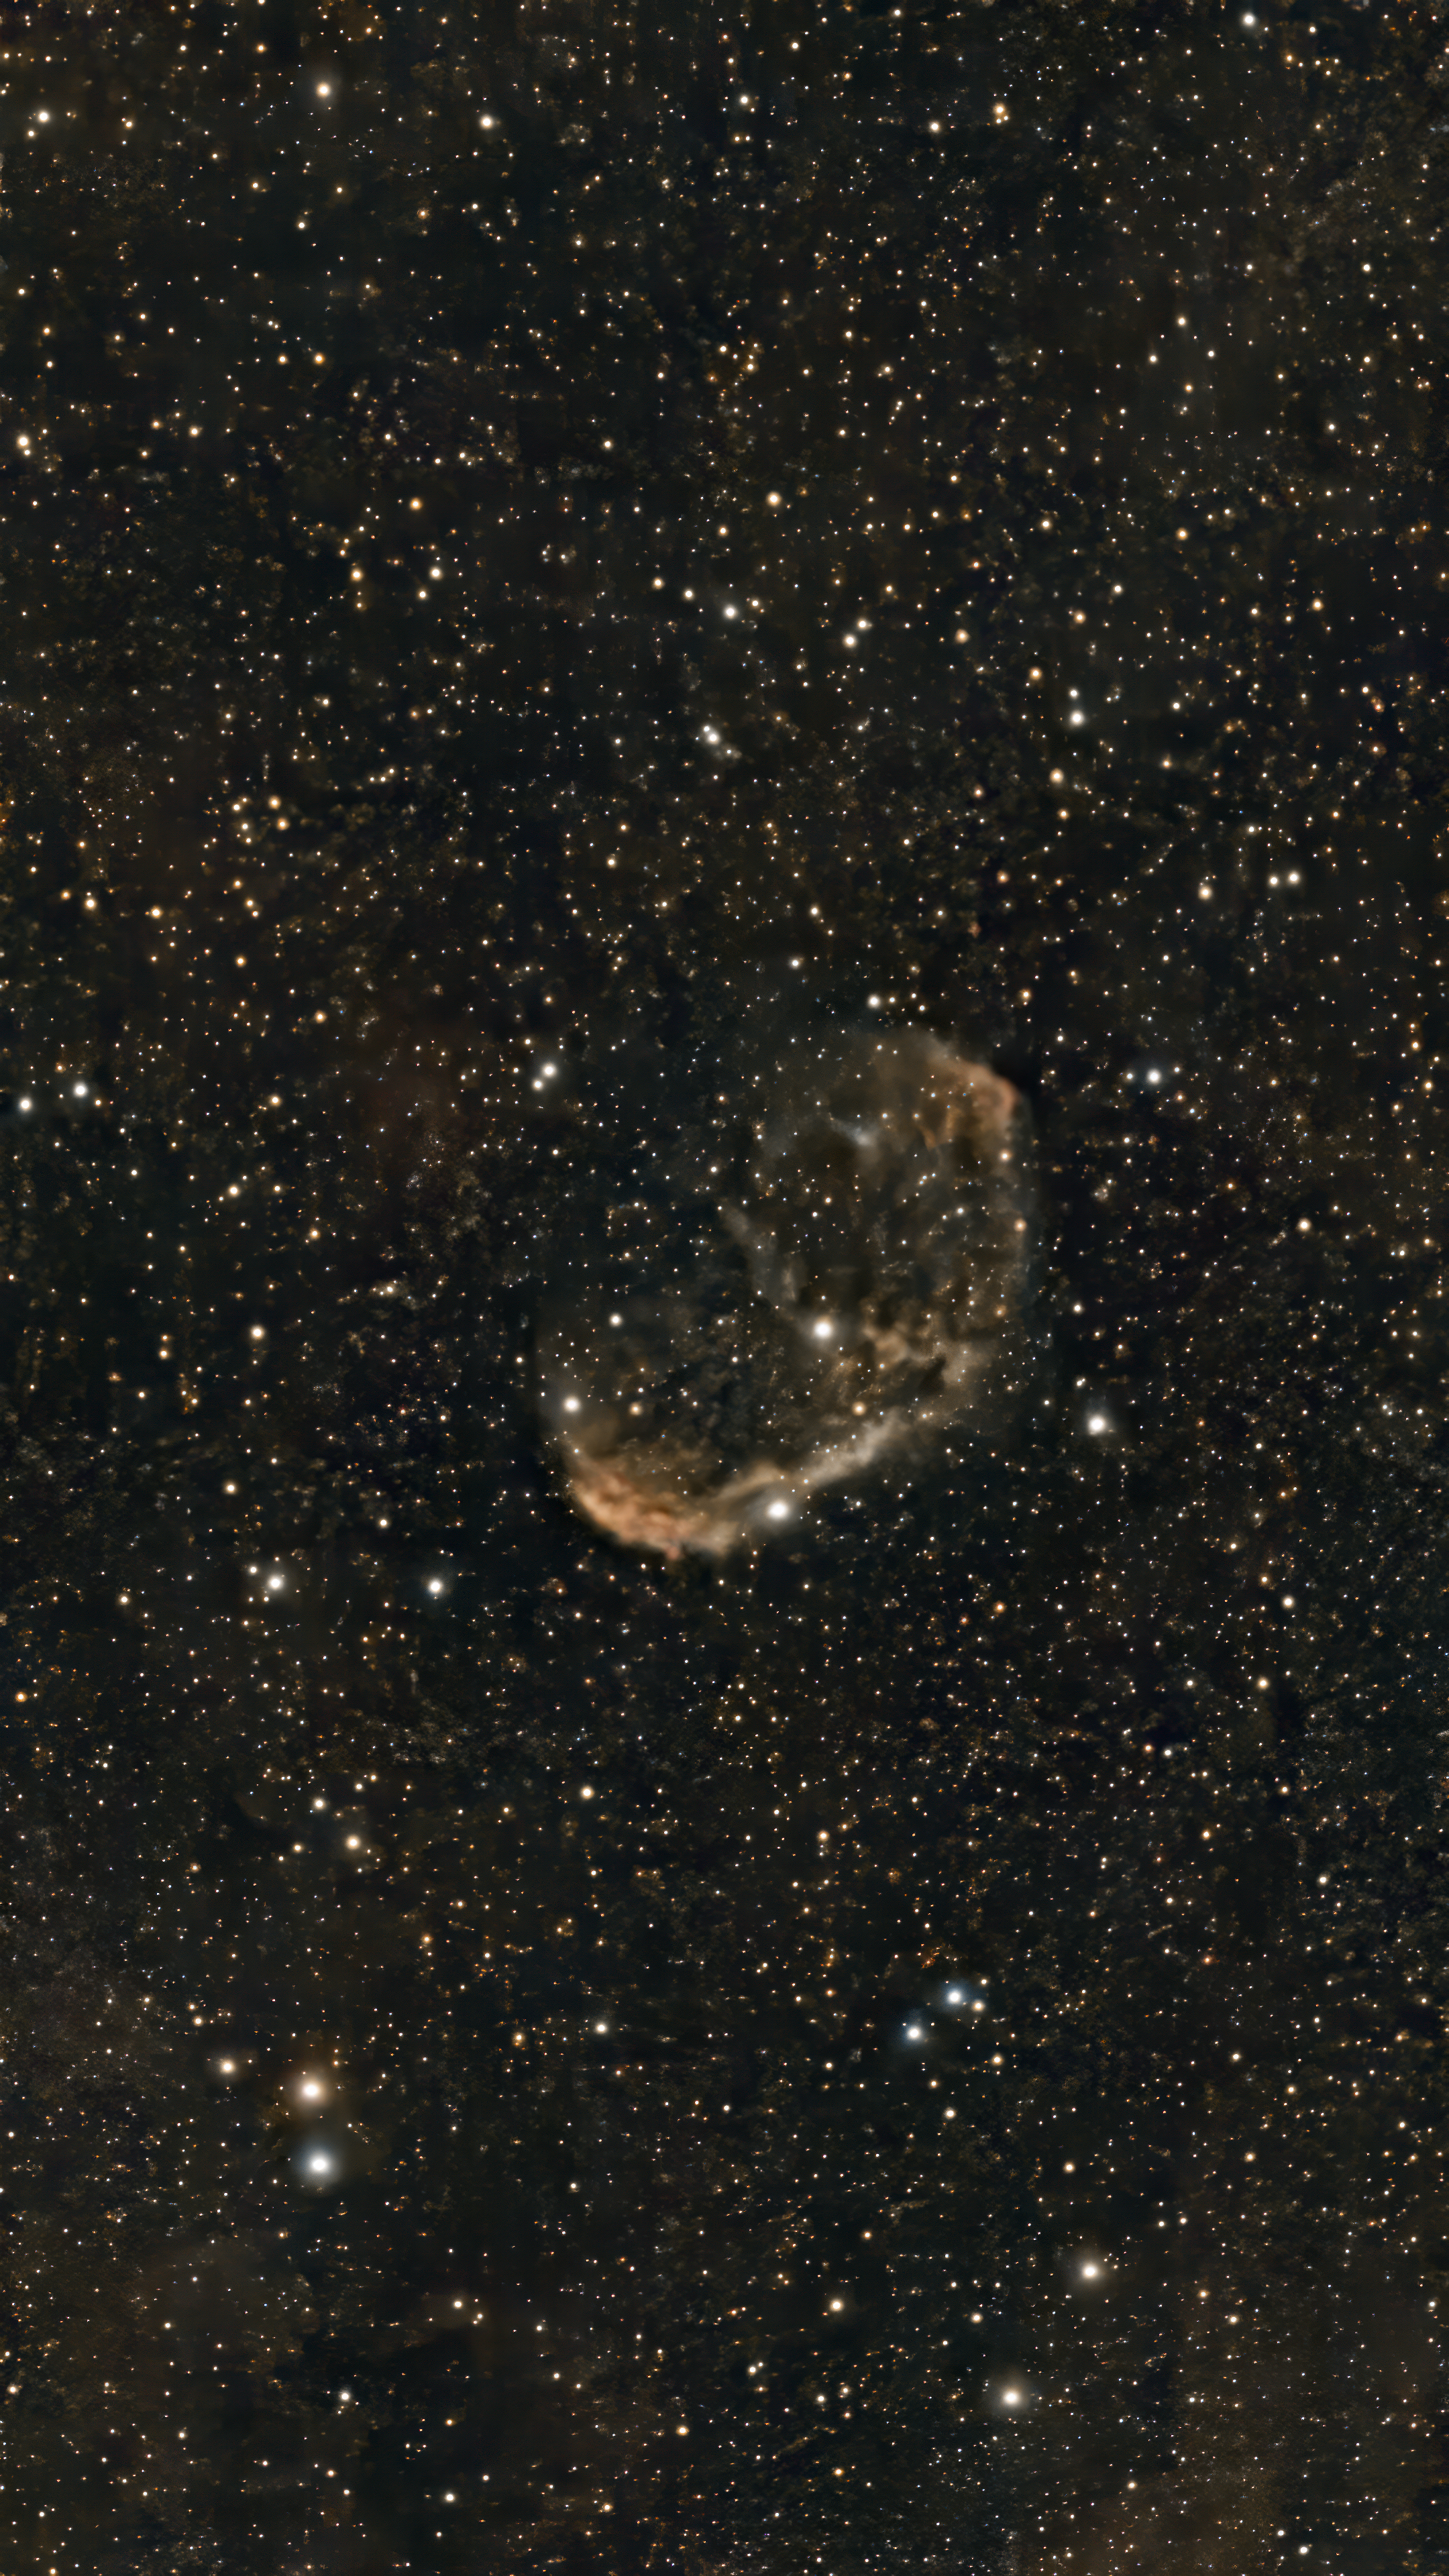
NGC 6888 Crescent Nebula in Cygnus |
NGC 6888 Crescent Nebula in Cygnus "The Crescent Nebula (NGC 6888) is an emission nebula in the constellation Cygnus, about 5,000 light-years from Earth, formed by the colliding stellar winds of a massive Wolf-Rayet star (WR 136) with earlier ejected stellar material, creating a bright, filament-filled shell. Discovered by William Herschel in 1792, it is also known as Caldwell 27 and is roughly 25 light-years across but is not visible to the naked eye." -- from the internet 45 20-second 4K exposures in Equatorial mode employing the internal Light Pollution filter. This image is just an enlargement of the original one to the left, as the 4K process allows for more enlargement, albeit again with some increase in shot noise. |
 |
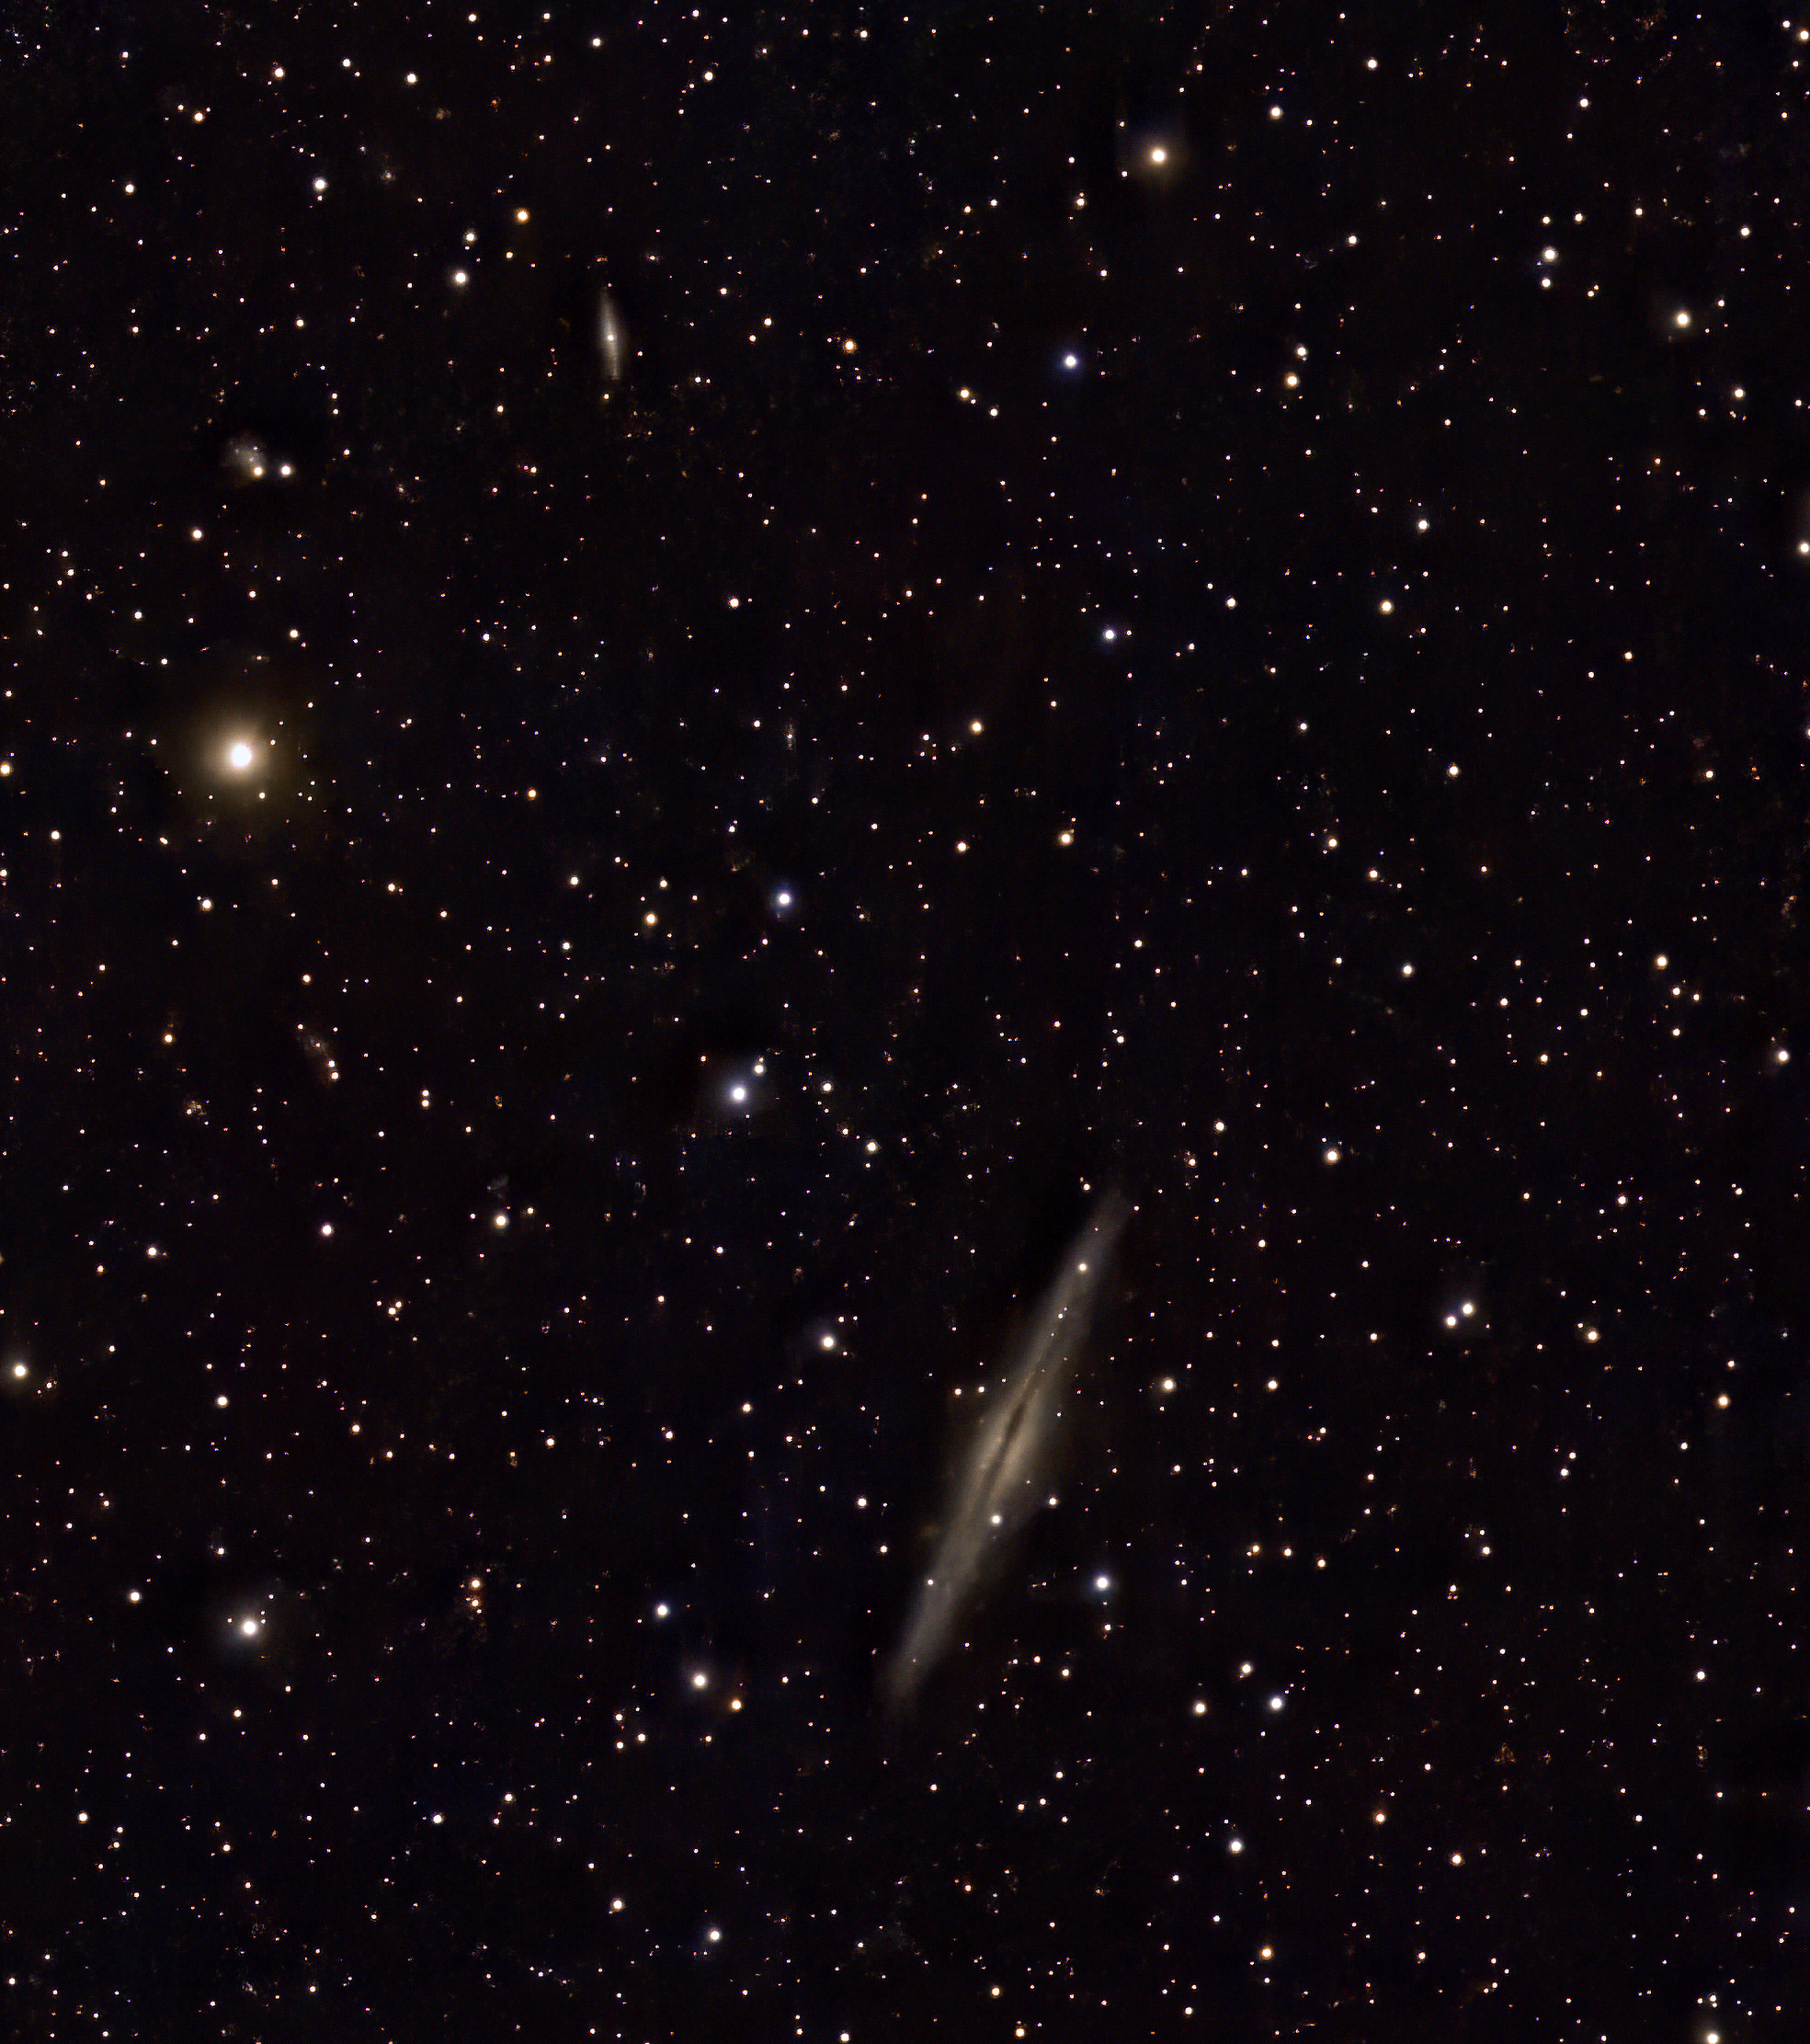 |
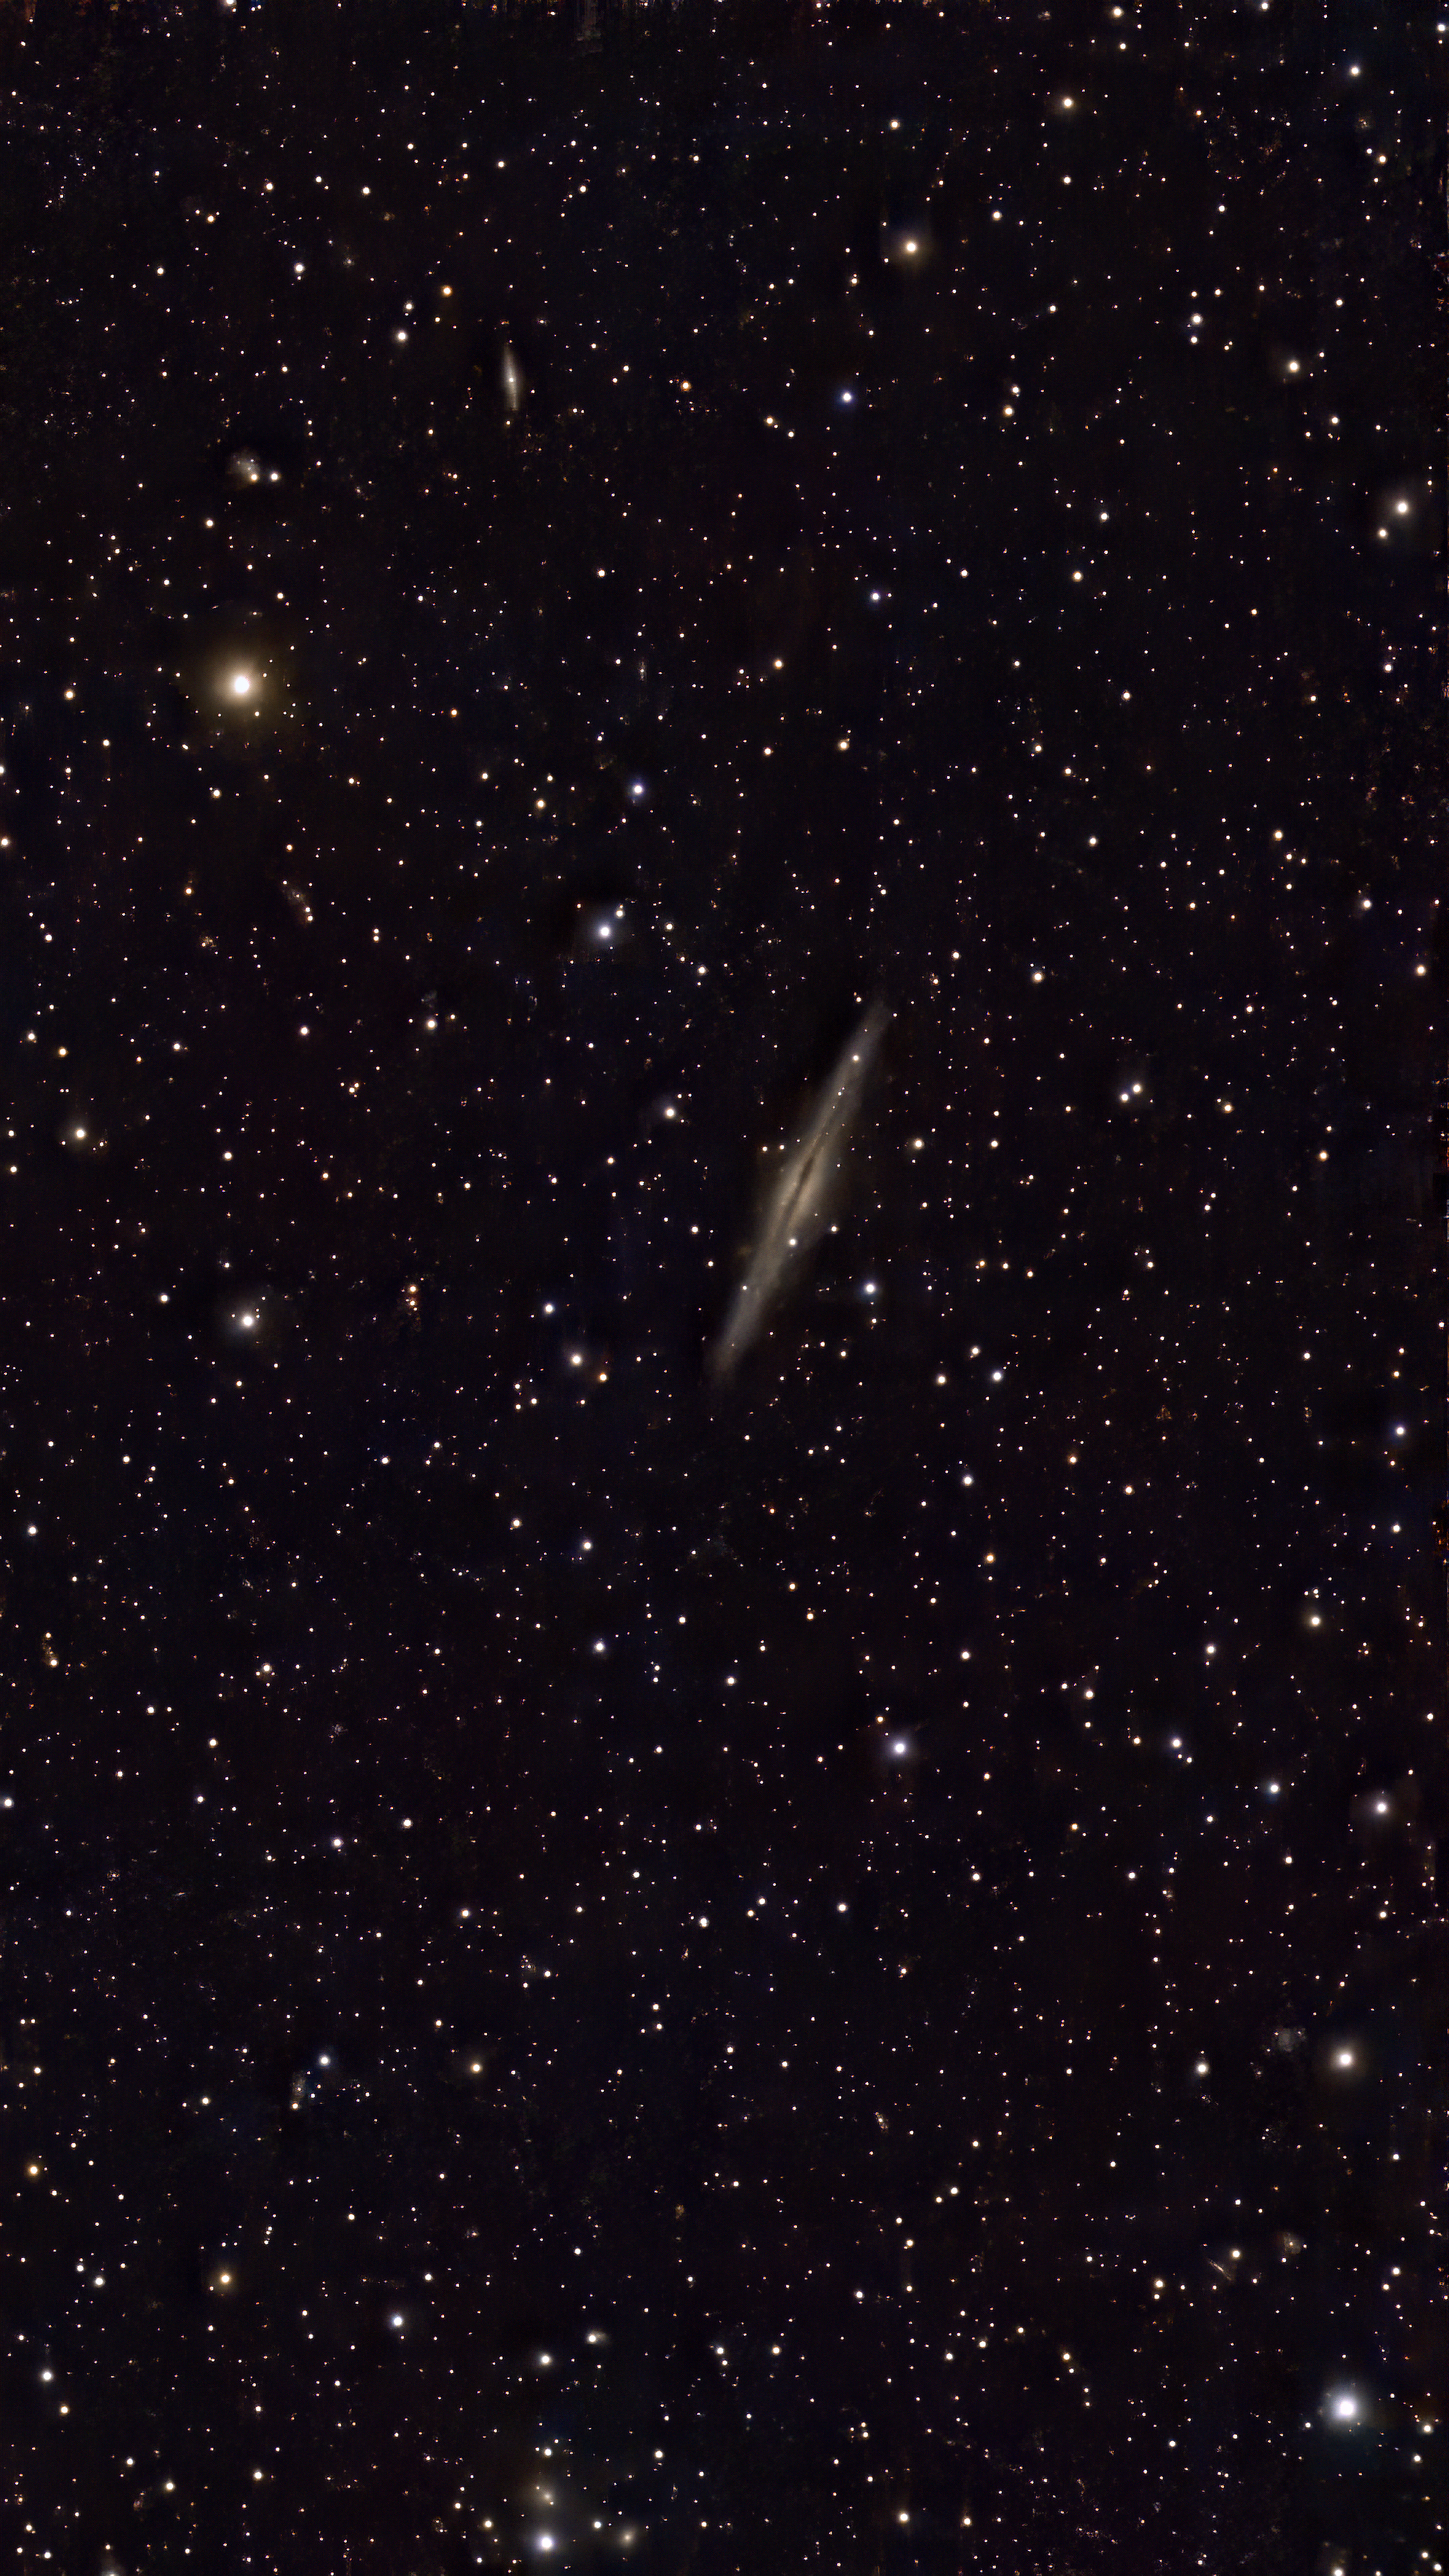
NGC 891 Outer Limits Galaxy in Andromeda |
NGC 891 Outer Limits Galaxy in Andromeda 60 10-second 4K exposures in Equatorial mode employing the internal IRCUT filter. This image is just an enlargement of the original one to the left, as the 4K process allows for more enlargement, albeit again with some increase in shot noise. The nickname comes from the use of this galaxy's image in the opening rant from the original "Outer Limits" TV show. Note the "companion" galaxies also present, above and to the right of the bright star in this rendition. |
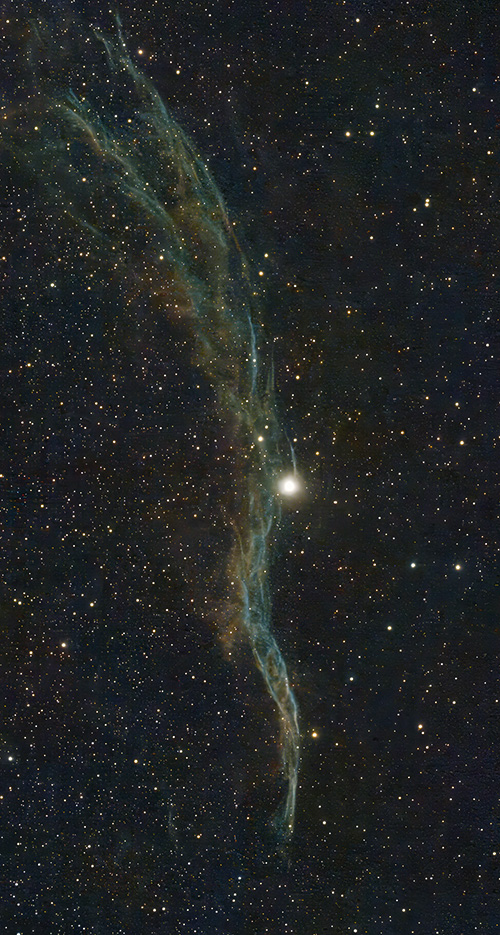
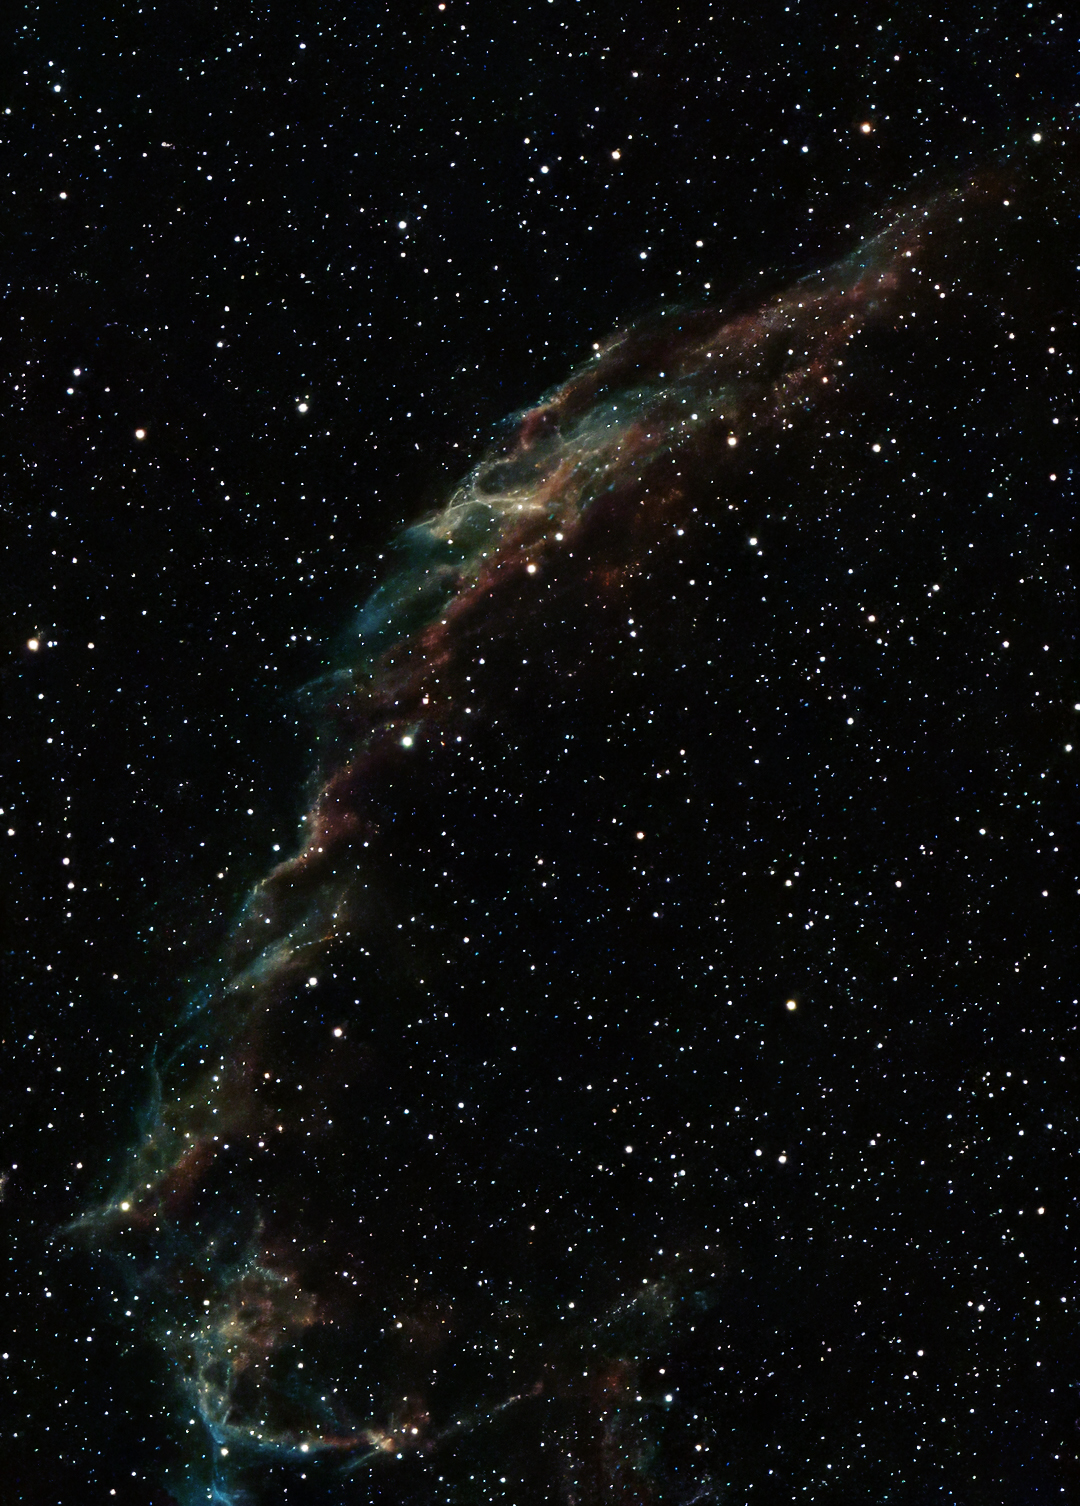
NGC 6960 Western Veil Nebula in Cygnus |
NGC 6992 Eastern Veil Nebula in Cygnus |
126 10-second 2K exposures in Equatorial mode employing the internal Light Pollution filter. As before, more noise was present in this original stacked image -- however, not as much as previously seen, probably due to more images taken. |
This stack of the Eastern Veil Nebula is 84 10-second sub exposures, not 4K (instead 2K), also employing the internal Light Pollution filter. Whereas this image of the Western Veil was taken from Bortle 6.2 high light pollution site, the Western Veil to the left was taken from my home on the mesa above Taos, NM, a much darker Bortle 4.3 site. See the links above for more explanation. Both images were processed similarly. "The Eastern Veil in Cygnus is the eastern part of the Veil Nebula, a large supernova remnant in the constellation Cygnus. Also known as Caldwell 33, it is an expanding cloud of heated gas and dust resulting from the death of a star that exploded between 5,000 and 20,000 years ago. The Eastern Veil is cataloged as NGC 6992 and is best viewed with a telescope, especially when equipped with an O-III narrowband filter to reveal its faint, intricate structures." -- both quotes from internet sources
|
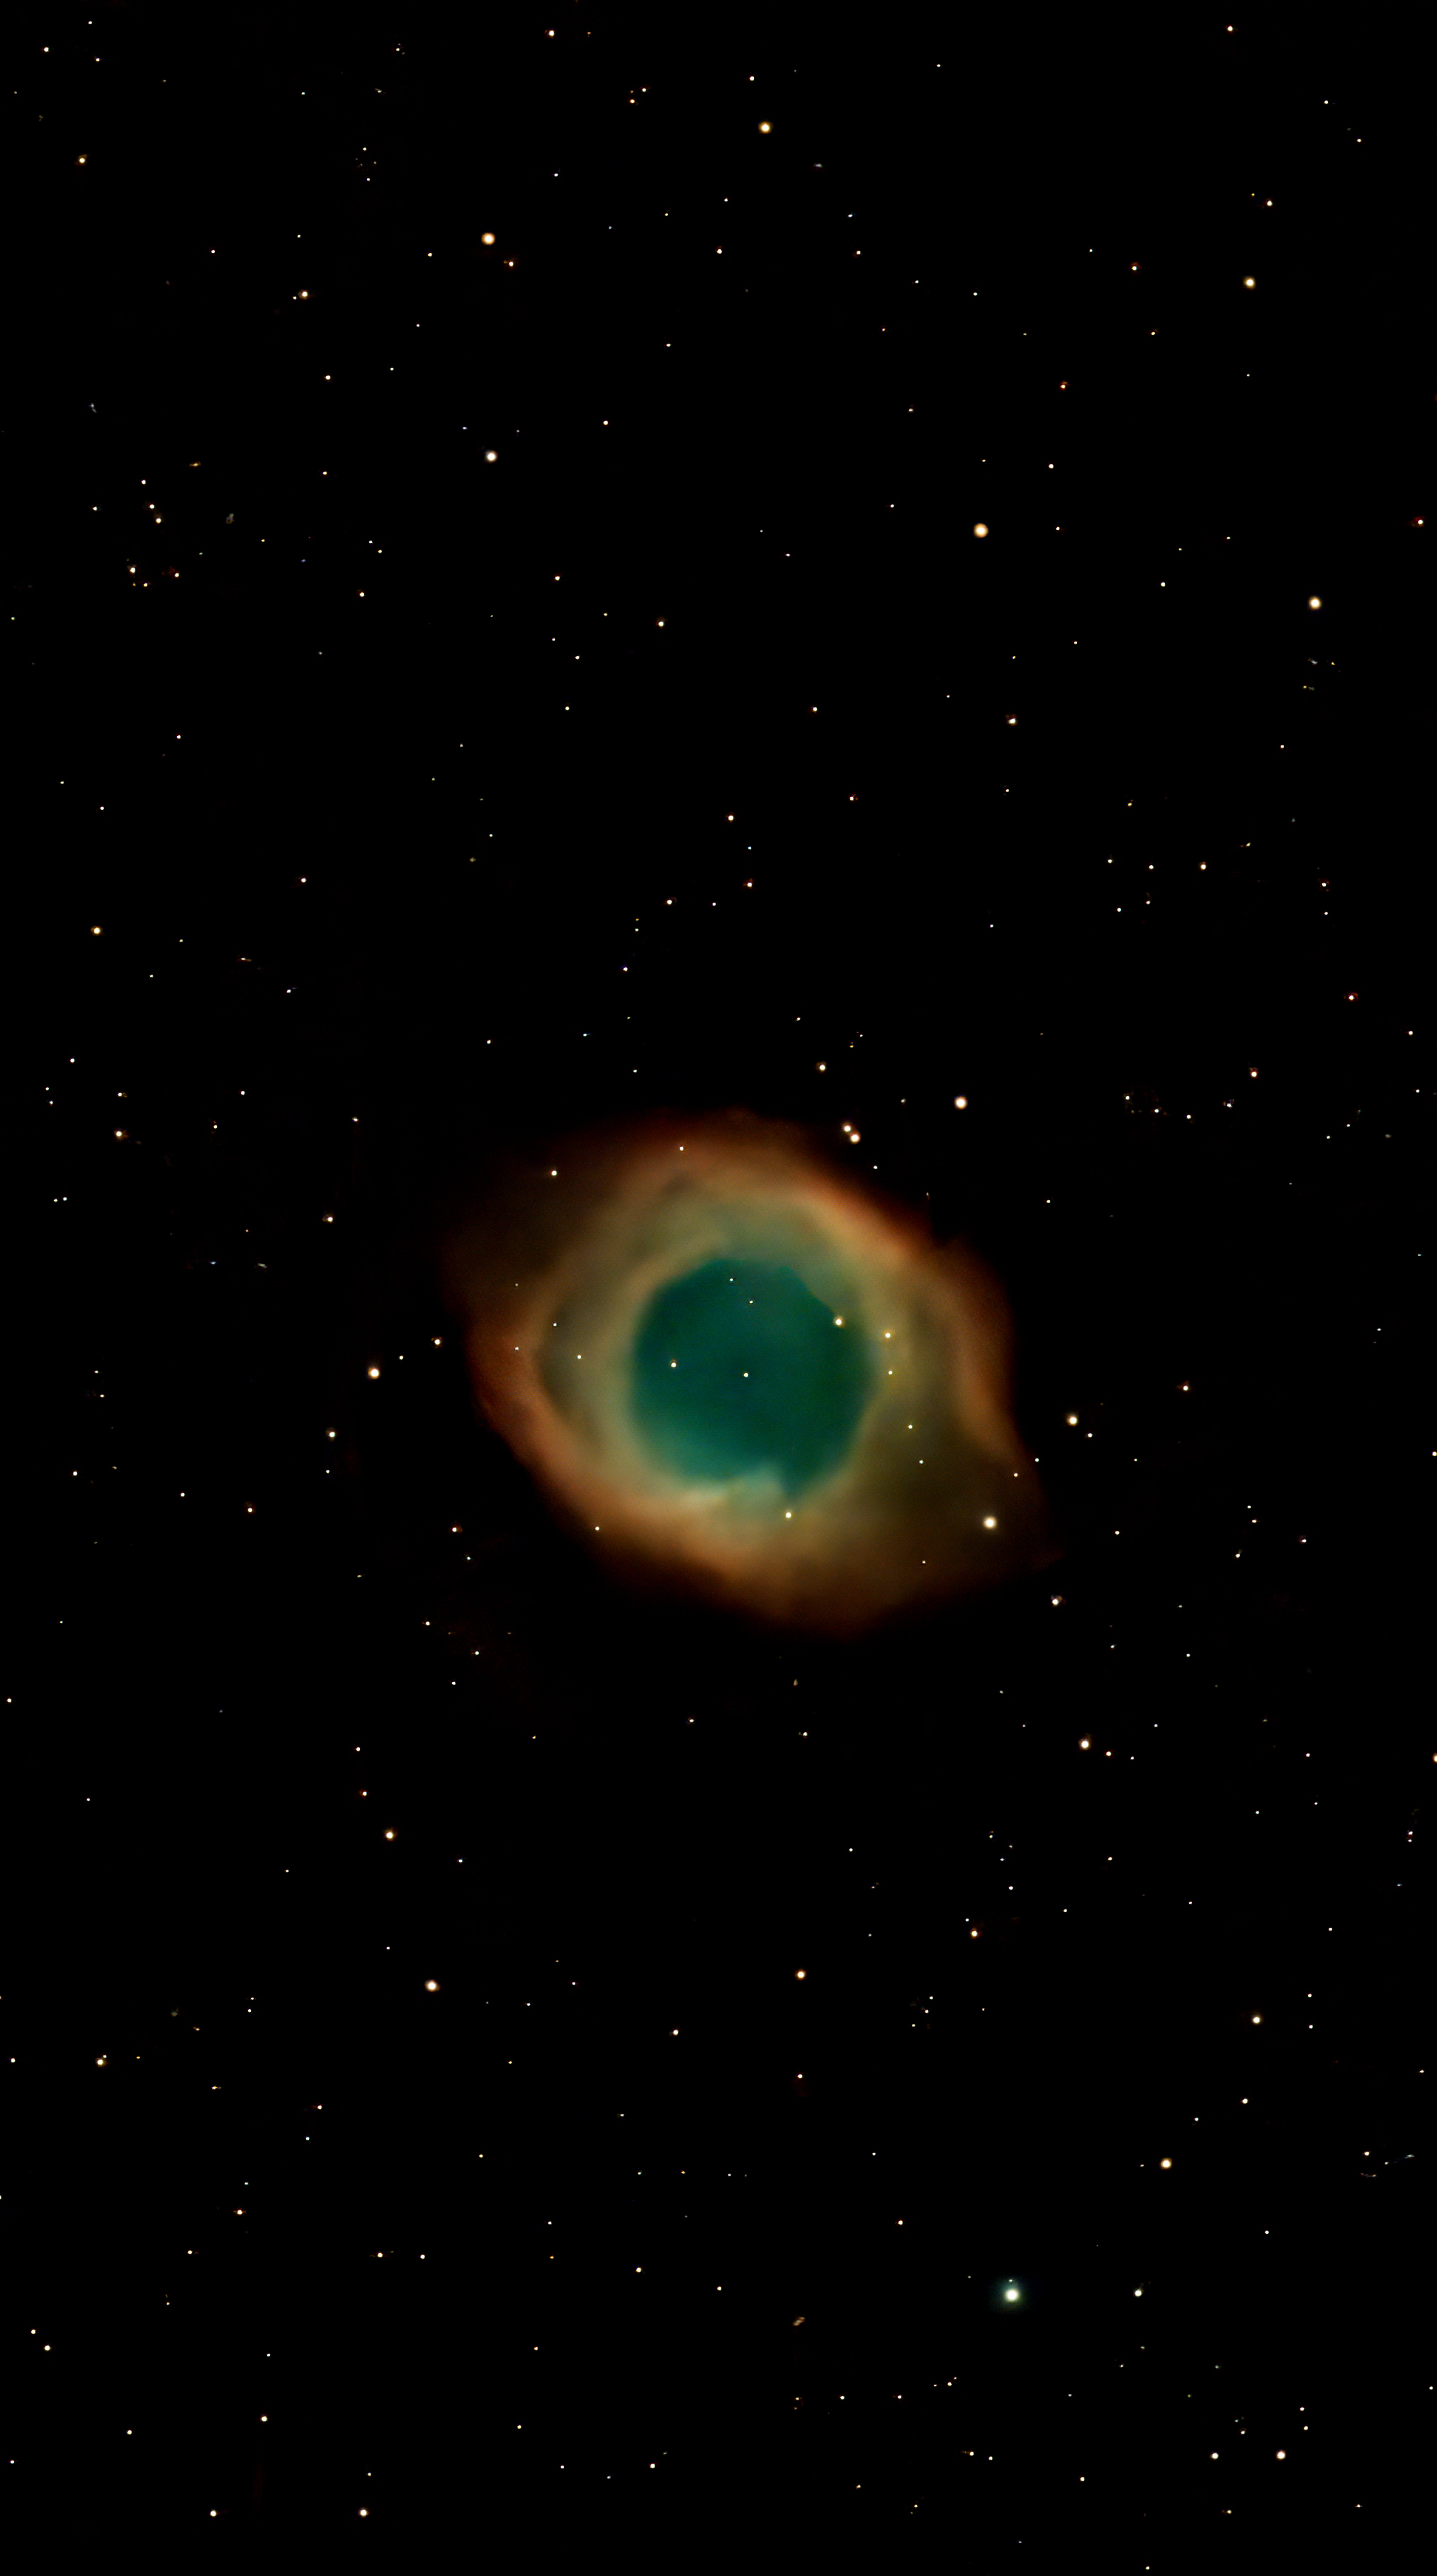
NGC 7293 Helix Nebula in Aquarius |
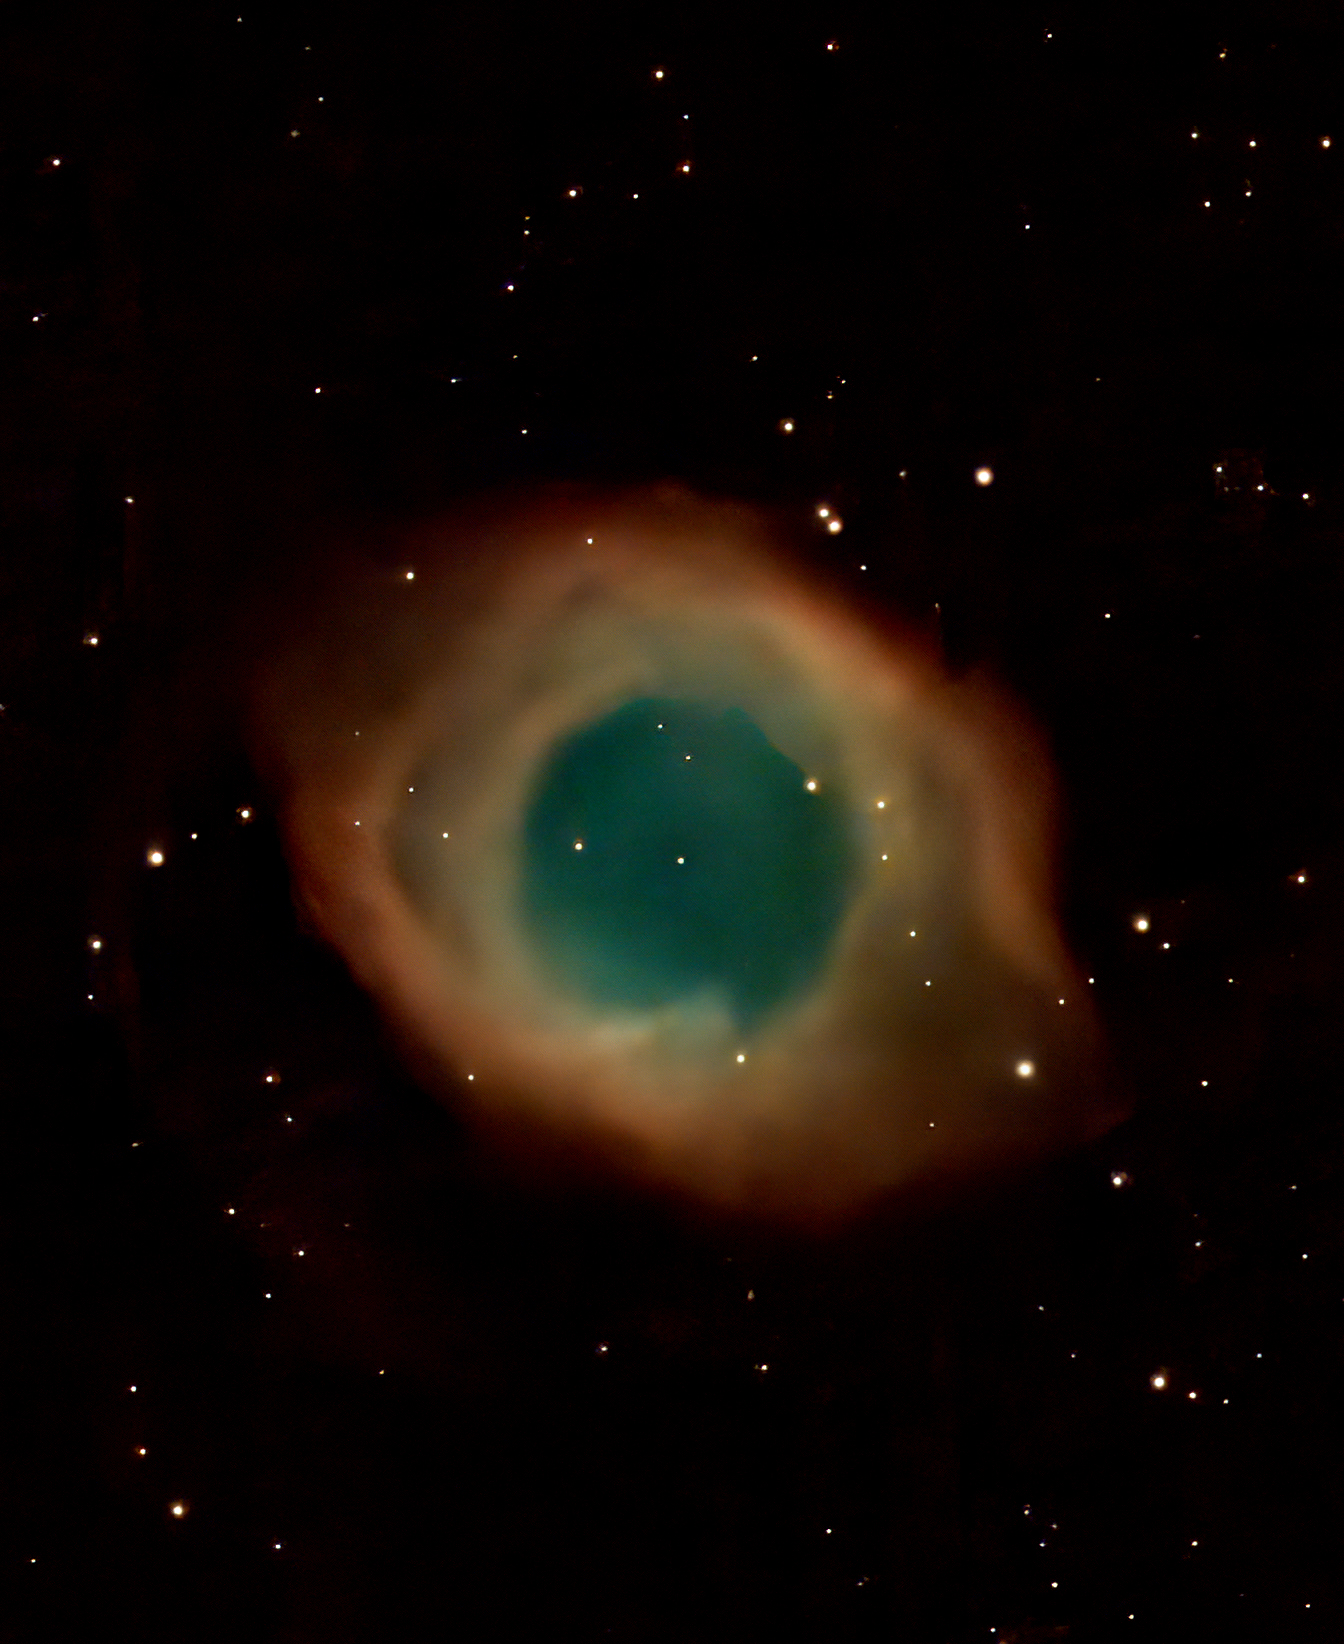
|
84 10-second 4K exposures in Equatorial mode employing the on board Light Pollution filter. |
NGC 7293 Helix Nebula in Aquarius This rendition is just an enlargement of the previous image to the left, since after the extensive post-processing, the image is quite clean and can take quite a bit of enlargement. |
_10.0s_IRCUT_20251003-043659_process copy 2.jpg) |
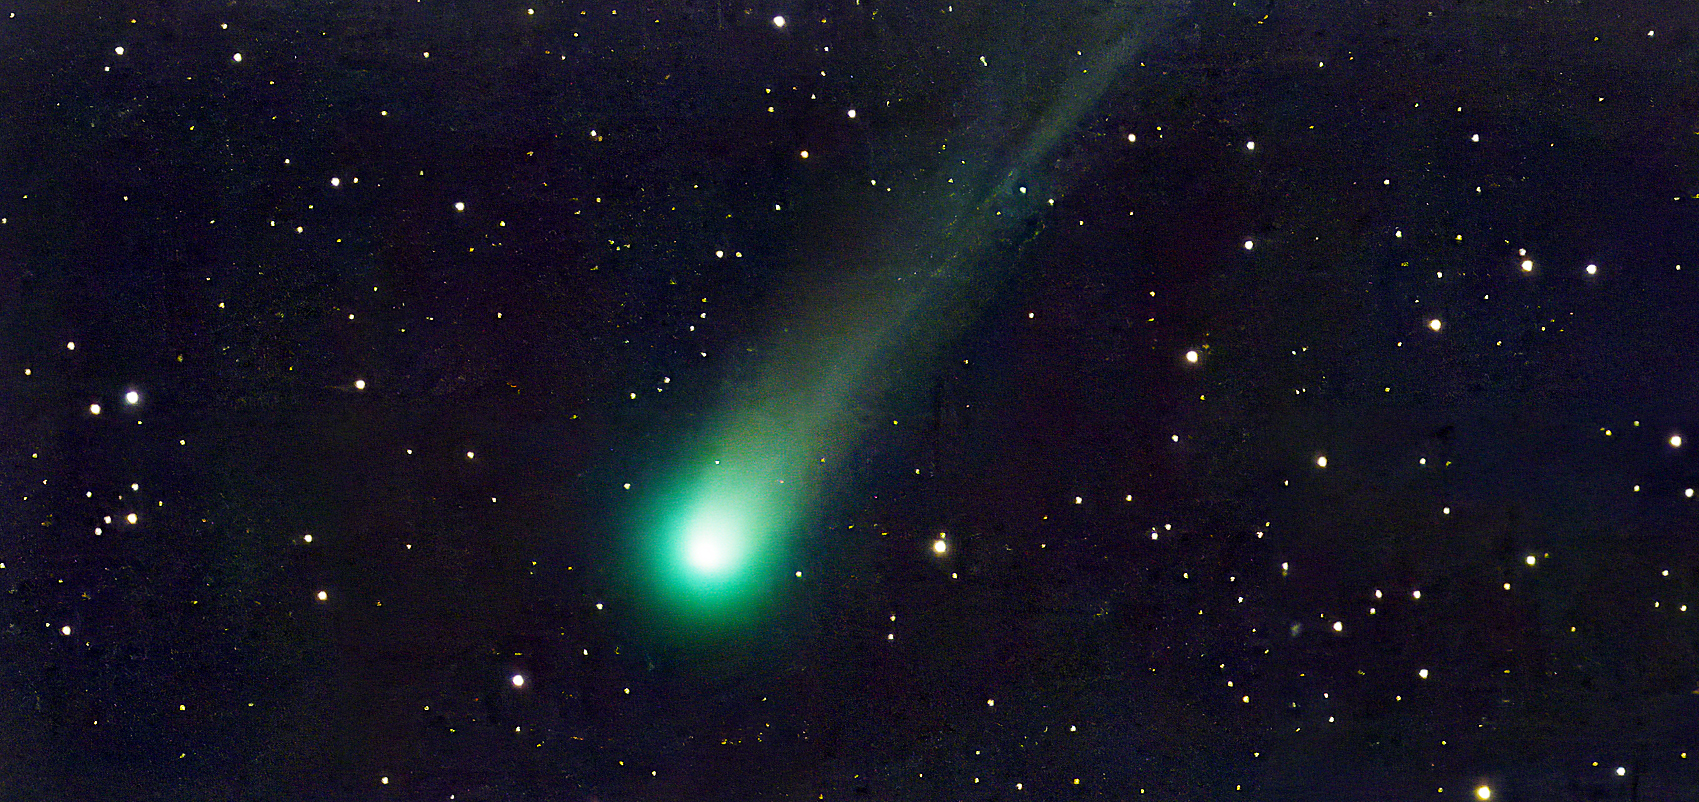 |
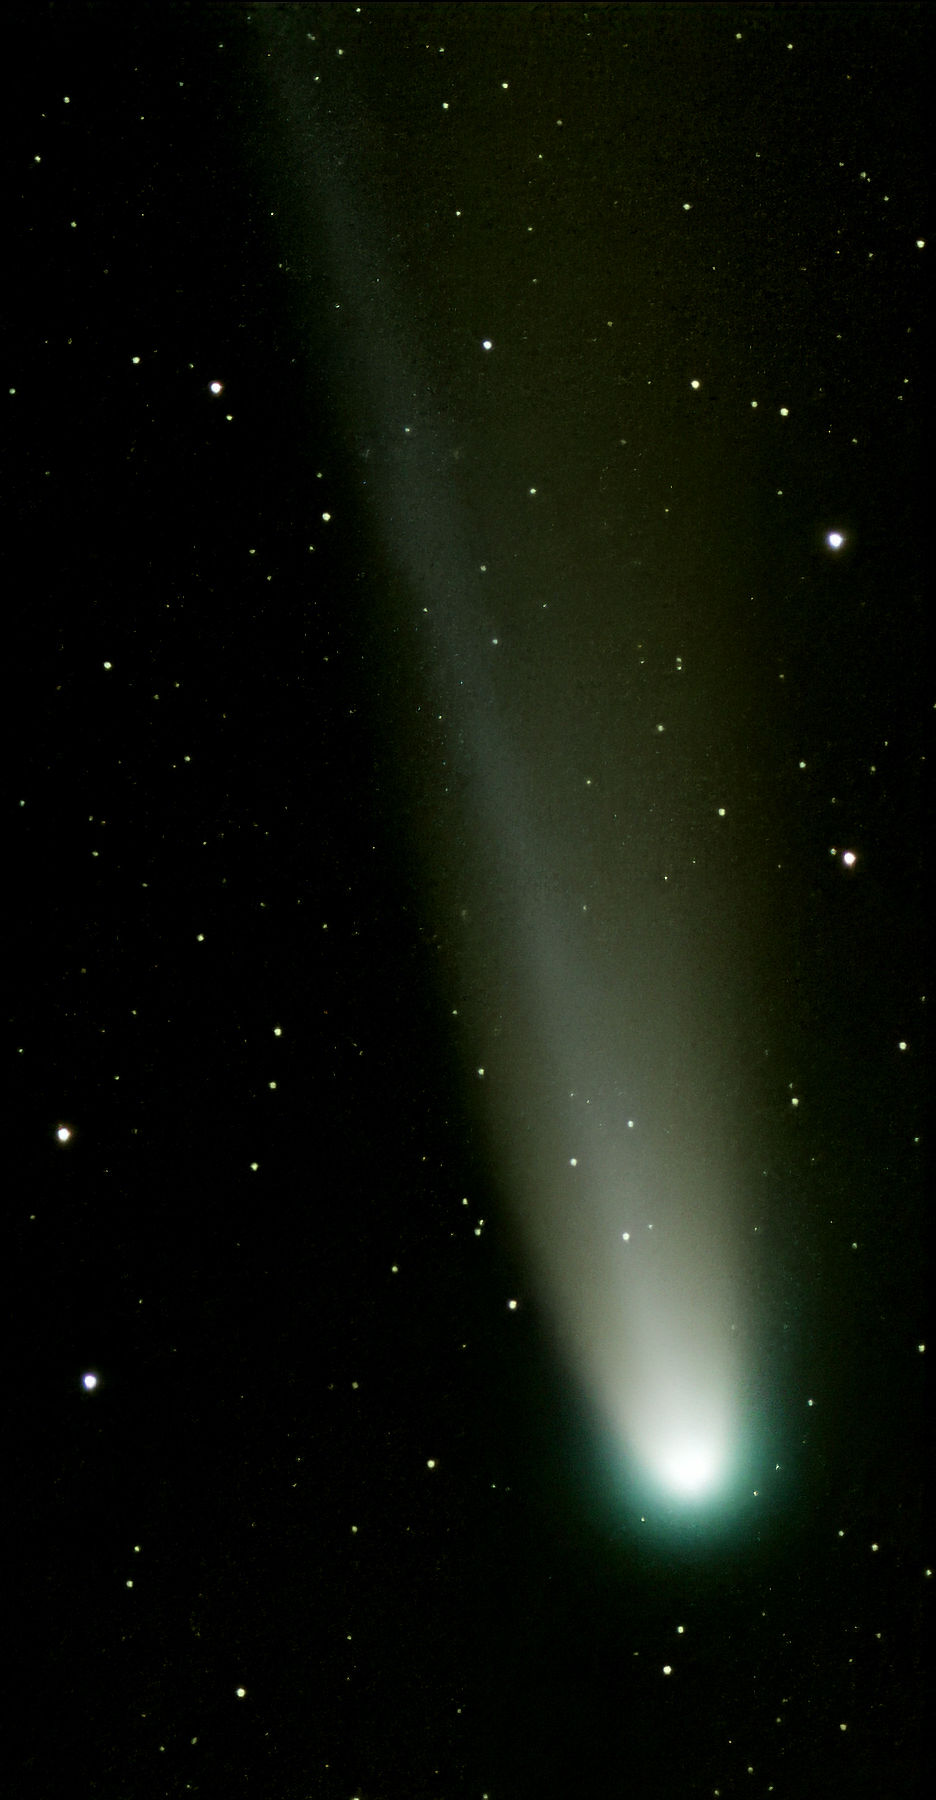
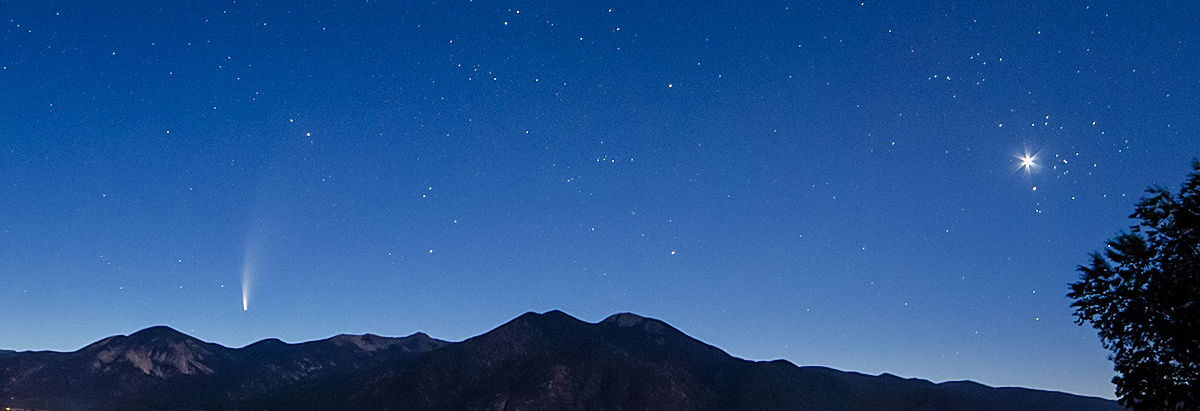
Comet C/2025 A6 Lemmon 72 10-second exposures in Equatorial mode employing the on board IRCUT filter, taken on the early morning of 10/03/2025. |
Comet C/2025 A6 Lemmon After a restack in ASIStudio and reviewing AND removing the offensive satellite subs, this rendition is essentially an enlargement and horizontal presentation of the previous image seen to the left. The original image was rather difficult to process, mostly because the object appeared very low in the sky and the background was quite flawed and noisy. Further, several satellites sadly ran through the original stacked image near the end of the stack. I previously used Photoshop's clone stamp to essentially erase the satellite tracks in the former vertical presentation, which turned out to be mighty difficult. Therefore, I restacked the RAW data after reviewing each sub in ASI's Fits Viewer (part of ASIStudio, see review link above) and discarded the offending images. As a result, this image was far easier to post-process. In the future, I will first review all of the original data and remove any offending subs before proceeding with the post-processing of the final .fits image. This image uses 65 of the original 10-second subs. |
Comet C/2025 A6 Lemmon The best 30 10-second exposures in Equatorial mode employing the on board IRCUT filter, taken in the early evening of 10/21/2025. After a restack in ASIStudio and reviewing AND removing the offensive satellite subs, I employed both the Topaz Labs Photo AI to this and many of the images, additionally very quickly post-processed the image in Photoshop. Comets are commonly and obviously green , so I DID NOT use the HastaLaVista Green filter! This comet stacked shot shows more detail because less time had elapsed between the first and last sub exposures, hence the comet had not moved (and blurred its tail) as much as the previous images. It is possible to actually process and stack the comet's images separately from the star field -- I did not think this was necessary. |
 |
 |
NGC 457 Owl Open Star Cluster in Cassiopeia |
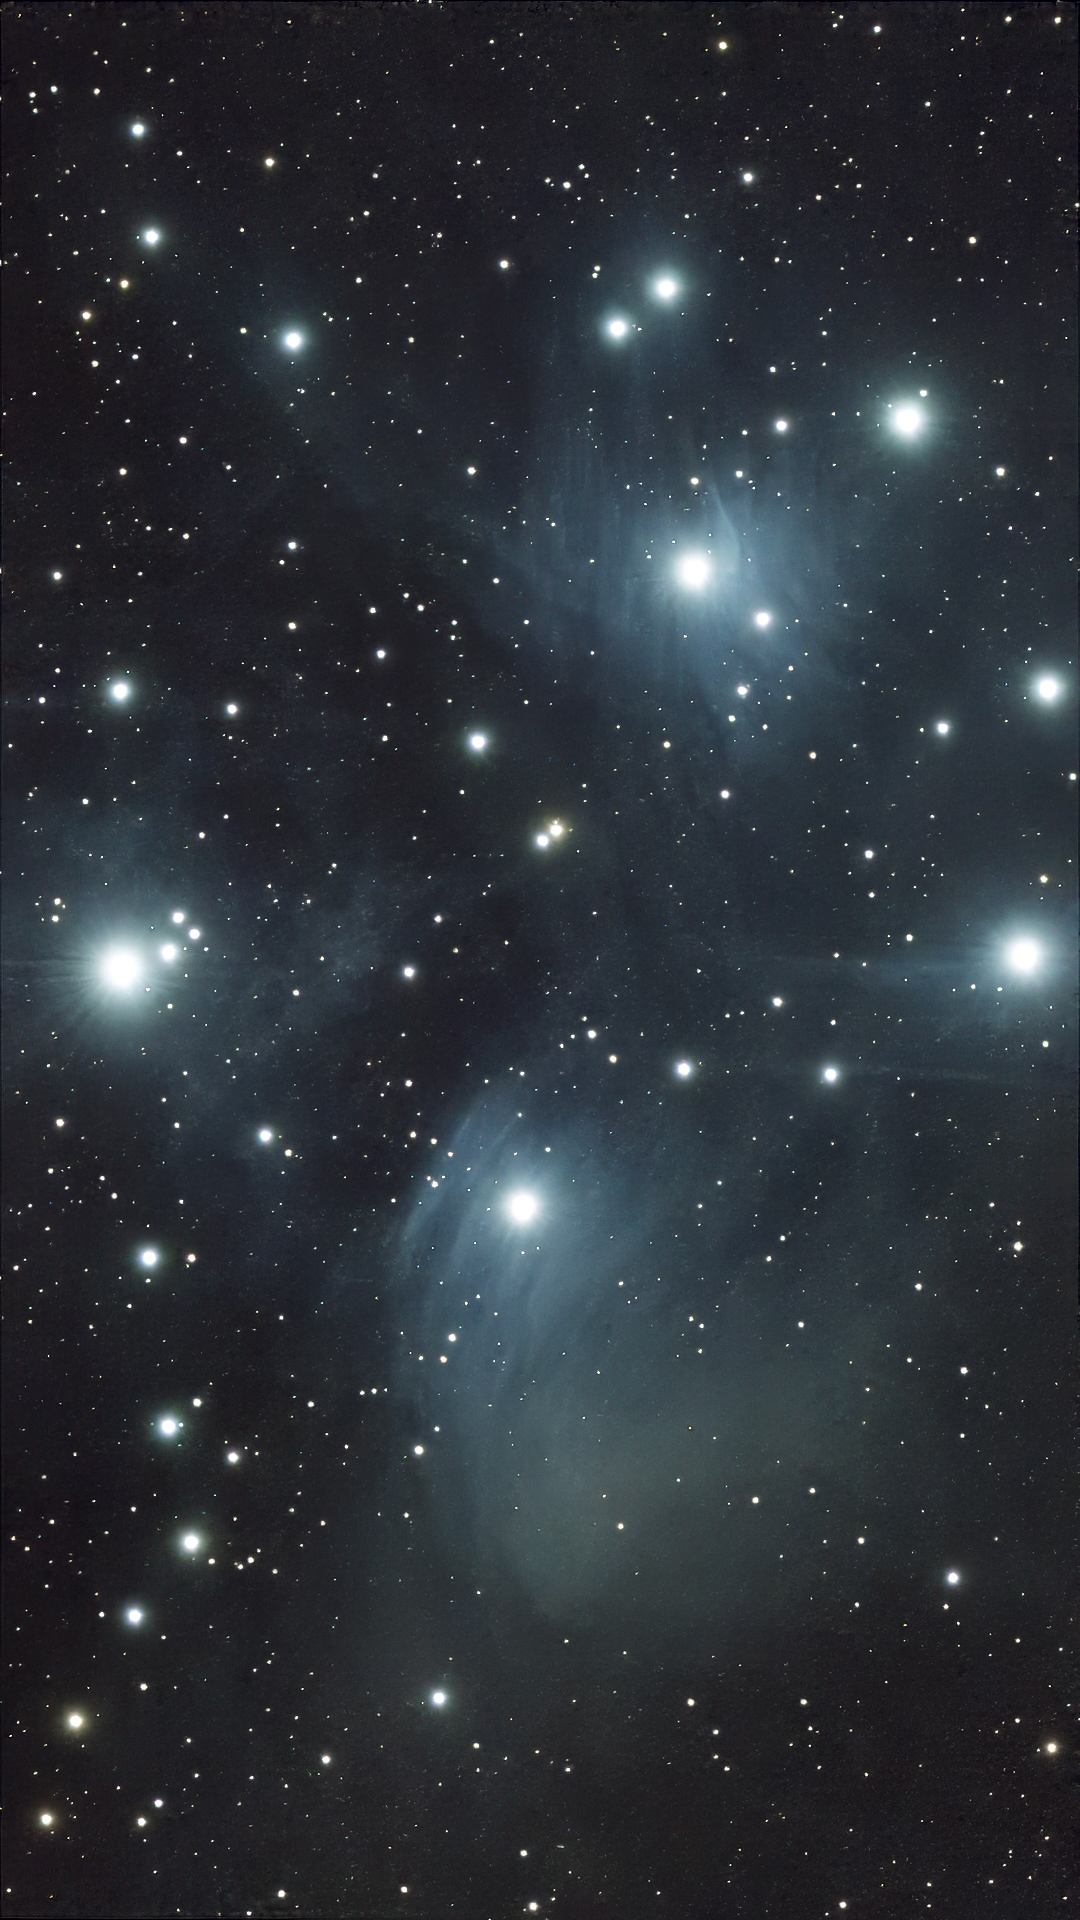
M45 Pleiades Star Cluster and Reflection Nebulae in Taurus 72 10-second exposures in Equatorial mode employing the on board IRCUT filter. This is a close-up of the famous Seven Sisters star cluster that dominates the early winter sky. It was up and prevalent in the neigh-dawn sky of October, so I thought I would give the cluster a try. It could use more exposure, but this one is also quite nice. |
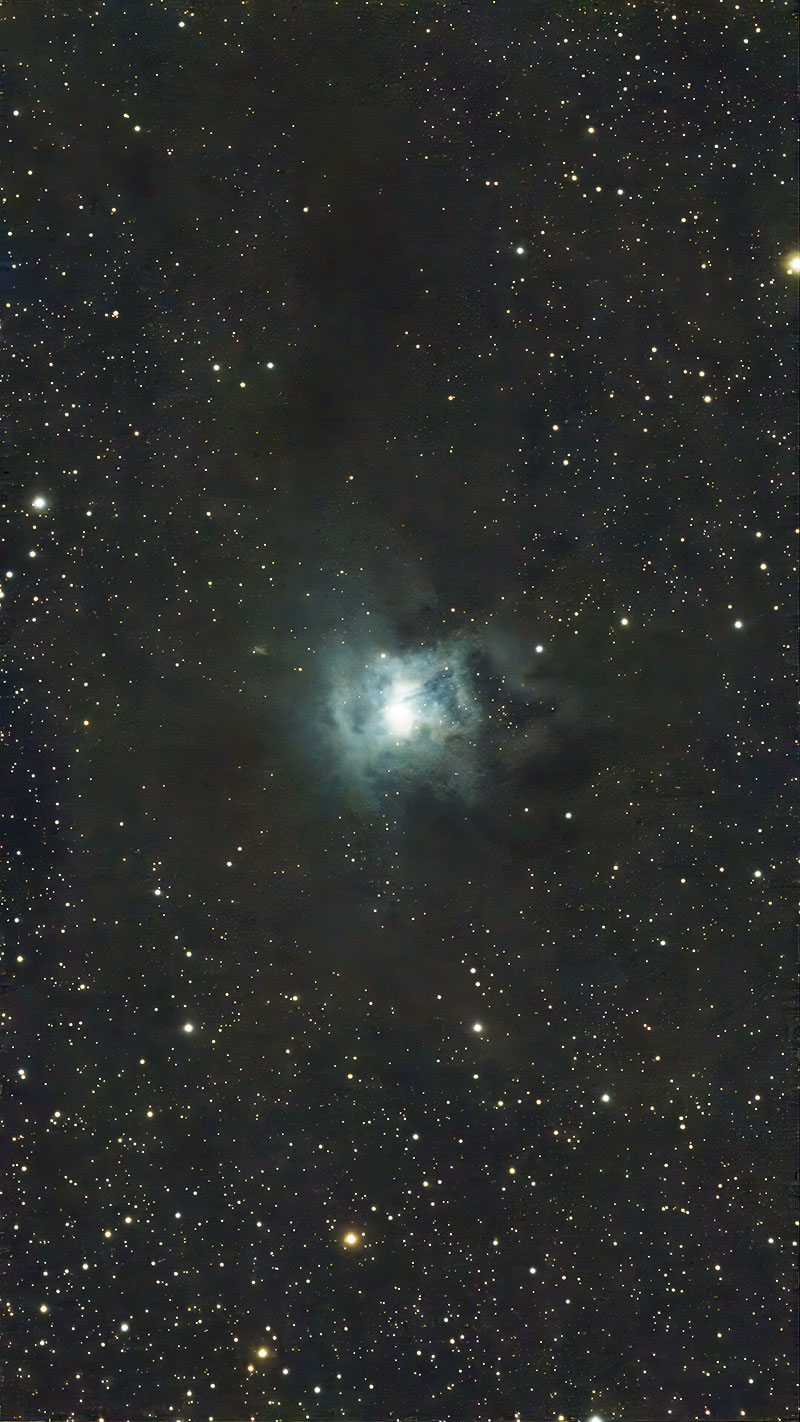
NGC 7023 Iris Nebula in Cepheus |
75 20-second 4K exposures in Equatorial mode employing the on board IRCUT filter. I present this image a bit larger because it really is outstanding, especially due to the 4K enlargement with added resolution. Note not only the cluster embedded in the bright bluish reflection nebulosity, but also the Iris Nebula itself. And also especially note the obscuring nebular gaseous clouds that block light that would otherwise be seen surrounding the nebula. |
 |
 |
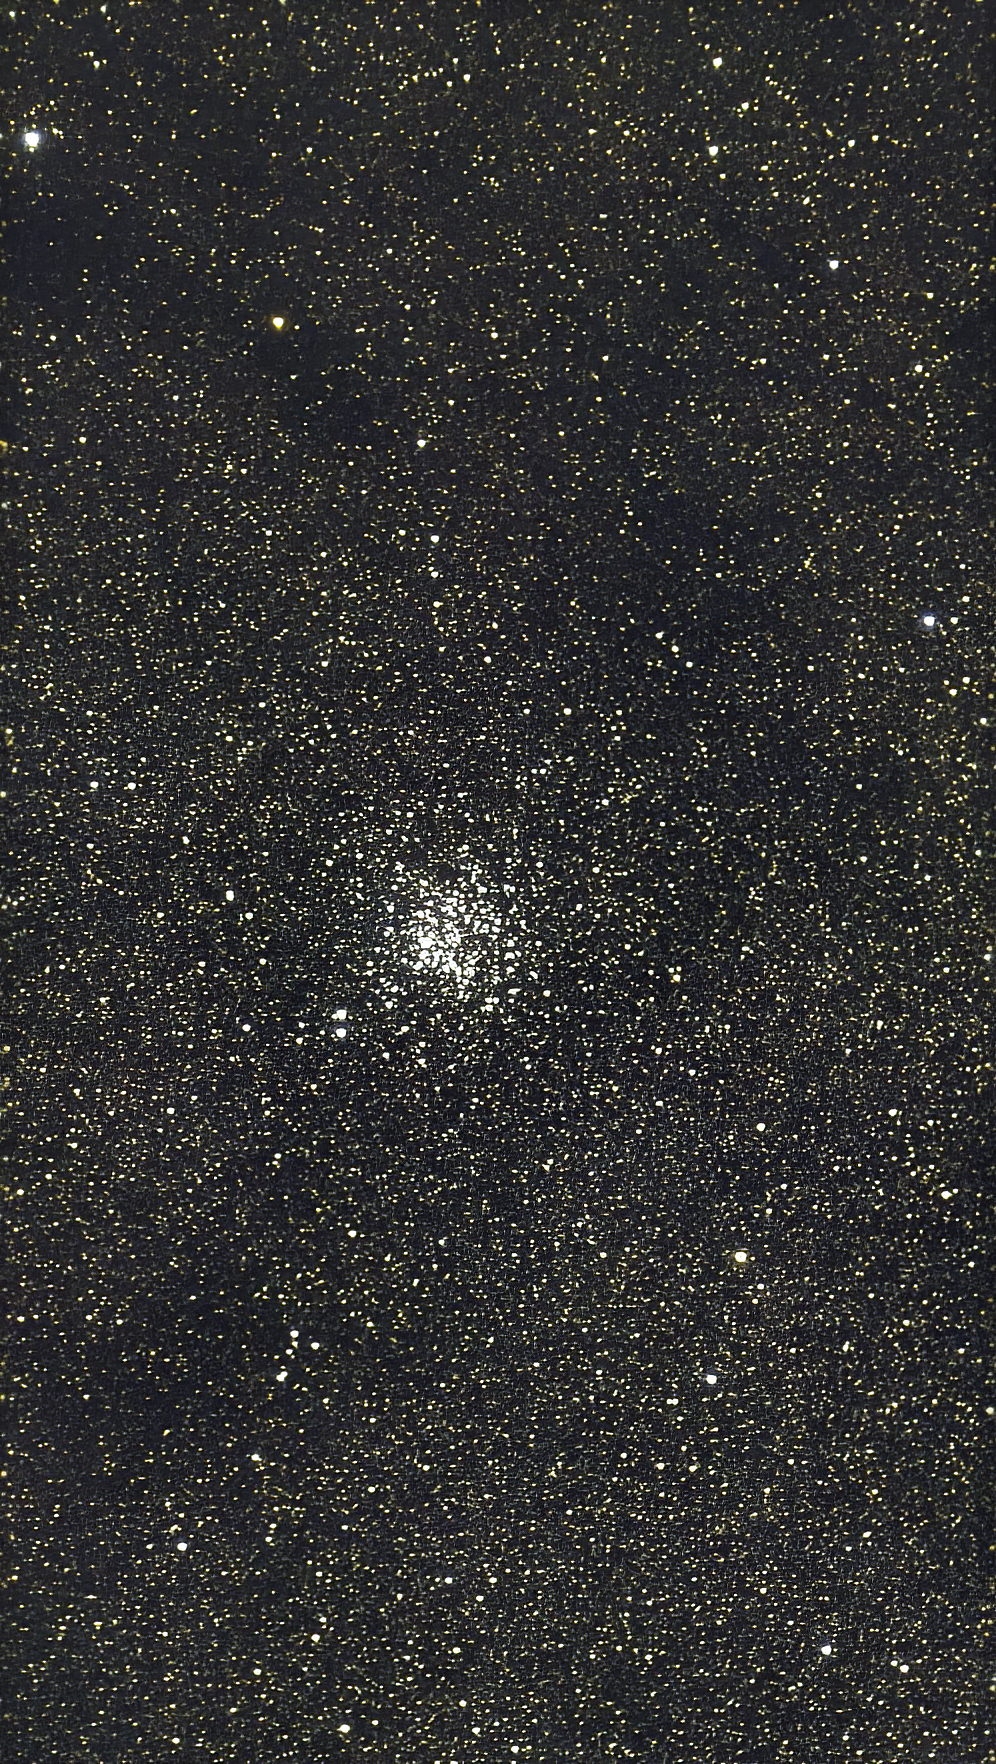
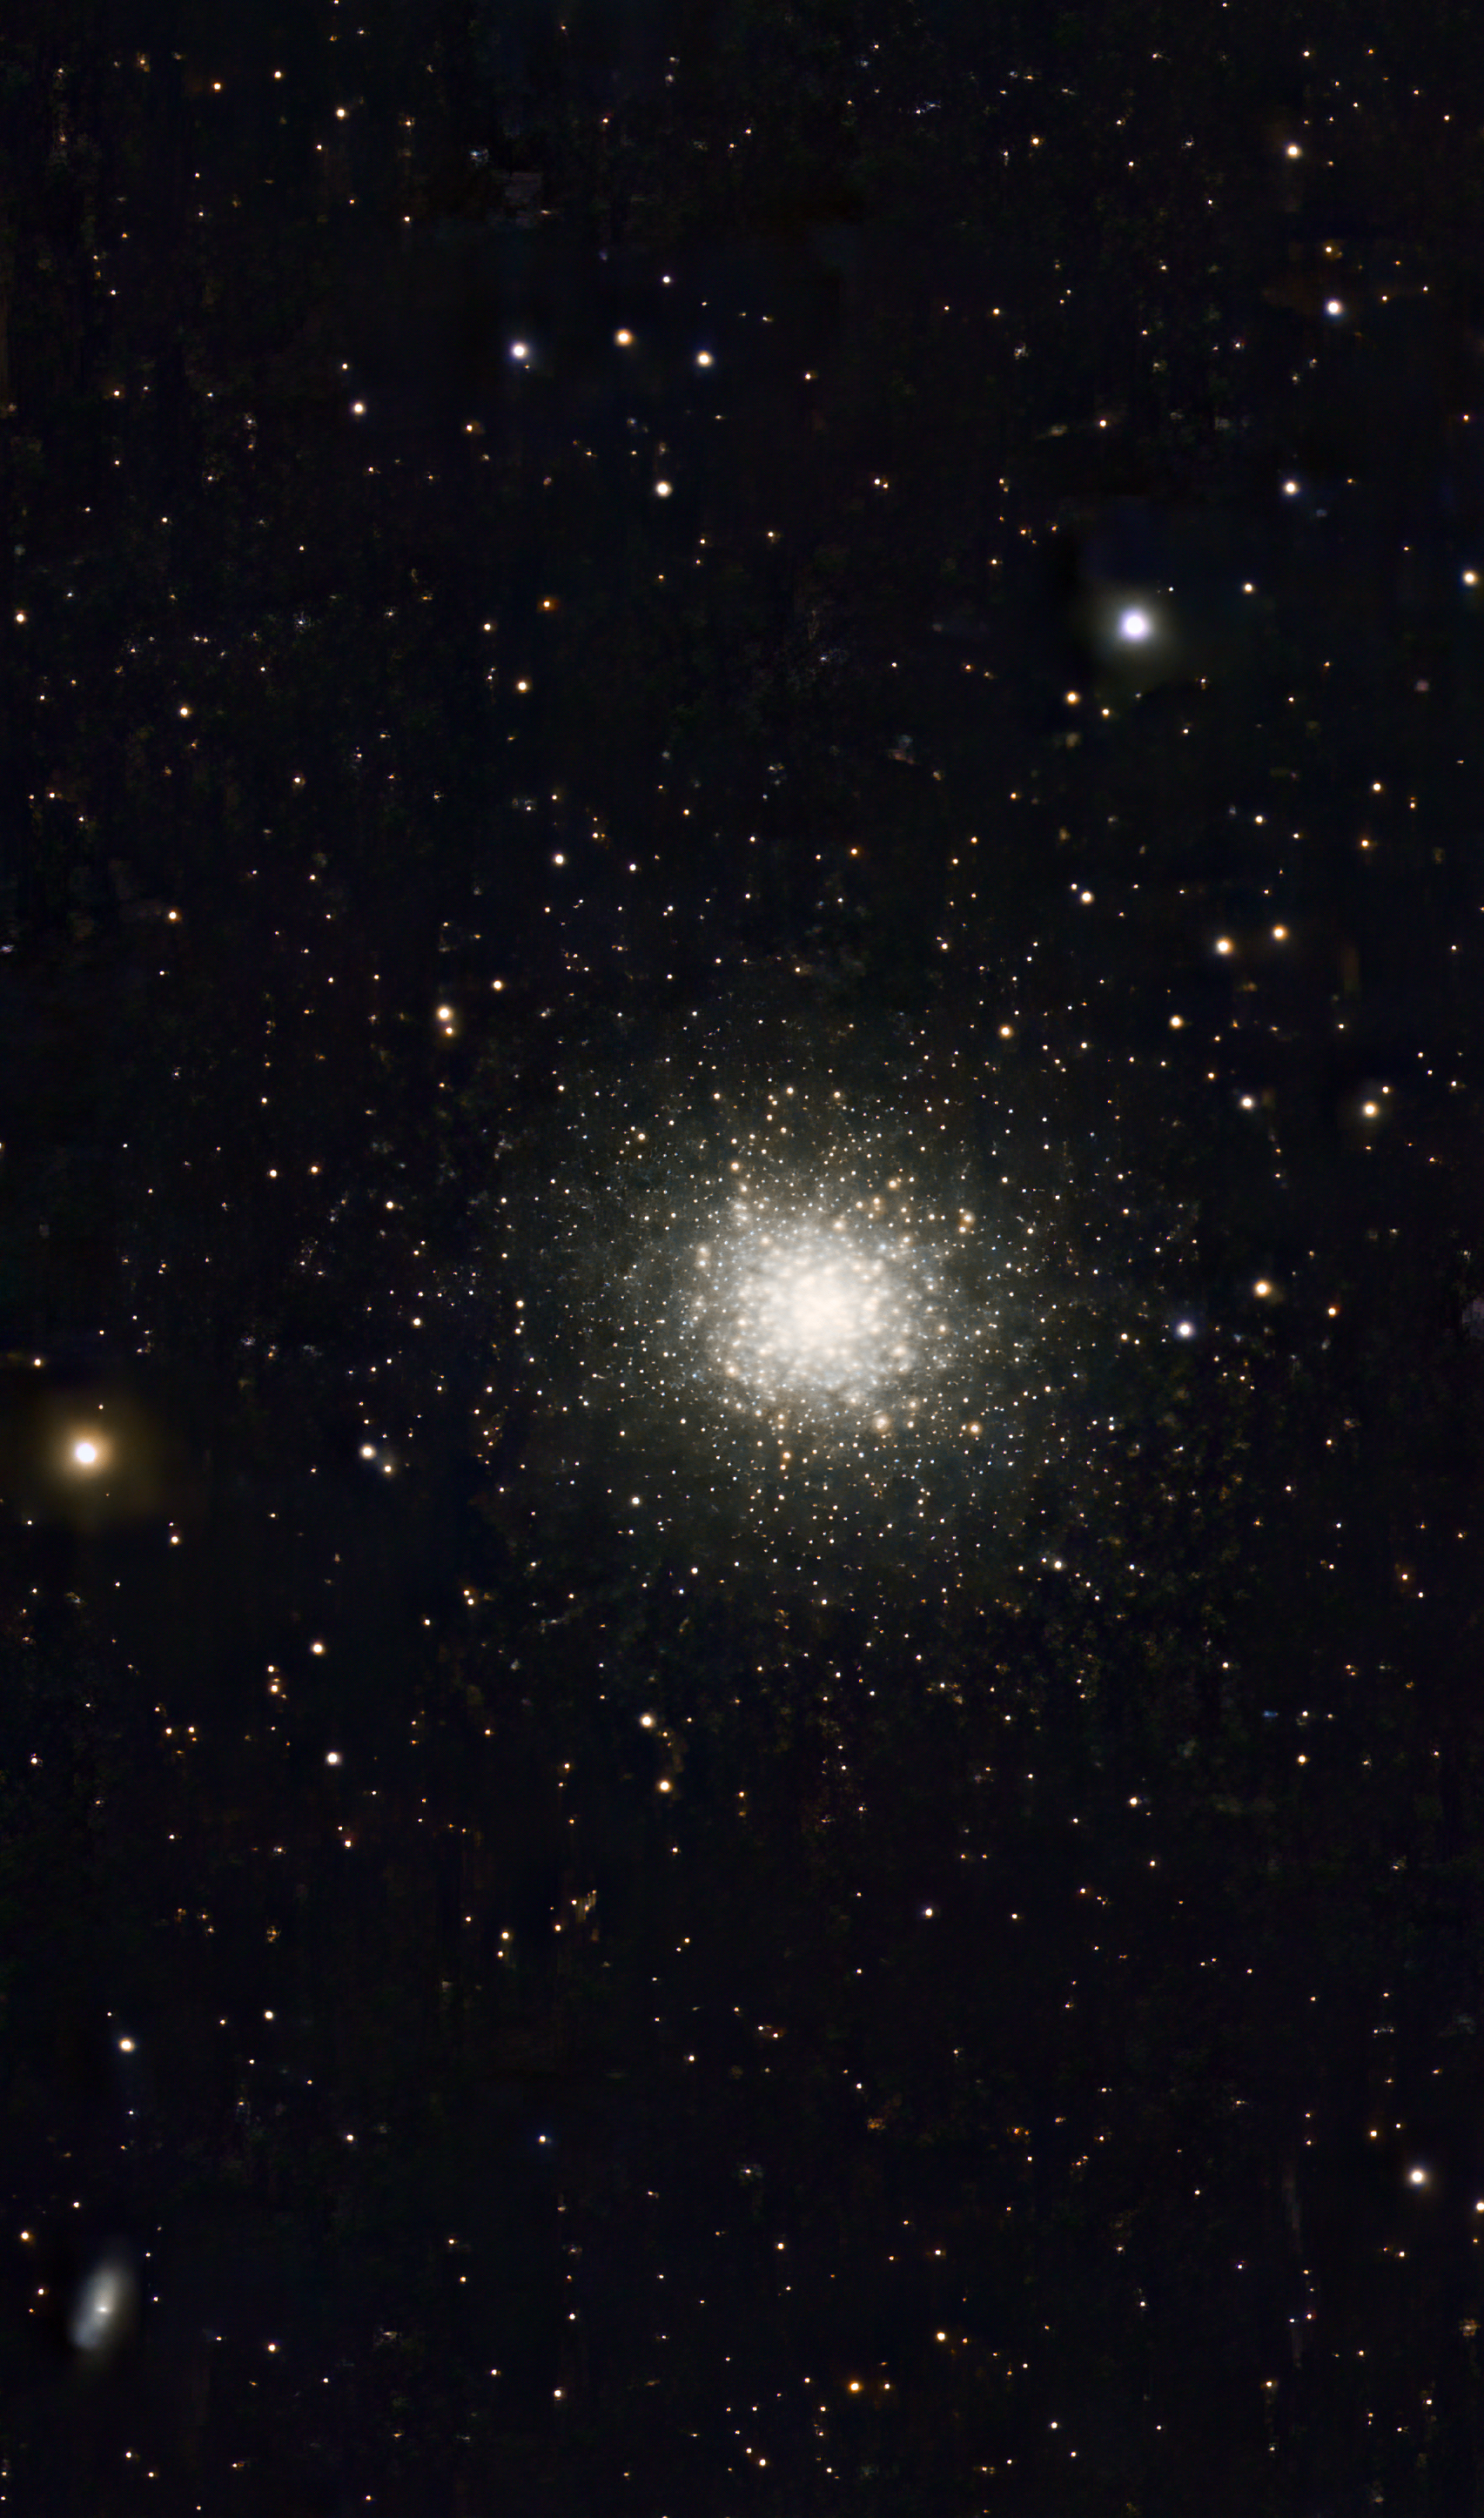
M15 Globular Star Cluster in Pegasus -- Great Pegasus Cluster |
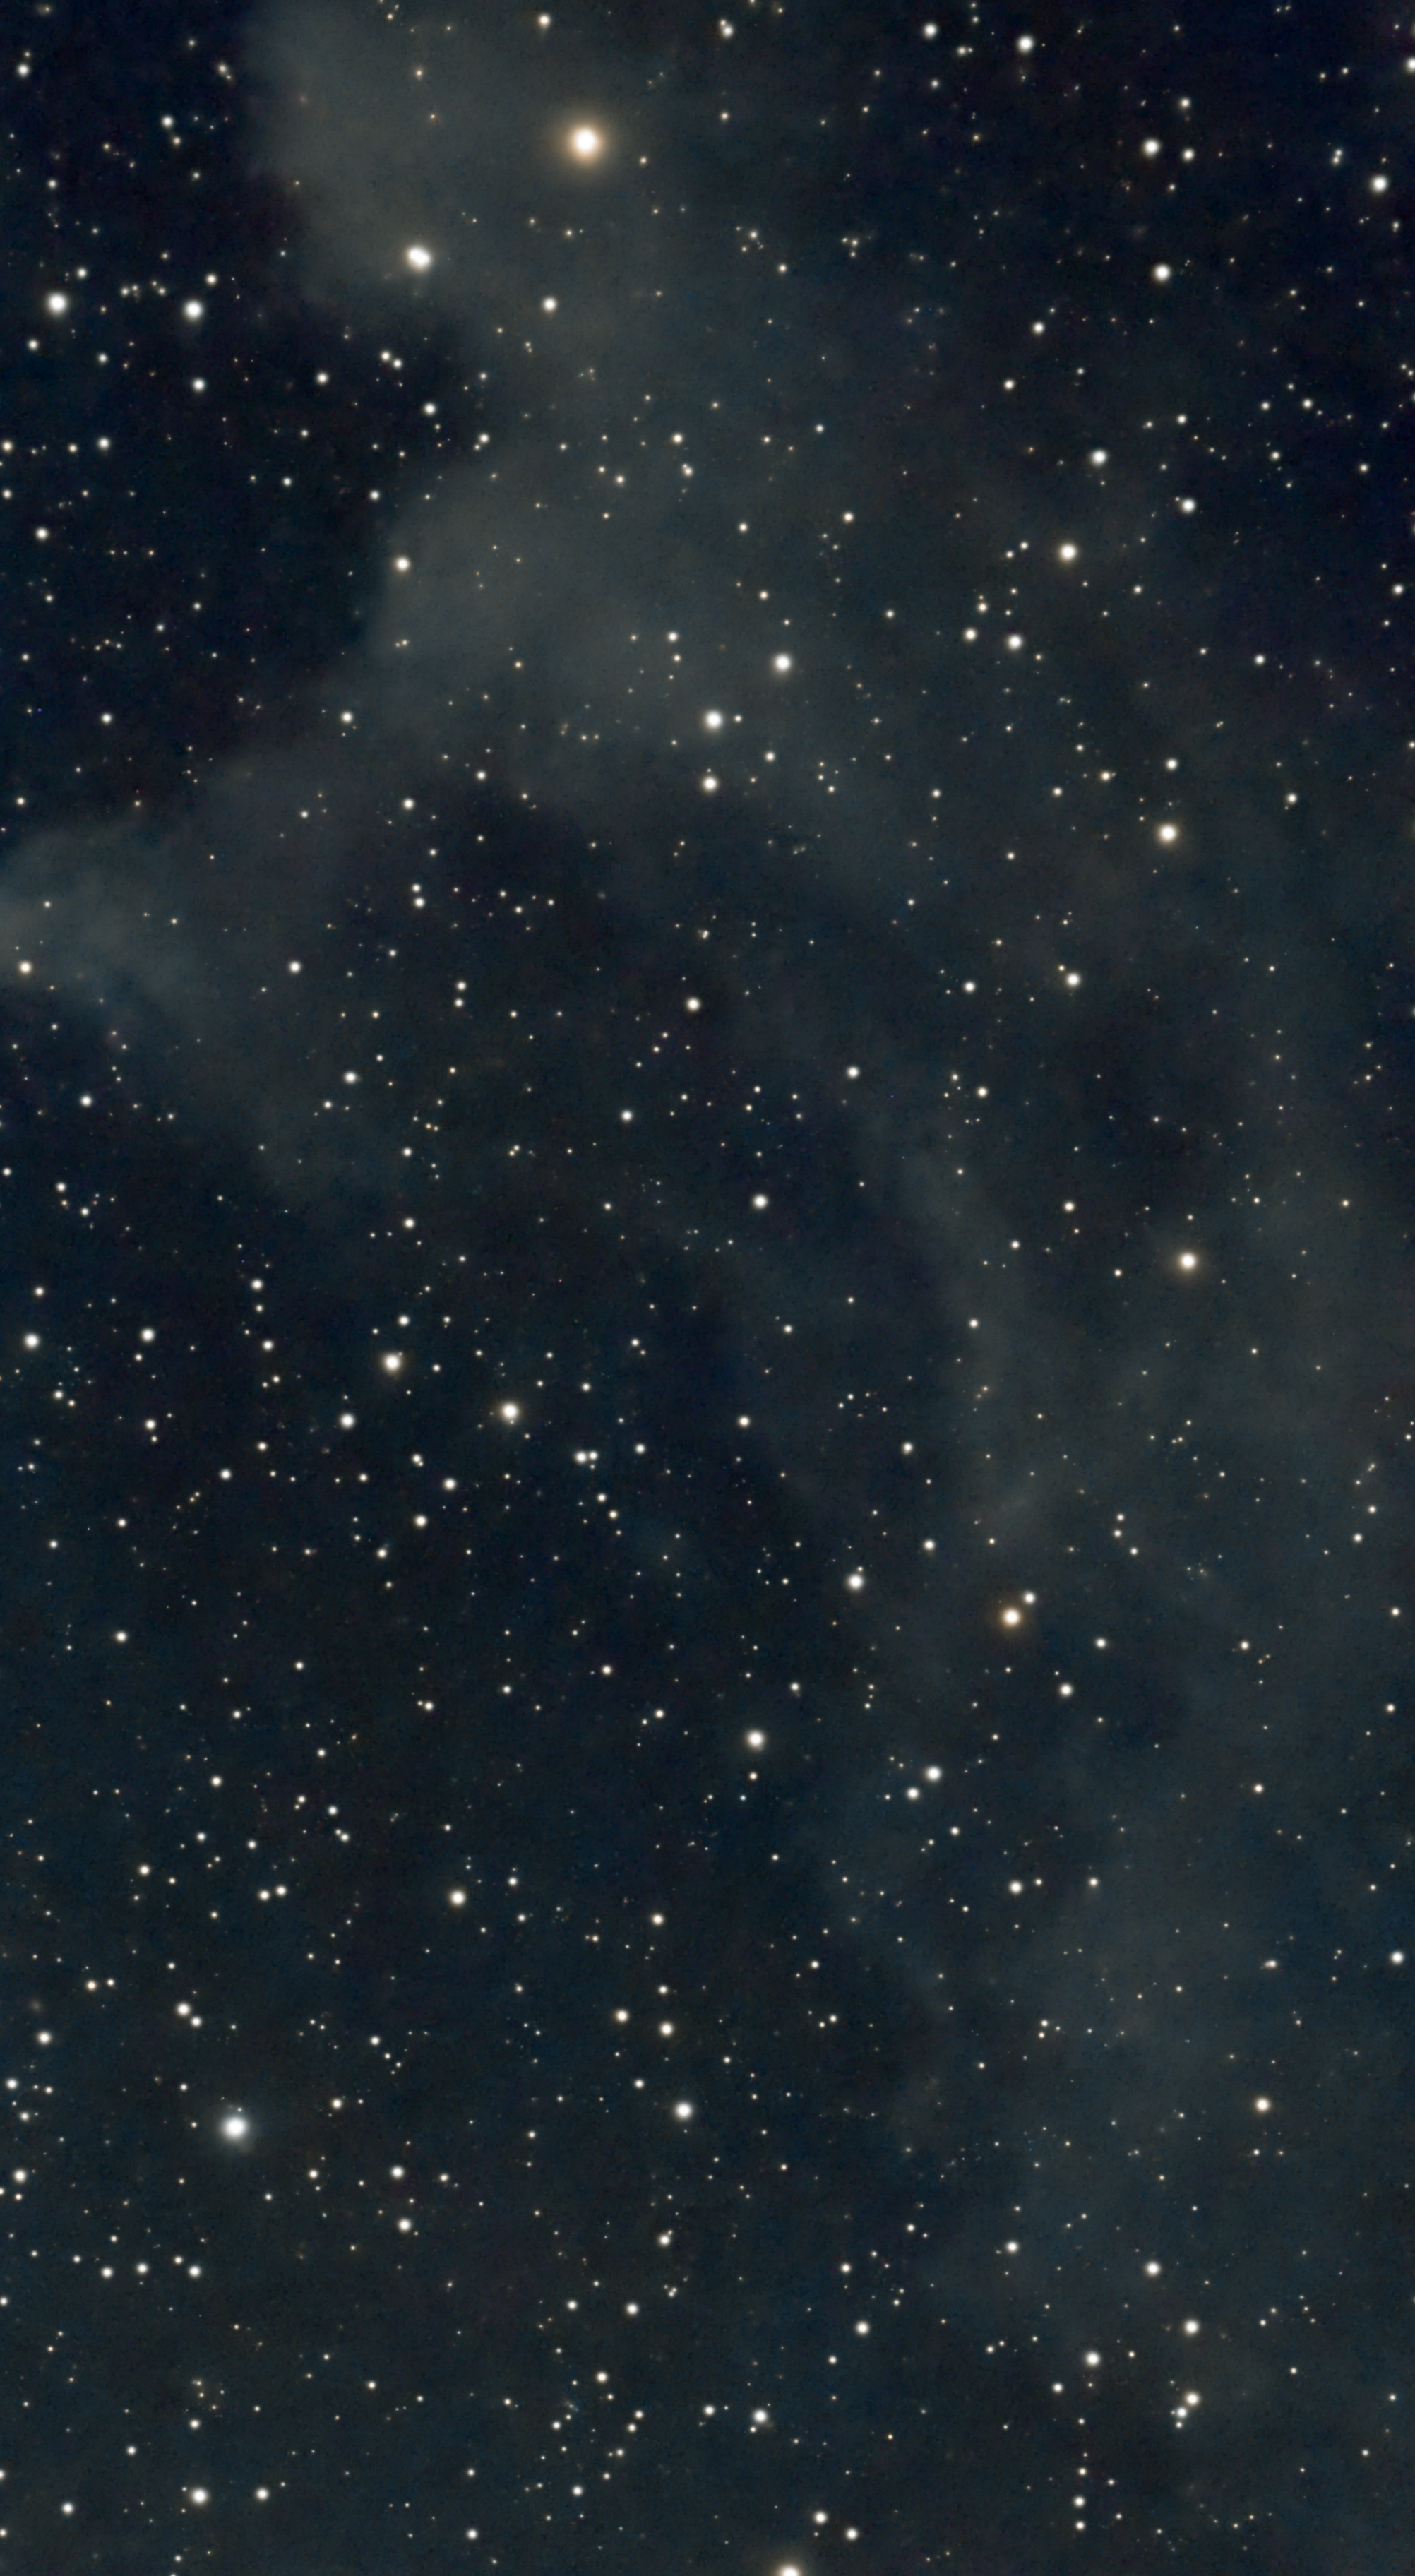
NGC 1909 Witch Head Nebula on the Orion-Eridanus border The molecular clouds of IC 2118 are probably juxtaposed to the outer boundaries of the vast Orion-Eridanus bubble, a giant supershell of molecular hydrogen blown by the high mass stars of the Orion OB1 association. As the supershell expands into the interstellar medium, favorable circumstances for star formation occur. IC 2118 is located in one such area. The wind blown appearance and cometary shape of the bright reflection nebula is highly suggestive of a strong association with the high mass luminous stars of Orion OB1. The fact that the heads of the cometary clouds of IC2118 point northeast towards the association is strong support of that relationship.” (from Wikipedia)
|
 |
 |
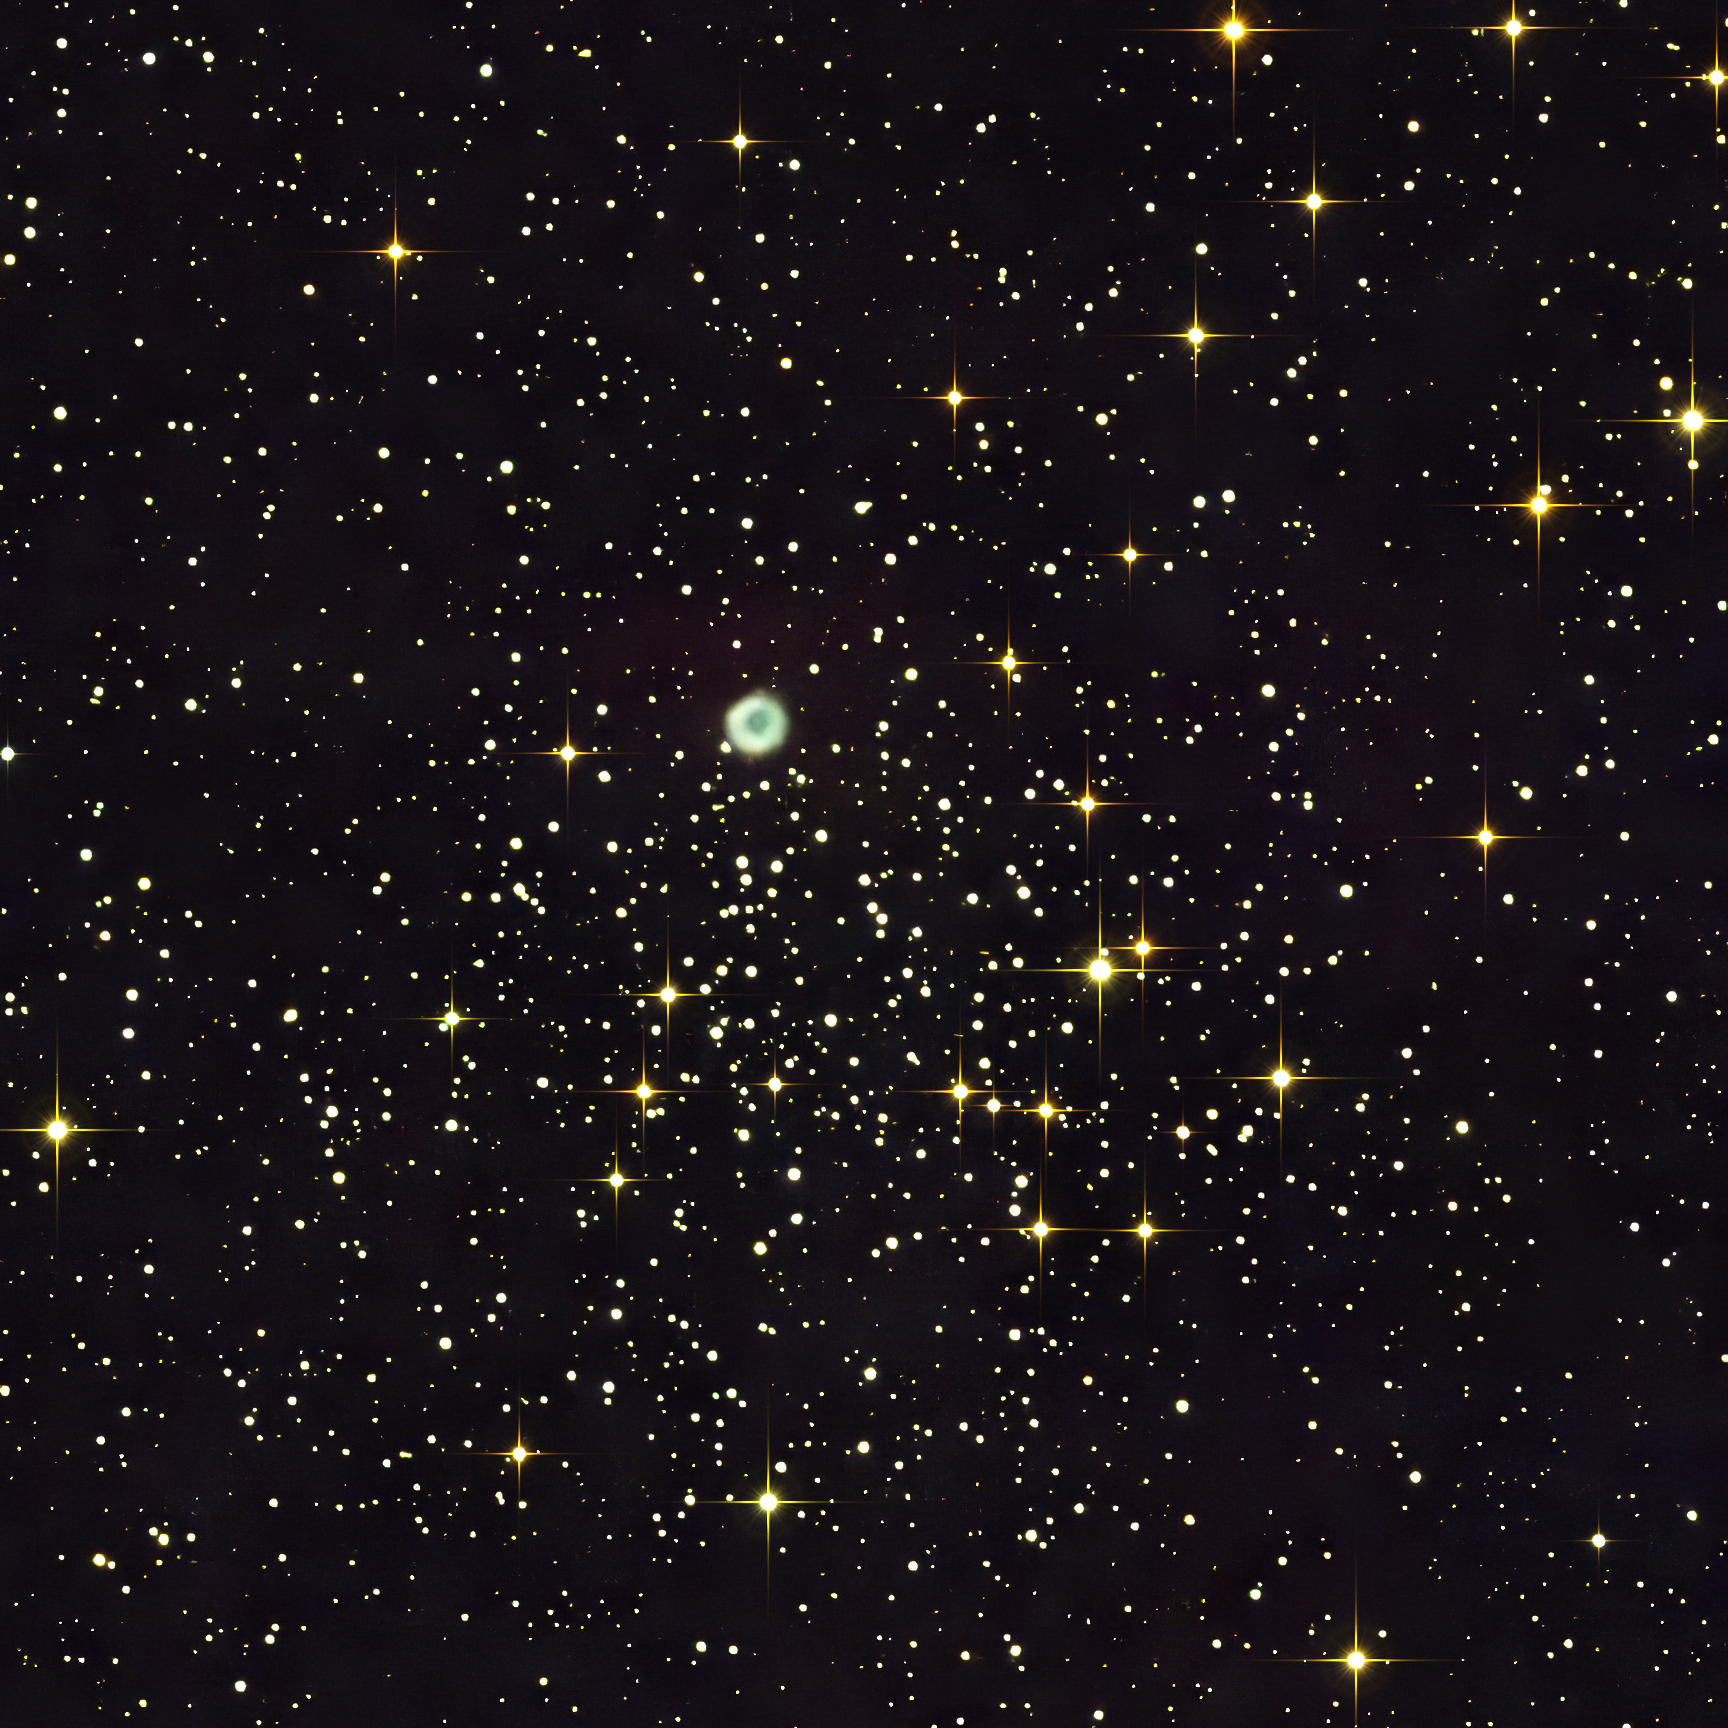
M46 Open Star Cluster in Puppis -- with embedded Planetary Nebula NGC 2438 It is rare to see such a Planetary Nebula within an open star cluster, although the two objects are not related or actually near each other in the cosmos. They are just conveniently lined up. There are two other objects (also not related) seen in the southerly constellation of Puppis, M47 and M93, also discussed in the linked article. |
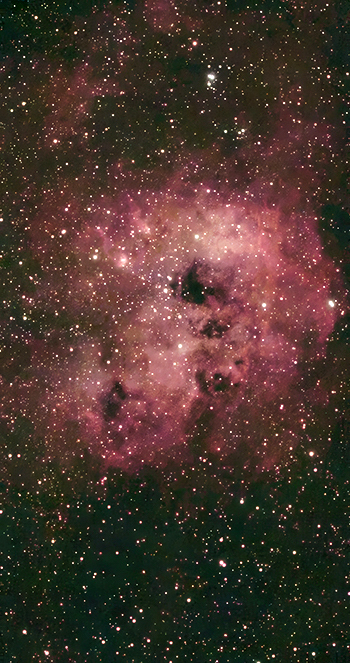
IC 410 Tadpole Nebula in Auriga Note the two down-swimming tadpoles (with starry heads) from upper left to lower right, aiming at the center dark area of the nebula. The nebula is in the center of the constellation of Auriga, a very rich star and nebula studded area of the Milky Way. Read more about this object by clicking its image.
|
 |
 |
|
To correctly and accurately view images such as those seen on this website, it is important to adjust your computer or device's monitor to the neutral gray scale above. First of all, every sector seen above should appear to be shades of a neutral gray -- gradually moving from black to white -- further, each segment should be independently visible, not "oozing into" one another. When your device is correctly calibrated (not so difficult) you will be able to view the images as they were created and intended to be seen. |
(all content copyright 2015-2026 Willis Greiner Photography, all rights reserved)